JOURNAL
documenting
&
discovering joyful things
Tiny missives: 100 days in Dinan
It has been way too long since I hosted a postal project, but all that’s about to change.
Do you fancy receiving a tiny painting on a tiny vintage card, in the mail? I’m making 100 a day, starting this week, and would love to send one to you, my friend. Here’s the story…
Last month while we were in Paris, my family and I took a walk beside the river to browse les bouquinistes. You’ll have seen them I’m sure: the little green-box riverside markets that flank both banks of the Seine. They sell secondhand books and paper ephemera, and have been doing something similar, I believe, since as far back as the 16th Century.
We had left our village of Dinan the day before and I was looking for vintage postcards from the region, but then I saw these: tiny packets of photographs that tourists used to buy and carry home with them, from the days when cameras were rare and printing photographs was costly. Most of the packets were, I’m guessing, printed almost a hundred years ago, or at least some time between the first and second World Wars.
And as I turned them over in my hands, sniffed that old cardboard (is there anything better than “old book” smell?), I knew I wanted to give them life.
I’ve spoken in the past about how I believe postcards and other tourism souvenirs were made to travel and to be shared. The journey is the entire point of their creation. And yet so often, a postcard can sit unsent and unseen in a shoebox for years, or even decades. In 2017 my husband bought me a box of 1000 unused vintage postcards (most of them fabulously ugly), and I posted them to strangers and friends alike, all over the world, for the whole year. We called this the Thousand Postcard Project. A little while before that, we found some books of antique postcards and I sent those out too, then made miniature envelopes out of the tissue paper that separated them, and posted haikus into the world.
So as our little family all stood together in Paris, with the winter wind in our faces and the children moaning “Come on this is boring” because we were supposed to be en route to the Christmas markets, those tiny cards were calling to me and I couldn’t resist. I asked the bouquiniste, “How much for nine packets?”
Later, I wrapped the miniature postcards in a scarf and carefully stored them inside the heavy 18th-Century writing box I’d picked up at the flea markets in Dinan (which was in turn nestled inside my suitcase, wrapped in rain-coats and stuffed all around with socks to protect it from bumps and bashes, and which I carried around for an entire month while we travelled), and promptly forgot all about them. This made for a lovely surprise when we finally returned to Australia, and I began the arduous process of unpacking after five months away.
Since then I have been pondering what to do with them next, and today I have decided! I will use them as tiny touchstones that will link me back to the time I spent in our French village: to the small and precious moments we shared, and the little lessons (and big lessons) we learned.
The challenge: 100 days in Dinan
I have exactly 100 of these vintage or antique cards, each of them depicting a place or a moment from somewhere in France. So every day for 100 days I will take out a card and draw or paint something simple on it that illustrates our time in Dinan. (If you want to follow along on Instagram, I’ll hashtag #100daysinDinan whenever I share a picture).
It could be as grand as a castle or as simple as the tomatoes we picked up at the markets but, as I paint, I will be remembering the sunny day we visited that castle, or the way those tomatoes tasted, sliced onto baguette and sprinkled with salt.
Cumulatively, I hope the painting of these 100 cards will help take me back to Dinan in my heart, and help to keep alive some of the slow and precious lessons I learned during our time there.
The community: 100 tiny missives in the post
But that still isn’t setting the little cards free, is it. So the second part of this challenge is where you come in. Every day after painting a card, I will slip it into a handmade envelope and post it anywhere in the world.
Would you like one?
If you would, simply fill out the form below to share your address with me. This is all about community and for me these sorts of projects are sweeter for the sharing, so you don’t need to pay anything, join anything, sign anything or respond in any way. Just accept my thanks for being part of this little 100-day project.
The form will stay open until I have 100 addresses but, right now, I’m off to start painting!
UPDATE: I now have all 100 addresses so I’ve removed the form for this project. If you missed out, I’m sorry!
If you’d like to hear about my future projects first, you can subscribe to this blog using the box below, or subscribe to my monthly newsletter using this link. I also share what I’m doing on Instagram, and you can find me at @naomibulger.
The shocking moon
It hit me with a jolt at 9pm on a warm night last week. I’d closed up the hutch so the bunny could sleep for the night, and was outside in the garden having fed the cat and tucked her up in the tiny potting shed where she liked to sleep.
It was almost dark, the night air slightly cooler than usual and full of happy bugs buzzing around upon some urgent business or another. I could smell the daphne, and lavender where I’d brushed past it to feed the cat, and there was just the slightest hint of pink left in the quickly darkening sky. The first of the bats were crossing toward the park.
Everything was so very ordinary for a summer’s night at home, but it was the moon that shocked me. The feeblest, watery crescent, barely anything at all: just a line-drawing of a moon, really. I looked up at that line-drawing of the moon in the soft, pink sky and thought, “It will be a dark night tomorrow night” (no moon: safe for the hunted things)… and then I thought of the full moon I’d seen over water in Scotland, heavy and ripe and turgid, and the two seemed a world apart. Which, of course, they were: you don’t get a lot further apart than the winter solstice in the highlands of Scotland from the south of Australia in the heart of summer.
It felt like another lifetime in which I’d looked upon that pregnant Scottish moon, and that’s when the realisation struck me: it wasn’t another lifetime, it wasn’t even a month ago. I was looking at the same moon, still within the very same cycle. She had waned from full to crescent and, in much less time, I had circled our planet like a miniature moon, in human form.
Have the shadows on my face changed?
Am I thinner?
(When I was in labour with my daughter, it was long and difficult, and my husband and I cried at the end with the sheer magnitude of bringing her precious life into the world. When I was in labour with my son, it all went too fast: the labour, the birth, all of it. I felt I wasn’t ready and I couldn’t slow the world down enough to really feel the vastness of this little boy’s new life. Instead I had the nervous giggles - “Don’t worry, that’s pushing the baby out,” the midwife said - and my joyful child was born in ease and laughter, ready or not. I wonder if maybe air-travel is like this, sometimes.)
For thousands of years, we all travelled at the pace of the planet, no faster than legs could carry or horses could run or salty winds could blow. Journeys may have been long and arduous, sometimes boring and often dangerous, but through the weariness and the peril there was ample time to adjust.
To seasons, to people, to our own decisions.
Now, in the space of just 24 hours, we can journey literally poles from our departure point, to a place that is the same but opposite, in almost every way. And the change is so rapid that we just go with it: land passes in a flash beneath us without any time to take stock, we get the nervous giggles (or take a sleeping tablet) and, when we come-to, everything around us has transformed before we are ready.
Everything but the moon.
The moon, which waxes and wanes whether the sun burns cold or hot and which, tomorrow night, will make the world dark and safe for the hunted things.
Painting hacks (and it's ok if you're not doing it right)
Recently when I wrote my frequently asked questions post, I deliberately neglected to answer one of the questions I get asked the most often… “Can you teach me how to paint?”
The truth is that I have never felt confident enough to ‘teach’ painting, because in order to teach something it helps if you actually know what you are doing yourself! I am completely self-taught when it comes to my illustrations, and by “self taught” I mean I just keep painting, experimenting and practising… I haven’t read any books or watched any YouTube videos to improve my techniques.
(Although I’m actually hoping to remedy that this year, and take some formal lessons in botanical illustration at the Botanical Gardens in Melbourne, so maybe one day in the future I’ll have something more useful to share on here.)
But in the meantime, rather than teach you how to paint in any strict, best-practise or rules-based way, I am going to share some of the tips, tricks, hacks and techniques that I have stumbled across so far on my illustration journey.
Why it’s ok to not do it right
Because I’ve never received proper training, it is highly possible that the things I share are not the best way to do things, or that I’m simply “not doing it right.” And I think it’s important that we all seek ways to feel comfortable with this, when it comes to our own creative work.
“Not doing it right” is why I’ve held back on sharing too much in terms of how-to-paint content in the past (fear that I’m not doing it right, and fear that I’d therefore be teaching you to ALSO not do it right).
But now I’m thinking differently, and I’m going to call myself out on this defeatist attitude. Really, it’s just another form of “imposter syndrome,” the feeling most of us experience sometimes (or often) - especially when it comes to creativity - that we are not good enough, even when others appreciate our creations - and that any minute, the world will see us for the failures we secretly believe we really are.
Why do our brains do this to us?? This blog is not the place to explore the depths of human psychology (although I do talk a lot about imposter syndrome and the Inner Critic in my Create with Confidence course), but today I will stand up to my own Inner Critic and hopefully bolster you to stand up to your own, by sharing my perfectly-imperfect tips for watercolour painting.
My hope? That you will a) find some tips in here that are useful, but b) even if nothing here is useful, that you will feel empowered to experiment, play and create, without the constraints of “doing it right.” Just go for it!
Ok, shall we get started?
1. It’s ok to pencil first
You know those Instagram and YouTube videos in which people deftly put wet brushes to clean, white paper and in a matter of minutes create beautiful floral wreaths or sleepy cats on cosy couches, or potted succulents in greenhouses full of charm?
Yep, I can’t do that either.
I sketch my picture out using pencil first (2B because anything darker becomes harder to rub out later), then use waterproof black pens (my preferred brand is Sakura Pigma Micron) to draw it exactly the way I want it to look. Depending on what I’m wanting for the finished product, I add in more or less pen detail, and when that’s done, I rub out the pencil marks.
By the time I come to do the painting, it’s really not much more than colouring in.
2. Painting tools (otherwise known as “You can get your paints from the supermarket”)
My father always used to tell me “It’s a poor workman who blames his tools,” and this is as true in the art-room as it is in the workshop, garden or kitchen. To whit: great tools can make life a lot easier, but they are no substitute for elbow-grease and practise.
For many years, I used sets of watercolours and gouache paints picked up in a toy-store and supermarket respectively. From time to time I still dip into my kids’ Crayola paints, and have used them for all kinds of projects, including illustrations I’ve been paid to create. Until two years ago, I was still using the used gouache paint set my grandmother gave me when I was 10 years old.
In case you’re wondering which is which:
Watercolour paints are made by mixing colour-pigment with binder. The paint is applied by wetting it and then brushing it onto paper. Once the water dries, the binder fixes the pigment to the paper. Watercolours are super-versatile because you can make the colour stronger or weaker depending on how much water you use, and you can easily blend them together or layer them over each other in-situ (i.e. on the painting itself) to create almost any colour or shade you want
Gouache paints are very similar to watercolour paints, except that an extra white pigment (like chalk) is added, to make them brighter and more opaque. (Think Toulouse-Lautrec posters and you’ll know what gouache looks like). You can also blend gouache and watercolour with one another to create just the right colour or intensity you want
Even now, my “best” paints are really hobby-grade paints (I have Winsor & Newton watercolours in a set and Reeves gouache in tubes). I’m sure an upgrade would be a good thing, but I haven’t made the plunge so far and, if you’re starting out and don’t have the means or desire to invest just yet, don’t let that stop you: some decent brushes (my favourites are 'Expression' brushes by Daller-Rowney) and a good feel for colour-blending are all you need to create lovely paintings.
Which leads me to…
3. Colour-blending 101
Alright, most of us know that there are only three primary colours (colours you can’t mix from others): red, yellow and blue. With the help of black and white, you can realistically create all the colours, shades and tones you need with just these basics.
Luckily for us, most paint sets come with a lot more options, so when we are ‘blending’, it’s to create subtlety and more realism. This is how I blend my colours:
First, I get a non-porous palette on which to mix my colours. I have an old plastic paint palette that used to belong to my grandmother, but anything non-porous will do. I also use dinner-plates, the plastic lids of my paints, anything I have handy at the time
Onto that palette, I add a small amount of the first colour, either by adding a lot of water (via my brush) to a hard colour in a paint set, or by squeezing a tiny bit of that colour from a tube
Next, I add my second colour to the palette - nearby but not touching the first - in the same way. And so on for any subsequent colours. So for example if I was making purple, I’d do this with blue and red.
Now I’ll bring a tiny bit of one colour into the middle, and a tiny bit of the other colour into the middle, and mix them together. Based on what that looks like, I’ll add little bits more of one or the other colour, until it looks right. At this point if necessary, I might bring in some other tones, for example a bit of yellow to give it warmth, or white to brighten it up, or a tiny bit of black to tone it down.
The trick is to do all of this gradually, one small bit of colour at a time, so that you can rectify any mistakes or any time you’ve overdone it with one colour, and build up slowly until you get exactly the shade you want.
If necessary, I test my blends on a scrap piece of paper, just to see how they look once they dry, and also to test how much water to add, to create the look I’m going for.
Once I’m happy, I use this new colour on my painting. If I find I’m running out, I start the process all over again but make sure to do it before the original blend has run out, so that I can match the shade as closely as possible so that my painting remains consistent.
4. Colour-blending combinations that come in handy
While travelling for five months I had only the smallest of travel-paint sets, so I had to do a lot more blending to get the colours I like, than I do at home. I am drawn to a muted colour palette with soft, natural tones. But my little travel paint-kit was full of bright and primary colours. Here are some of my personal thoughts on colour, and some of my favourite combinations to achieve the tones I love.
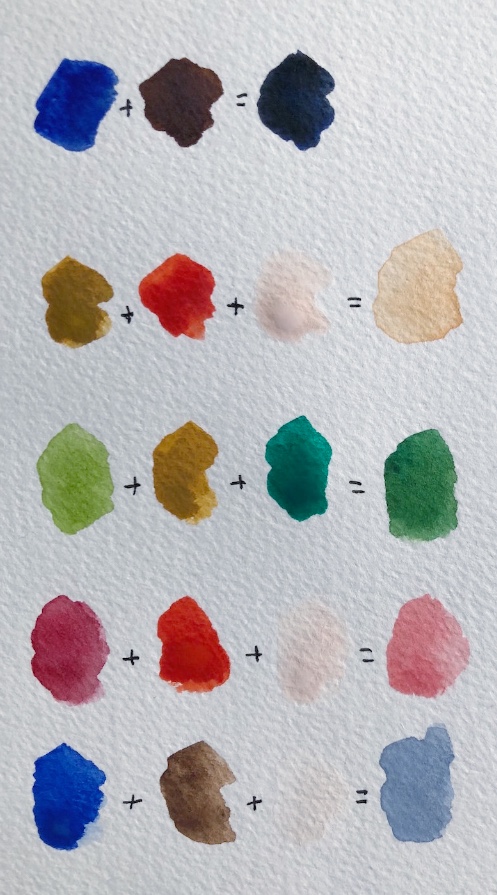
First of all, I have something to say about black. I’ve learned from experience that black can easily dominate a watercolour picture. Look around you: most of the things you think on first impressions are black are not actually true black - most likely they are a kind of dark grey, or a warm kind of black or a cool kind of black… do you see what I mean? For this reason, I almost never use actual black in my paintings (other than in the ink outlines). Instead, I either water it down heavily until it becomes a kind of grey, or I use this blend in the top row…
TOP ROW: The “sort-of black” here is achieved by blending dark blue and dark brown together. If I want a warmer black I add more brown, if I want it cooler I add more blue. Because it’s not “true black,” it looks more natural on the page.
SECOND ROW: I mix light-brown, orange and white together with a fair bit of water to create this kind of neutral sand, which forms the base for all kinds of other colours I need. It goes well with greens, and is also a good starting point for skin-tones, as it can go lighter, darker, or a touch pinker
THIRD ROW: I paint a lot of botanicals, but find the ready-made greens are often unnatural. Also, there are just so many shades of green in nature, just one or two won’t cut it. Depending on what I have to hand, I most often mix a lighter green with a darker green, and then play with adding either light brown, yellow, or the sand I created in the second row above, to get the right tone for the leaf I’m painting.
FOURTH ROW: I’m not a fan of “candy pink” but I love a duskier pink in everything from flowers to sunsets to balls of knitting and an old lady’s hat. I get this by blending the dark red in my paint set with a kind of fire-engine red/orange also in the set, and then adding white until I get the exact depth I want.
BOTTOM ROW: The dove blue/grey here is one of my favourite colours, and I get it by mixing royal blue (as opposed to the dark blue of the top row) with dark brown, and white. It is a much prettier and more natural sky than just watered-down blue, and by adding a tiny bit more brown I can turn it into a lovely, soft grey, that is nice for animal fur, for example, or to add shading and texture to the bark of trees.
(NOT PICTURED BUT HANDY): Purple is quite difficult to make. Most of us know to blend blue with red, but too much red and you quickly get brown instead. I try going lighter first: I’d probably blend the dusky-pink and dove-blue colours in the bottom two rows together, to create a soft kind of lilac, then I’d add more of any of the colours in those two rows bit by bit, in order to get the exact tone I wanted. For me, this is easier than starting from scratch with just red and blue.
4. How to shade a painting
One of the easiest ways to bring a painting to life is to add shading. This not only makes whatever you’re painting look more three dimensional, it also adds interest and texture to what you have created. Imagine a painting of a cactus in a terra-cotta pot. You could simply paint the pot a terra-cotta kind of orange, OR you could create shading to help it look round, rough-to-touch, and give it that lovely aged patina that real terra-cotta gets.
Here are some of my tips and hacks for shading a painting:
A consistent light-source
The most important thing is to imagine a consistent light-source. Imagine shining a spotlight on whatever it is you are painting, or imagine which way the sun is shining or where the window is. Keep that light-source consistent in your entire pattern. It will do all kinds of weird things to people’s brains if the shadows on one part of your picture are on the left, and in the other part they are on the right. Light doesn’t do that (unless you’re a surrealist painter).
It’s lighter where the light is (duh, Naomi)
If the light is coming from the right, everything on the right-hand side of your picture (from terra-cotta pots to trees to animals to a bottle of wine) will be lighter and brighter on the right, and darker on the left. If the light is shining straight in front of your thing (like your terra-cotta pot), then it will be lighter and brighter in the middle, and get darker on either side. If the light is coming from directly above, the leaves at the top of your plant will probably be lighter than those at the bottom.
Shadows are not only about light and dark
Shadows don’t have to be created by simply applying lighter and darker versions of the same colour. Here are some of the ways that I create shadows in order suggest a light-source and create interest:
a) By using more or less intensity of the same colour (by adding more water to make it less intense)
b) By putting a watery drop of dark-blue, black or dark-grey into the areas that I want to shadow, after applying the first ‘main’ colour
c) By blending up two versions of a colour, one that is darker and/or more intense for the areas that are to be in shadow (for example in the case of a terra-cotta pot, I will often blend up two versions of the neutral ‘sand’ colour I shared above, one that has slightly more light brown in it, and another with a bit more pink. The first will be my main ‘in the light’ colour, and the second will be the darker shadows)
d) By using a completely different colour for the shadows, which might be unexpected but, because it is darker or stronger than the lighter areas, still tells viewers’ brains: “this is shadow.”
e) By painting the object one colour, and then “blotting away” the part I imagine to be in the sun, by pressing a paper-towel down over that part. Pressing the paper towel down immediately will remove all the colour. Instead, I like to wait a short while (a minute or thereabouts) and then press - that will take away some of the intense colour, but leave a softer version.
What ever technique you use to create shadows, if you want to have a soft or even invisible transition between the light and shade sections, a good tip is to take a clean, wet paintbrush and gently brush water over those “transition lines.” I don’t always bother with this because sometimes I like things to look a bit more rough and deliberate, but you can create a very natural, organic transition from light to shade if you want to, just using water in this way.
Here are some examples of different ways I’ve created shadows:
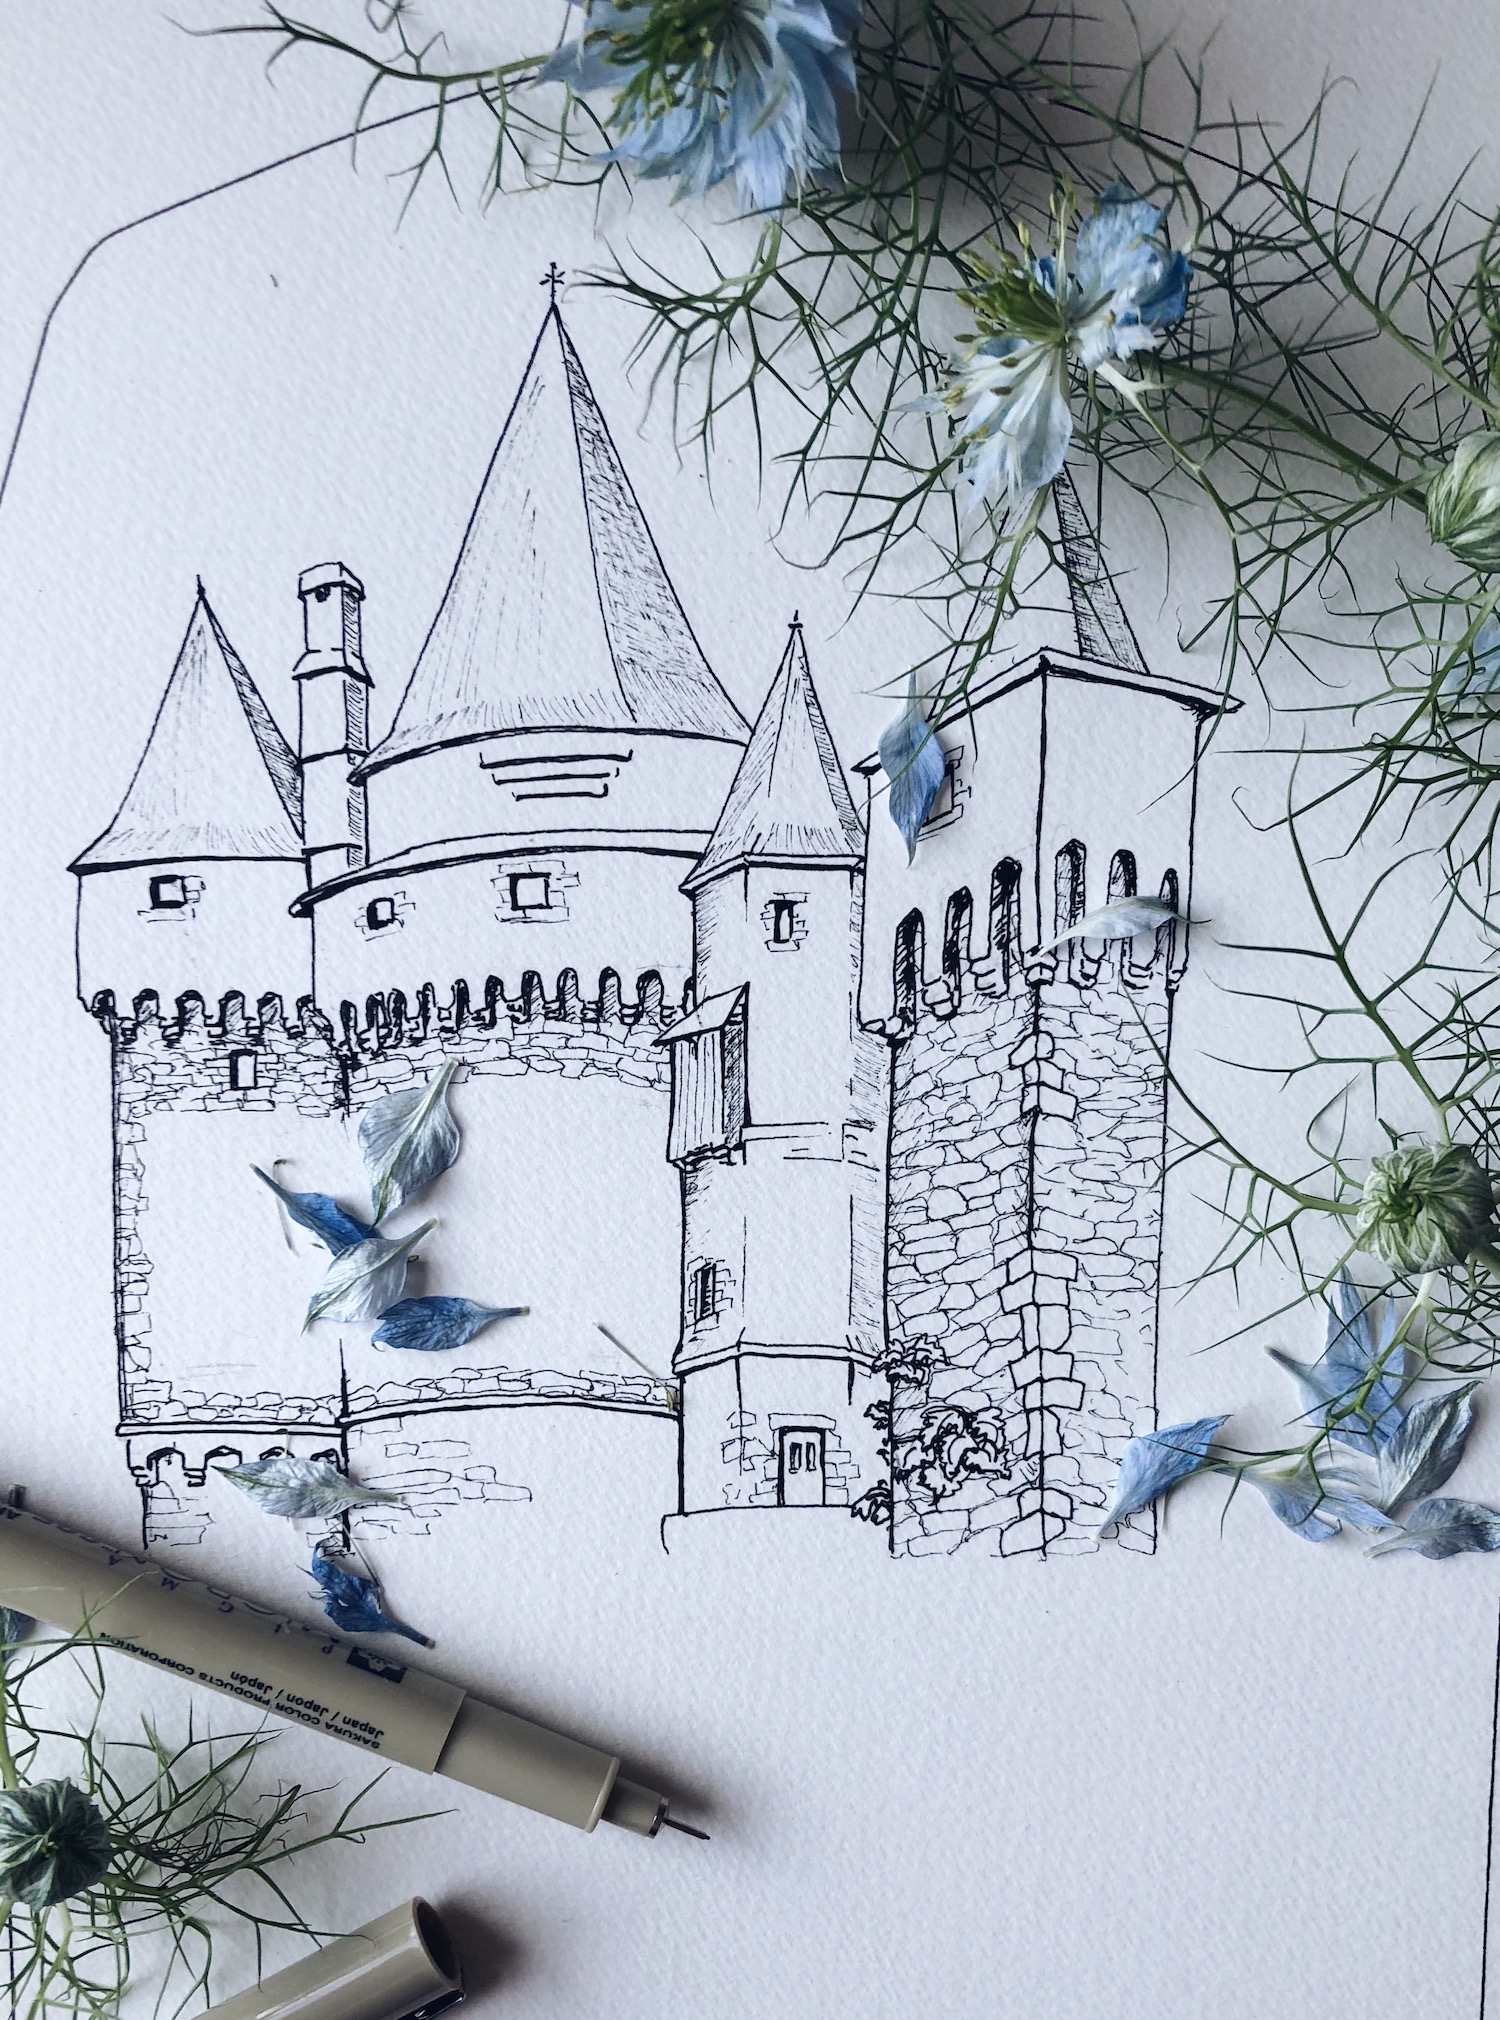
In this partial painting of a castle in Dinan, I used a watery dark blue to create the shadows, despite there not actually being any “blue shadows” on the golden stone walls
In this painting of a whale I made for a Boots Paper greeting card, I used a rather unnatural aqua blue as the shading at the bottom of his belly. The brightness of the blue, and contrast to the much more washed out almost-white of his body, creates the shade I wanted, while also suggesting a watery “whale in ocean” feel that I wanted, despite not painting the ocean
In this greenhouse mail-art picture, I used three different blends on the terra cotta pots to show the light, middle and dark sections of the pots (and to add interest and texture), and blotted some of the way almost entirely, then added white paint, in the areas I wanted to appear super-light. (Here is another picture of pots in which I was - slightly - more subtle in the shading)
5. Paper, and paper towels
Paper weight
(As in, the weight of the paper, not the old-fashioned paperweight that your grandfather kept on his desk).
In general, it is best to paint with watercolours and gouache on paper that has been specially made for that purpose. Watercolour paint is thicker than ordinary paper, which helps to stop it from going bumpy and buckling with all that water. So to give you an idea:
Ordinary copy-paper is usually 80gsm (gsm just stands for “grams per square metre” and refers to the weight, or thickness, of the paper)
A fairly average watercolour paper thickness is 185gsm
Obviously, you can experiment to see what works for you. I have used copy paper plenty of times in my mail-art, and just flatten it down under books overnight if it buckles too much.
But if you pop into an art supplies store and ask to buy watercolour paper, it can be a little overwhelming. There’s weight, there’s texture, and there’s all those different methods of making the paper itself. How do you choose?
Here’s what I have experienced so far (although please remember - see the top of this longgggg blog post - that I am an amateur):
Rough, textured watercolour paper looks fantastic on those old watercolour landscape paintings you might have seen. It gives a lovely tactile feel to the painting
If you want to paint something for printing (such as something for a book or stationery, like my illustrations for Boots Paper), the texture might go against you, because it will stand out too much against the smoothness of the page elsewhere
Paper that is “hot pressed” gives you that smooth feel I’m talking about, and the other benefit is that the paint dries quite quickly on it so you can layer your colours on quickly
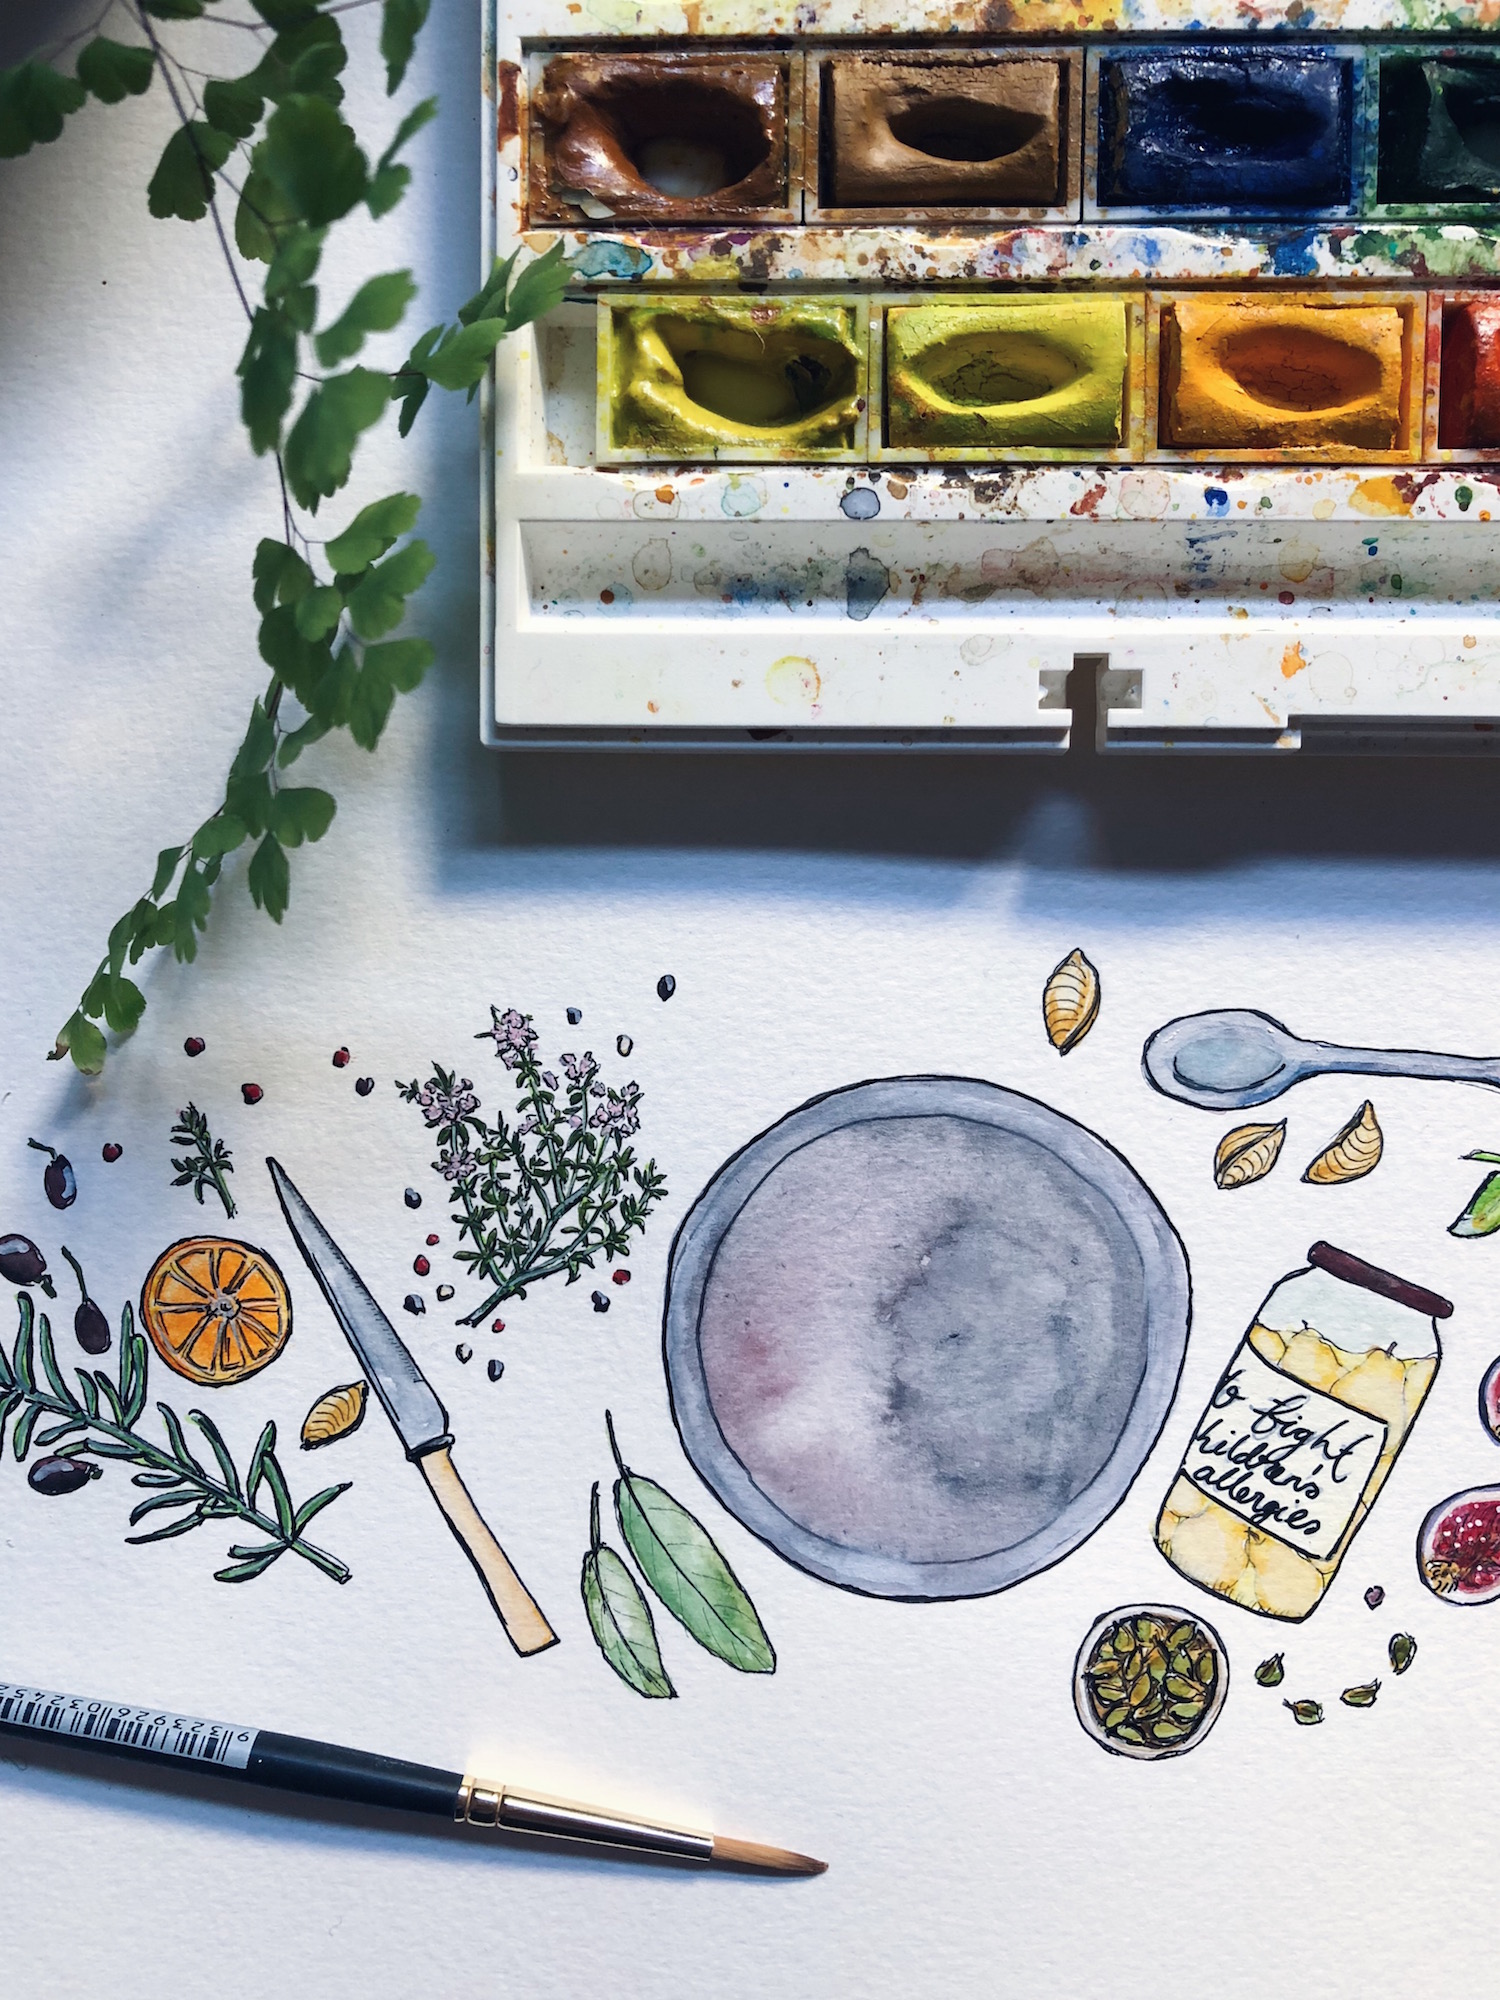
Paper that is “cold pressed” tends to be slightly more textured (though not necessarily as rough as the old-fashioned paper I mentioned earlier) so the paint stays wet longer if you want to create some effects using water and blends. (As an example of this, take a look at the image of food around a grey dinner plate I shared earlier: the dinner plate was left blank because a logo was going to be added inside it, but for subtle interest, I used a lot of water to create that slightly ‘bleeding’ effect you see, reminiscent of glazed pottery)
Most watercolour paper is either cream or white - think about what you mostly like to paint when you choose, and the tones you prefer. For my Boots Paper illustrations I use a slightly more creamy background, because that is what Boots’ owner, Brenner, prefers. For my own work I like a brighter white, because I prefer cooler tones
Preparing the paper
Confession: I never do this. I mean never. I have never even tried it. However… best practise is probably to stretch and then tape down watercolour paper, to ensure you have a perfectly flat surface, and that the paper doesn’t buckle with all the water you apply.
Perhaps if I painted more landscape-style images with big wash areas, I’d have felt the need to learn how to prepare my paper sooner, and have cultivated this good habit. Because my illustrations are mostly quite small, it hasn’t been an issue (so far).
If you want to learn how to prepare your paper (or want to teach me), here’s a tutorial.
Paper towels
My favourite painting tool, other than paints, brushes and water, is a trusty paper towel. My favourites are the kinds that have little patterns embossed on them. I always have one or two paper towels beside me when I paint, and I use them to:
Clean brushes (after I’ve cleaned them in water, I wipe them off on paper towels to be sure they don’t have any paint residue left on them)
Blot away mistakes (if the paint is still wet, you can blot it with a paper towel and you are magically back to blank paper! Even if the paint has partly dried, try wetting it thoroughly with a brush, then blotting)
Blot sections of an image to create a feeling of light and shade, as I mentioned above
Create texture. If there are embossed patterns on the paper towel, it can be fun to actually use this in my painting: I press the paper towel over the paint while it is not quite dry (but not super wet or the paint will disappear) to create a fun, mottled pattern
Here is a short video in which I use a paper towel to create light and shade in my picture, let the paint partially dry (while I sip tea, naturally), then create a new layer in a different colour.
I hope this blog post was useful! I feel a little bit silly and vulnerable writing about “how to” on something I really do just muddle through, and feel about as far from being an expert as you can possibly imagine.
This lack of training probably makes me a fairly poor instructor: if there was something you were wanting to know from me about how I do my painting, but I’ve failed to mention it here, feel free to ask away. Likewise, if this actually is useful to you and you’d like to know more (such as some tips on drawing, for example, which in all honesty would be equally bumbled-through), let me know and I’ll see what I can come up with.
But no matter what, I DO hope this long post inspires you to pick up that dusty old paint-set (yes, the one you picked up for your kids at the supermarket) and wile away an afternoon playing with colour.
Still waters
How does the saying go? Still waters run deep,” if I recall. And, like most clichés, there is enough truth in the old, worn-out phrase to justify how the phrase wore out in the first place.
“Still waters run deep.” How things that appear to be still and quiet can actually hide passion and action, beneath the surface.
And, in my case, how taking the time to slow down and take stock has helped to bring me back to life and energy, from the brink of burnout.
As the year and our time abroad simultaneously draw to a close, I have been thinking about ways that I can apply the lessons I’ve learned during this quiet escape to the often noisy and busy life I lead in Melbourne. We can’t all live out our days in beautiful French villages, so how do we find rhythm and balance in what constitutes “ordinary life” for each of us?
I don’t feel that I have the answer yet, but I have learned some lessons that I hope to take with me into Australia in 2019. So I thought I’d share them today, partly because people have been asking me about how I’ll go adjusting when we return, and partly because maybe by telling you, I’ll feel that much more accountable to follow through.
This sabbatical was a precious gift, and I don’t want to let it drift away with the breeze.
* Saying no. I am going to say no a lot more. I will say it gently, and with love, and probably often with a twinge of sadness and FOMO (Fear Of Missing Out). But I will say no, nevertheless, because saying yes has contributed to the feeling of overwhelm that threatened to drown these particular ‘still waters’ more than once in the past year.
* Eating well. It didn’t take an extended sojourn in France for me to learn that this was important, but it did take an extended stay for me to actually put this into practise. After we return, I want to eat at meal times and not snack in between. I won’t be too extreme in terms of limiting our diets, but I will do my best to make more of our meals rather than buying takeout, and to continue to challenge my children to try new things and embrace new flavours.
* Becoming my own benefactor. This is something I touch on, briefly, in my Create With Confidence course, but which I am also going to apply to myself this year. The idea is that rather than putting all the pressure on my art to earn my living (ie. “I want to create and I need to eat, and so I need to make money from the things I create”), I will be willing to do other non-creative things that earn a living, in order to fund the art I want to create. Part of this is because I am learning, slowly, that when I make art for money, I lose the love for the art. And I want to keep that love.
* Making for joy. By becoming my own benefactor, I also free myself up to create things purely for the joy of creating them. I’ve signed up for some workshops at the botanical gardens in January, learning to paint botanicals. I’m going to crate an illustrated almanac. I’ve fallen back in love with this blog (you may have noticed more frequent posts of late), because I’ve stopped writing for any reason other than for the joy of creating, and the desire to share my thoughts, ideas and questions, with you. I’ll launch that podcast. All of this feels exciting and genuinely freeing, because by earning my money in other places, I don’t have to find ways to make these ‘heart projects’ financially viable.
* Writing more letters. While in France, I have loved sinking back into the habit of writing long, chatty letters and making mail-art, purely for the joy of connecting with someone, or giving them joy.
* Escaping to nature. I am going to be deliberate about taking time out on weekends to escape into nature. Parks, forests, paddocks, orchards… trees are where I recharge, so I intend to be more proactive in seeking them out and losing myself among them. There will be picnics!
* Finding beauty. I live in the inner-city, and there is so much that I adore about where I live. But the truth is, I dream about a country escape, and I’ve realised I had subconsciously come to resent my home and its lack of open spaces. The same goes for my longing for a cooler climate. I truly detest the hot summer in Australia, and it always seems to last for such a long time. My goal, when I return, is to pretend to be a tourist in my own town. To imagine I am visiting for the first time, and in this way to fall back in love with the city I call home.
UPDATE: The evening after this blog post went live, I was listening to the Hashtag Authentic podcast with Sara Tasker, in which she chatted with Hannah Bulliant about “setting tingly goals for the new year.” I found myself shouting “YES” into my headphones while alone in the kitchen, and so much of their conversation resonated, for me, with the thoughts and ideas I’ve shared here. So if you’d like some further inspiration along the same lines (but much better articulated), take a listen to their episode, here.
A seasonal shift
The weekend before we left the village forever, they turned the Christmas lights on. I stepped out of our apartment in the twilight to go to the post office, and hadn’t taken two steps before the entire town burst back into light.
Christmas trees on every corner glowed with colour, rainbow twinkle lights floated in swathes above the cobblestones, intricate patterns of light made snowflakes above crossroads, and every laneway seemed touched with magic.
I raced back from the post office to call the family outside, and together we strolled through the wonderland, marvelling at each new discovery. It seemed as though almost the entire village had had the same idea, we were all, young and old, wandering the town in joy, and the streets were filled with the sounds of “Ooh!” and “Ahh!”, punctuated by church bells.
It felt like a fitting farewell to this town that we had called home for almost four months. From summer to winter, we watched the town transition from full bloom (and full to the brim) to a kind of turning-inwards, resting and readying for winter, and every new face on our town has been lovely.
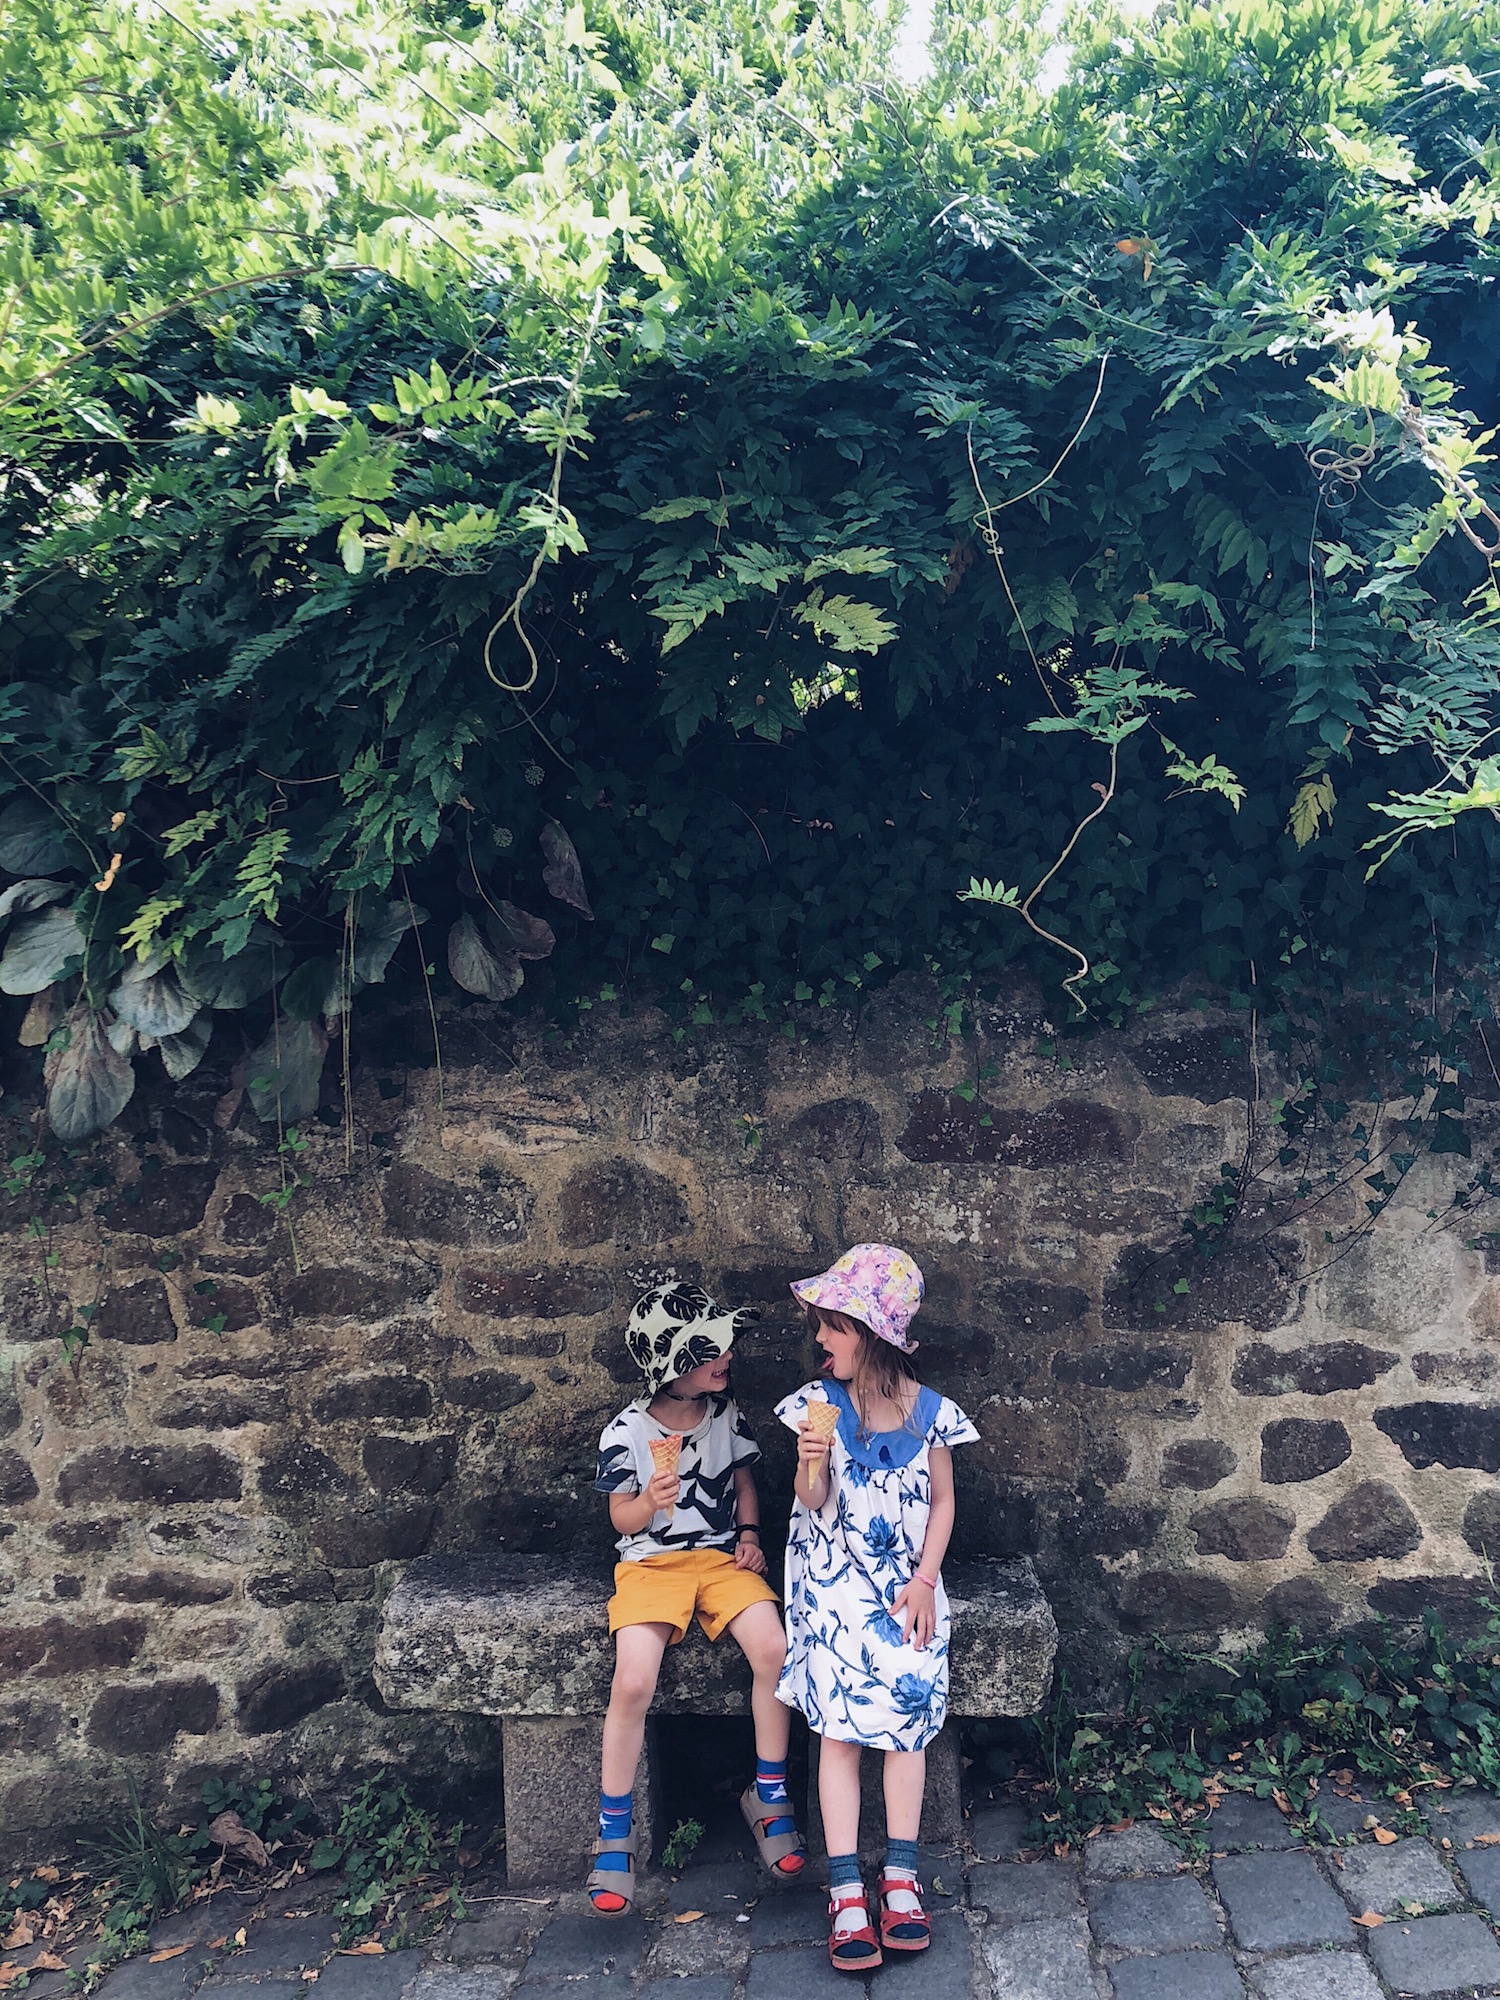
In the summer, the streets hummed with tourists. The glacerie did a roaring trade, with towering coronets of triple-flavoured home-made ice creams, and markets filled with handicrafts lined the street underneath the ancient clock tower, every day. A horse and carriage clopped underneath our window every hour or so, and a miniature train carrying retired German tourists chugged over the cobblestones all day long.
We would wander down to the river in the sweltering heat, and sit on the stone edges with our feet in the water to cool off, or take a ride on the canal boat that took tourists to Lehon and back all day long (always telling the story, in two languages, of how if something happened to the horses pulling the canal-boats in the past, the captain’s wife would have to don a harness and drag that boat along the little river herself).
On Wednesdays, the square beneath our window, in front of the ancient basilica, would fill with stalls of antique toys and books and curios for sale. Scout wore a hand-woven “love knot” around her wrist, woven by a local woman at the market. Ralph found a red tin van that had once held chocolates. I picked up a 300-year-old writing desk, and a hand-painted ceramic kugelhopf mould from a famous artists in Alsace.
Everything in Dinan was alive. The geraniums in the pots outside our windows burst into extravagant colour, and the dancing light seemed to filter inside, even before dawn. There were jazz concerts in the square below us, sending music into our living room through the open windows until after midnight, while we ate crackers and cheese and sipped rosé, and I painted the memories of our grand adventure.
And then the wind turned cold.
As the seasons changed, so did the village. The glacerie closed its shutters for the last time in the year, as did our favourite boulanger, and many of the shops and restaurants taped handwritten signs to their closed shutters: fermé jusqu'en décembre (closed until December).
It was a lot easier to move around the town without the crowds, and the children never had to wait for a space on the tourniquet in the playground, and the cafes and bistros that did remain open started selling vin chaud (hot wine).
The breeze picked up, and the trees changed colour. Gold dominated, but there was also brown, orange, and crimson in the mix. On windy days, the sky would rain colour. We collected conkers and walnuts, and roasted found chestnuts. The chemin des pommiers (apple path) below the castle walls was slick with fallen, rotting apples, a picturesque death-trap to any who ventured down that steep slope.
I walked the children to childcare in the golden glare of sunrise, and home again in the dark. On days off, we started frequenting a deli where the paninis were particularly good, and the proprietress was super-friendly towards the children. In fact, everyone grew friendlier, now that the throngs and crowds had melted away.
And then one dark afternoon, they turned the Christmas lights on.
Kind Noël
Brightly shone the moon that night
Though the frost was cruel
When a poor man came in sight
Gath'ring winter fuel
It’s nearly Christmas, and I’ve been singing Good King Wenceslas in my head all morning. It’s one of my favourite carols: I love the tune, but also the story of kindness and generosity that it tells (and also this scene in Love, Actually).
Of course we could all benefit from practising random acts of kindness, Wenceslas style, at any time of the year. But at Christmas, when we are simultaneously stressed and frazzled but also trying to practise goodwill to all men (and women), it’s nice to be reminded that little acts of kindness can make a bit difference to someone’s day.
With that in mind, I’ve been making a list of ‘random acts of kindnesses’ that I could keep in mind for inspiration at this time of year…
Give up my spot in line to someone at the shops
Pay for the coffee of the person behind me in line at a cafe
Donate to a charity I care about, or volunteer if I have the time
Leave some anonymous Christmas gifts in the letter-boxes of our neighbours (eg. little cards, handmade ornaments, posies from the garden, etc)
Offer to help an elderly neighbour mow the lawn (or shovel snow), put up Christmas lights, walk the dog
Host a casual dinner party or afternoon drinks for friends, and tell them I appreciate them
If I see someone struggling with heavy bags, offer to help carry them
Buy a round of drinks for people in the table next to us if my kids are noisy
Bake something tasty and bring it to the office
Call or text a friend and tell them five things I really admire about them
Leave a thank-you note for a shopkeeper or waiter who is kind to me
Do a toy cull / book cull / crockery cull / clothes cull and give them to charity
Candy-cane bomb a parking lot, like this
Take three for the sea (pick up and bin three pieces of litter I see when I am out)
Write a letter to someone I love
The next time someone annoys me by knocking on my door or stopping me on a busy street to ask me to give to charity, I’ll make a small donation (because the cause is good, and that person has to have one of the world’s most thankless jobs)
I’m sure this list only just scrapes the surface. What ‘random acts of kindness’ do you practise or suggest (or have you experienced) at this time of year?
Frequently asked
I thought it was about time I answered the questions I receive the most, somewhere that they could all be found in one place. Have I missed something you’d like to know? Feel free to ask away in the comments, and I promise to reply.
Here we go…
How do you get watercolours to show up brightly on brown kraft paper?
The secret is they’re not just watercolours. I also use gouache paints, which look and feel pretty much the same, but are chalkier in consistency, and brighter and more opaque on the paper. Back in the old days, poster artists often worked in gouache. I mix my gouache and watercolour paints together within my images (and often combine them with one another to create the exact colour and consistency I want).
What pens do you use in your artwork?
I use fine-line archival ink pens for outlines and details in my paintings, and to write the addresses in my mail-art. The ink is waterproof, so it doesn’t run with the paints. My favourites are these Sakura Pigma Micron pens, and I have a collection of nib sizes that range from 005 (very fine for detailed work) to 05 (thick and bold, good for addresses).
Where can I find likeminded pen-pals?
There are loads of places to find people to write to. Pen-pal groups, yes, but also other projects and programs through which you can brighten someone’s day with a handwritten letter. I shared a list of some of my ideas for the show notes of this podcast episode with Tea & Tattle (scroll to the bottom of the show notes to find the list). I also teach about finding like-minded people to write to (and people who will write back) in my letter-writing e-course.
What camera do you use on your blog and Instagram?
To be honest, 99 percent of my photographs these days are taken using my iPhone. I have a DSLR Olympus PEN camera that I love, and it definitely takes better pictures, but the reality is that I can’t always carry it with me everywhere I go. The iPhone lets me capture small surprises and spontaneous moments in my day, no matter where I am.
Whats happening with the Meals in the Mail project?
Ahhh, that project. Meals in the Mail remains one of the favourite projects I’ve ever run. Here’s where it’s at: at the start, I promised to turn all the recipes into a book, but I received more than 250 letters (after expecting 20-50). To share the recipes, mail-art and stories in this way would make for a book that was around 750 pages long, which would be as unwieldy and impractical as it would be impossibly expensive, so I had to rethink.
I dabbled with the idea of giving the project its own blog instead, but that felt flat to me, and didn’t do these wonderful letters justice. So right now I am in the midst of making the recipes myself, one at a time, and talking to the makers about their food and the stories that make them special, for a podcast project. I can’t wait to share when it’s ready.
When will your snail-mail book come out?
Soon! The copy is finished and edited, the cover is done, and the design is in place. I am finalising some extra illustrations needed, and then it’s off to print. More about this book here.
How do you find the time for all your creative projects?
I could be glib and say there’s never enough time, and that’s certainly true to an extent. I’m definitely not as productive as I’d like to be (case in point the snail-mail book above, which has been in progress for more than four years!). But I do have some tips for finding or making time to be creative, or maximising the little bit of time we have. I’ve put them all into a little e-book called “Time to Make,” which you can download for free when you subscribe to my newsletter (which you can do here).
How can I do more with my creative ideas / start selling my creative work?
I teach all of my knowledge on the personal aspects of creativity (creative block, perfectionism, confidence, time, those sorts of things) in my hybrid coaching and e-course, Create With Confidence which runs once a year. For people who want help going public to share or sell their creative work I have a self-paced course called the Sales & Social Masterclass for Makers, which you can join at any time. I also share tips for free in my newsletter, and am happy to answer your questions via email.
Why and how did you come to spend so much time in France?
Think of that self-imposed sabbatical as me cashing in my ‘holiday savings’ after seven years of not stopping. The idea was my husband’s, after he knew he’d be heading to Italy for work in 2018, and thought that if the children and I were nearby we could all meet up.
We chose to stay in Brittany in France because that’s my family background on my father’s side, and we wanted the children to learn a little of the language and culture that was part of their heritage. At ages four and six, with Scout only in her first year of school, it was an ideal time to travel, before missing so much school became a problem.
I am lucky that I work from home, so I didn’t need to take leave from any bosses. I worked ridiculous hours in the lead-up to the trip, which in retrospect wasn’t the healthiest of ways to save money (ever heard of just “not spending,” Naomi?) but even so, we will be probably be paying off the debts incurred during this time for quite a while.
It was worth it.
That’s it from me for now. As I said, please feel free to ask me anything I haven’t covered yet here. Or (better still), tell me about you! What do you love, make, do, feel?
Brocéliande
Do you believe in magic?
I do, now.
I believe in the magic of forest paths that lead to unknown places, and ancient oak-trees with roots that reach so far into the earth that they touch history.
I believe in the magic of red-and-gold leaves that fall like rain, the crunch of them underfoot, and the sound of wind like whispered promises. I believe in the magic of afternoon light that is actually gold, mist in the morning like a blanket, and the smell of woodsmoke in the air.
Of mulled wine and hot chocolate, sipped in cafes with fogged-up windows and friendly strangers. The call of owls in the night, carrying across still water.
I believe in the magic of standing in a place of legends, the very spot where, at some point in the 5th Century AD, a Briton named Arthur once spearheaded a resistance against invaders from the north, and inspired more than a thousand years of stories.
Stories of love, of betrayal, of heroics, of swords, and stones, of witches, and warlocks, of knights, of round tables, of grails, and of kingdoms that unite and endure.
And of a lady in a still and silent lake.
Ode to writing letters, and cauliflower soup
I’m not going to deny it’s cold out there. The children race ahead of me to the playground, seemly oblivious to the biting wind, and the fact that there are scratches of frost amid the remnants of last night’s rain on the monkey-bars and the spinning tourniquet.
Their games start almost immediately and, to the soundtrack of their laughter, I find a section of bench that is seeing sun (or that might possibly see sun one day). I bring a little towel with me so that I can dry a space to sit down, and then pull out a note-pad and a pen, and ease my gloves off, one finger at a time.
And now, while the children swing and slide and leap and spin, I write letters. I write to strangers, I write to friends. I write to family, I write to my children’s teachers, I write to Instagrammers and podcasters I admire. I write about the produce I found at the market, about walks we take in the woods, about books I’m reading, cakes I’m baking, dreams I’m dreaming, and about the way time runs at a different pace in France.
I write until my fingers turn red from the cold, and then blue, and then wrinkle until they look twice my age. The children race past me, shrieking with laughter during some great game or another. I blow on my fingers, I shake them out, and then I write some more.
Later when we are home, I pull out the pencils and paints. Trace around my trusty wooden envelope-template, and make up designs that I think people will enjoy, inspired by the world around me right now. A café in Paris where we drank hot chocolate and ate croissants. Sunflowers that I’d picked up at the market in London two days earlier. A castle in Bretagne. The picnic we enjoyed in summer at the ruins. Rosehips from the basket-full I picked from the hedgerows, the swan we admired in St James’ Park, my mother’s vegetable garden.
When I’m done, I fold each painting into an envelope that will carry these tiny moments and stories from our lives along highways and past mountains, across bridges and over oceans. From autumn to winter, or spring, or rainy-season, or dry. To vast cities and country villages, rural outposts and marshy islands.
All for the low, low price of two euros.
Sitting in the cold playground and writing these letters, these long, rambling spillings-out of my days, feels like I’m returning to my roots. It’s not that I ever stopped writing letters, but the luxury of time to write in this way isn’t something I’ve given myself in many years. (Note that I say “given myself” rather than “been given,” because too many times I’ve claimed not to have time when, in reality it was simply that I chose to spend my time in other ways).
I’ve heard it said, and in fact I talk about it in my letter-writing course, that writing something down by hand (rather than typing) aids the memory. It’s something called “reflective functioning.” We feel the event or experience all over again as we write it down, and then reflect on it and make sense of it as we read it back. Perhaps by writing down the seemingly mundane but often precious moments of my days, I am helping to commit them to memory and heart, my letters becoming an act of mindfulness and gratitude, appreciation for the littlest of things that bring joy.
But I sometimes wonder if, in not only writing these things down but also sharing them with someone else, I am doing more than committing them to memory. Maybe I am giving them lives of their own.
What if, upon reading of the intricate romanesco broccoli I picked up at the market on Thursday, my correspondent is inspired to make her famous roasted cauliflower soup, and invites friends over to share it? The conversation and laughter last well into the night, and it is a simple experience of friendship and hygge. That wasn’t my letter, but maybe a letter could spark such a thing?
This is the power of words shared. They don’t stop on the page and, from the moment we drop our letters into that post-box, they no longer belong to us. To me this is a beautiful thing, and the fact that I can never know if or what my letter might spark in someone else does not make the imagining any less joyful.
The truth about what happens on our walks
Chevalier Ralph clambered up onto the rocks by the path, to his look-out. “Can you see the advance guard?” the Warrior Queen Scout called up to him, “Are they close yet?”
We all peered through the forest trees and across the canal, to the hiking trail on the other side. Two retirees carrying trekking poles were striding along the path. “I see them!” yelled Chevalier Ralph. “They’re almost ahead of us!”
And then at the same time, both children looked further into the distance, and stiffened. A walking group of about 20 more retirees had rounded the corner of the path across the river, behind their two ‘advance guard’ friends.
“The pack! The pack of oldie chevaliers!” the children yelled, in mock terror. “Run!” And so we ran, a mad race to the old castle ruin, us on one side of the river and our unwitting enemies on the other.
We were two chevaliers and one warrior queen, you see, and we alone knew of a plan by our arch enemies to attack our castle. They intended to sneak up on the castle, cunningly disguised as an innocent-looking walking-party of octogenarians, then storm our walls and take the kingdom.
Luckily, we happened upon them during our walk. Now it was up to us to get to the castle before them, and save the day.
We raced along the forest path, past the ancient abbey with scarcely a glance, and scrambled up the steep hill to our fortress, all the while listening for the sound of deceptively-benign conversations about chestnuts and knitting and grandchildren.
Once there, we pulled up the imaginary draw-bridge, locked the non-existent gates, and armed the crumbling battlements. Hastily (there was no time to lose!), we reached into my backpack and added to our number: the castle was now under the protection of Chevalier Ralph, Chevalier Mummy and the Warrior Queen, as well as a soft toy Lightning McQueen, another soft toy Harry Potter, and a little plastic dog from Paw Patrol, called Chase.
The toy chevaliers protected the most vulnerable aspect of the walls, overlooking the valley, while the three of us checked every other side, craning our necks for enemies disguised as grandparents. We sent messages via carrier pigeon to the next town over, warning them of imminent attack.
At this point the Warrior Queen decided she was no warrior after all, but just a plain old queen who needed protecting. After about five minutes of that she found that being helpless was boring, and so miraculously developed the powers of flight. A man wielding a leaf-blower in the village below was actually a dragon, roaring with fury and spewing dust and leaves.
Chevalier Ralph stopped bing a chevalier and became instead a superhero, by the name of SuperBoy. As we headed to the neighbouring village, we had to stop multiple times for SuperBoy to throw stones into the canal, as this was the only way to recharge his waning superpowers.
Soon after this, the adventure grew so complex that it is impossible to explain. Suffice to say we won the day, both sides of the war agreed to make friends, and we celebrated with chocolate eclairs and raspberry tarts on the way home.


