The Easter craft challenge #1 - snail mail
 There is something so very tactile and satisfying about receiving old-fashioned snail mail in the box, don't you think? There is a wonderful theatre to opening it, not knowing what's inside. And a special feeling, knowing that the sender has taken time to write to me by hand, to pack a parcel, to wrap and post and send it.
The fact that mail takes such a long time to arrive (as opposed to the instant gratification of email, phone calls and messaging), and has been through so many hands to get to its final destination, only adds to the romance of the post.
When you receive a parcel from me in your mailbox, it has been on a journey. It has seen places you may never see, and has travelled across mountains and highways and oceans to reach you. The stamps and marks and scuffs that you can see when it arrives are evidence of its adventurous passage toward you across the globe.
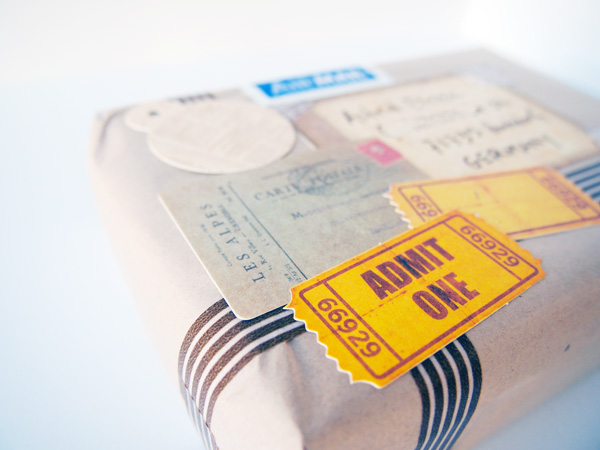
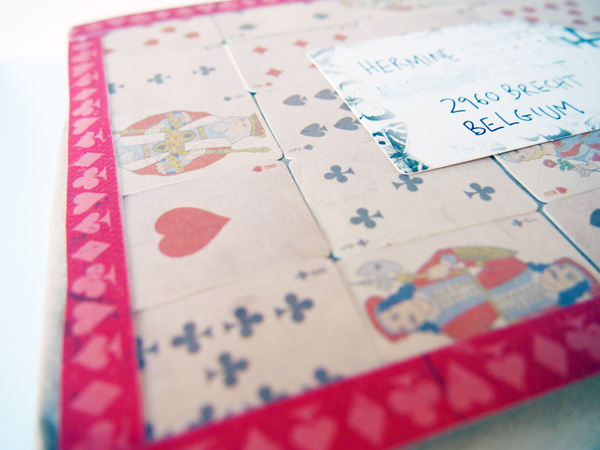
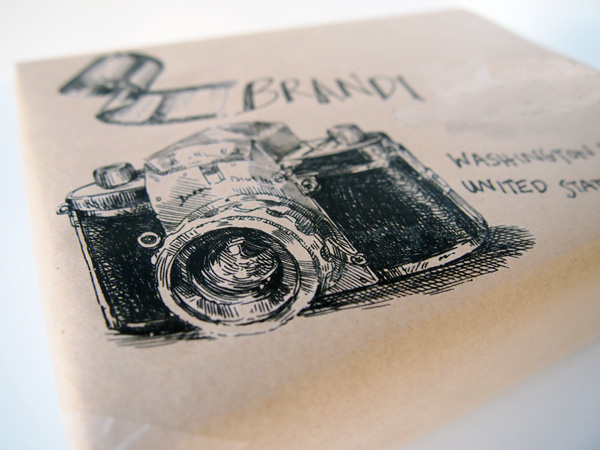
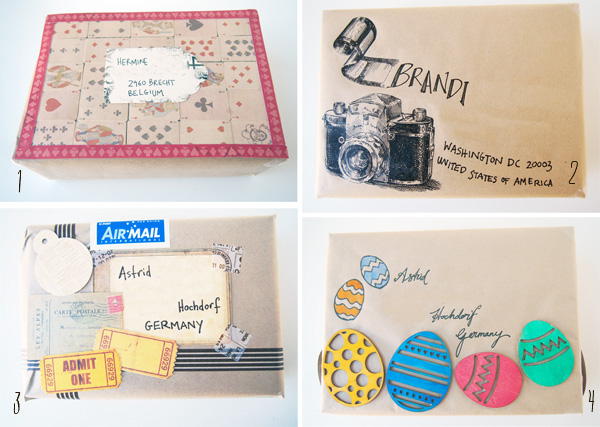
Often, I like to draw or paint pictures to embellish the addresses on the mail I send, like these. I also use string and wax and ink stamps to add to a parcel's beauty. (This is for the benefit of both the recipient and all the postal workers who handle it: the woman at my local Post Office loves it when I come in with a new parcel, turning it over in her hands and saying "Oh, lovely," before affixing the stamps.)
But lately I've been exploring other ways to make the mail I send something lovely to look at. And after a recent trip to Kaisercraft at the fabulous Uni Hill factory outlet precinct for inspiration, I came up with some new ideas using collage, stencils and wooden embellishments.


 They were super easy to make, and I'm really happy with the results. If you want to have a try, just wrap your parcel in plain paper, then have a play. I used PVA glue to attach the wooden and paper collage pieces, although double-sided tape would probably do as well. For pieces that absolutely couldn't fall off (like those containing the addresses!) I reinforced the corners with pretty printed tape. The wooden eggs were plain when I bought them, so I painted them before gluing them on.
Some mail tips for embellishing mail (so that they won't get mad at you at the Post Office):
* Make sure you leave space on the top-right of the parcel for the stamps * If your parcel is going overseas, leave space for the airmail sticker to go on the top-middle or left * If you need to make a customs declaration (most Australian post going overseas requires this), leave a good area on the back to stick the form so it doesn't destroy your lovely artwork on the front * It's a lot easier to send 'fancy' mail if you are sending something with a flat surface, like a book. If your mail is bumpy or squishy, consider putting it in a small box before wrapping it in the brown paper, so you can more easily decorate it * Since you're using paper in place of an envelope, take a few extra steps to be sure it is strong enough to survive the journey. I make sure there are a few layers of paper around my parcel. I also reinforce all the fold-lines of the paper with sticky-tape, leaving nowhere that it could catch or tear. Finally, I put a piece of sticky tape on every corner to protect it from tearing if it bumps around with all the other mail.
I found all the supplies I needed to decorate my mail from the the amazing new Kaisercraft University Hill store. This included PVA glue, printed sticky tape and a craft knife, as well as the following 'features' for each box:
 1: Packet of mini playing cards
2: Packet of Rub Ons - easy-to-use stencils in various designs
3: Packet of "Timeless Tags" - more than 50 pieces of die cut shapes
4: Two packets of three wooden Easter eggs
Coming up next week: Easter eggs with hidden messages inside.
Sponsored by the good folks at Uni Hill factory outlets.
