JOURNAL
documenting
&
discovering joyful things
Make this: surprise slide-up cards
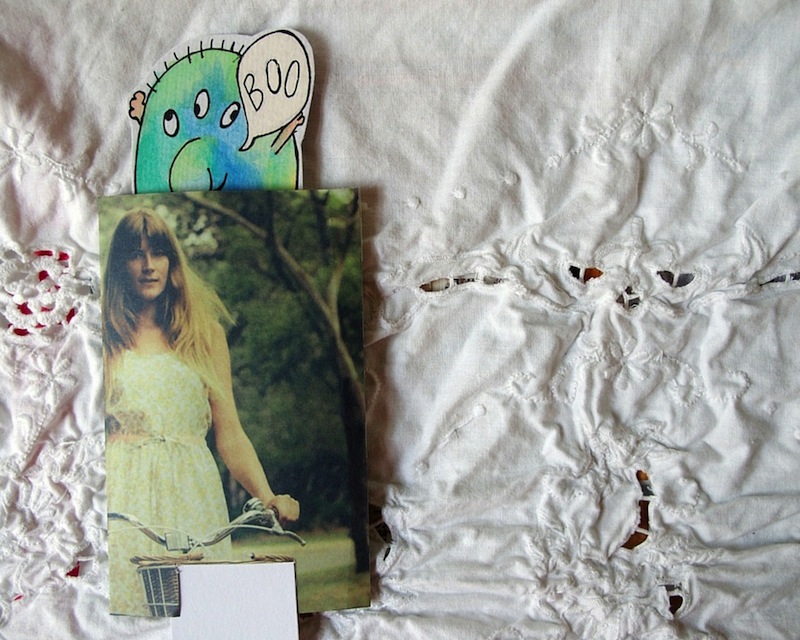
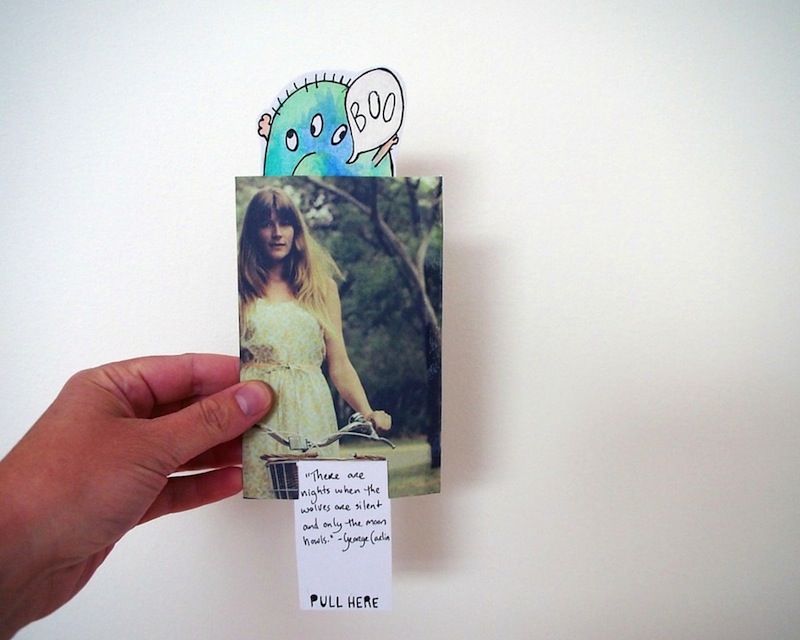 Boo! Recently I made these little slide-up cards, after watching one of those "how-to" tutorials on YouTube that make simple things so much more confusing than they should be and assume you are the proud owner of an entire cupboard full of obscure craft supplies, when you could actually make do with a piece of cardboard and some sticky-tape.
Mine were Halloween-themed but if you want to make them too, they would suit pretty much any occasion or holiday: little hearts popping up to say "I love you," fireworks popping up to say "Happy New Year," flowers or confetti or - you get the point - to say "happy birthday," and so on.
Following is my pared-back tutorial, with a few moments of "full disclosure" on things I did wrong or could have done better, so you can learn from my mistakes.
The basic mechanics of these kinds of slide-up cards involve plastic wrapped around a rectangular piece of cardboard (or more accurately, an "H" shape, to stop the plastic from sliding off). You stick a second piece of cardboard with your picture or message on one side, and a third piece of cardboard with the "pull here" instructions on the other side. When you pull down on one piece of cardboard, the plastic slides around, pushing the other piece of cardboard up. Make sense?
ΔΔ What you'll need:
* One or two sheets of thin cardboard, or some thick (eg water-colour) paper * Scissors * Sticky-tape or glue * A pencil, or something to measure your cards (you could use a ruler and/or one of those grid maps, OR you could do what I did, and trace around your mobile 'phone) * Thin plastic (full disclosure: being the non-craft-supplies-cupboard type person that I am, I didn't happen to have any thin plastic available, so I just cut up the plastic covers from some greeting cards - do you know what I mean? - and they would have worked really well except for the folds in the plastic that caused the "slide up" bit to catch)
ΔΔ While you can make these cards all out of the same cardboard, I used a few different types, just to make my cards interesting. I used the beige cardboard you see pictured because it was handy, to make the H-shaped mechanics of the card. I used water-colour paper for the slide-up monster or ghost, and for the "pull here" tab at the other end, because I thought the colours would show up better on white than beige and I didn't happen to have any white cardboard handy. I used old pages of Frankie magazine to make the "envelope" of the card, because they're pretty. You could of course use plain cardboard for the envelope, which would leave a whole lot of space to create your own design or the first part of the message.
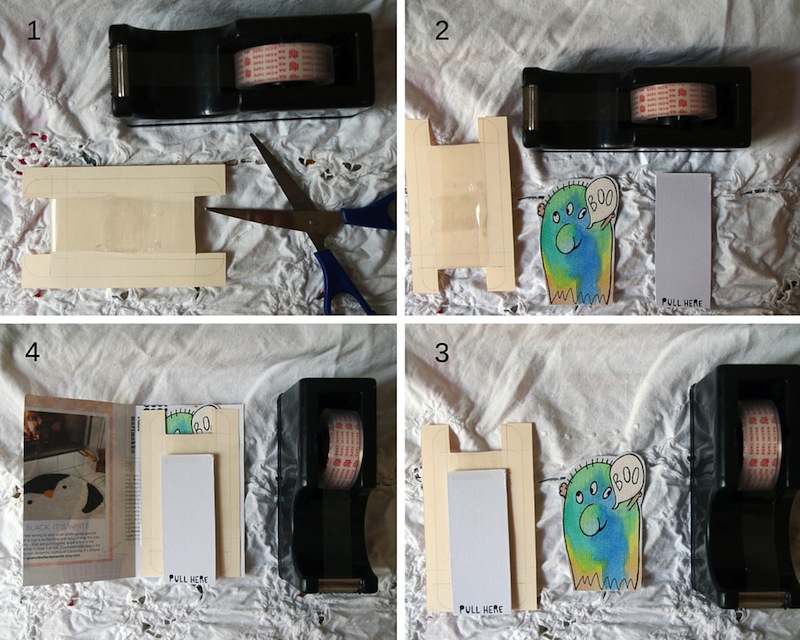
ΔΔ Step 1 (top left): cut out a piece of cardboard in an "H" shape, then cut out two rectangles, slightly smaller. I traced around my iPhone to get the rough sizes of my two smaller rectangles (which make up the monster and the "pull here" tab), then just went a bit bigger to get the H shape. You can see the pencil-work where I traced around the iPhone then made it a big bigger. This is part of the inside of the card so don't worry about pencil marks.
Step 1b (because clearly this is actually two steps but I forgot to take a photograph of the H before I'd already stuck the plastic on)... Now cut out a strip of plastic long enough to wrap all the way around the short bit of the H, then wrap it around and stick it together. Make sure it's not too tight, because this is what will be used to slide your picture up and down so it needs to move easily. (Full disclosure: as I mentioned, the creases in the re-purposed gift-card wrapping I used meant that in some cards, the plastic would get stuck and wouldn't slide smoothly. Also, I used sticky-tape to secure the plastic because I didn't think glue would be reliable, but the tape also created some problems with the smooth sliding of the pulley. So the one thing I would do very differently next time would be to find some better - crease-free - plastic at the newsagency, and possibly some good glue)
ΔΔ Step 2 (top right): take your two smaller (in my case iPhone-sized) pieces of cardboard, and place them to the plastic on the H to see how they fit. You may need to trim them further. Now would be a good time to draw your slide-up message or illustration (in my case the monster), because it gets tricky to draw or paint after the card is made.
ΔΔ Step 3 (bottom right): place your "pull here" card on top of the H, lining it up with the bottom of the H-card. Then tape it to the plastic at the top. Turn the H over, and line up your picture (monster) card, face down, so that the top of it is flush with the top of the H-card. Tape it to the plastic at the bottom. Turn the H back over and test it at this point. Give the "pull here" tab a tug, and see if your picture slides up. Don't worry if they flop everywhere, the envelope will hold everything in place.
ΔΔ Step 4 (bottom left): cut out another piece of cardboard or paper. Measure it to be slightly bigger than the H, then double it sideways. I used pages from Frankie magazine for this. Fold the cardboard or paper in half, then stick the H to the right-hand side of the card (on the inside, of course). Make sure when you tape it that you secure the H on both sides, but don't stick down any of the moving parts.
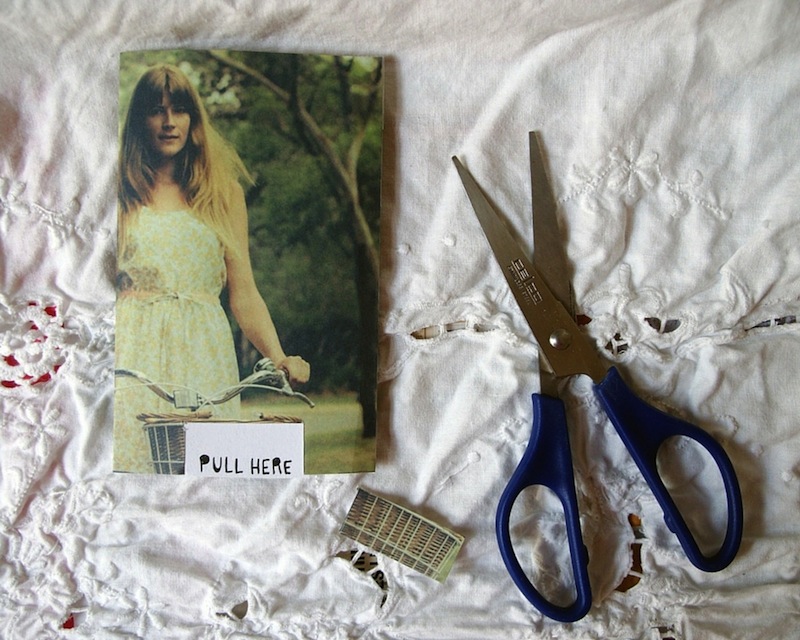
ΔΔ Step 5: Fold the card over to close it, and seal it up with sticky-tape or glue, again making sure you don't go near any moving parts. Cut out a little square or semi-circle to reveal your "pull here" tab.
ΔΔ You're done! I used the blank space above "pull here" to include a spooky little Halloween quote (see the picture at the top). You could add a secret message here, if you wanted to.
Halloween inspiration board (friendly ghosts and purring cats)
 I know, I know, but I really love Halloween. On my street, it is such a community event. Crowds of small children, dressed to the nines in the most adorable costumes, carry their little jack ‘o lantern buckets along the footpath. The braver, older ones traipse up to front doors and knock with hope in their hearts, while the smaller, more timid ones stand and shuffle their feet and wait to see what happens next…
We don’t really trick-or-treat on my street, we just treat. There’s an unspoken rule that if a house has decorations out the front or if the front door is open, it’s ok to knock. Otherwise, the kids just pass on by.
By the time Halloween rolls around it’s daylight saving in these here parts, so it’s almost like a giant summer street party. We meet neighbours we’ve passed at the shops and never spoken to before. Our children shyly make new friends. Often, trick-or-treating ends in impromptu barbecues and picnics and drinks all along the grassy island that divides our street. Honestly, Halloween is the best.
I’m completely comfortable with cherry-picking the things I like about Halloween, and ditching the things I don’t. I don’t like horror, I don’t like gore. I like my ghosts friendly and my black cats purring, you know? And I’m ok with that.
And so, bearing that in mind, here’s what I’ve pinned to my (imaginary) Halloween inspiration board, so far.
* I really wish somebody would invite me to a tortured artist Halloween party (who would you go as?)
* These marshmallow spider’s web cupcake toppings look more tasty than spooky
* Still on the subject of cupcakes (why not!), these printable monster cupcake holders are adorable
* Edible glow-in-the-dark secret messages! Ok, ok, these ones are on cupcakes TOO, but you could also put them on biscuits. Or something.
* A big handful of All Hallows Eve confetti
* And finally, this luna lamp is just about the most beautiful thing I have ever seen. It's part of a crowd funding campaign that's on right now, so act fast if you want to get your hands on one


