JOURNAL
documenting
&
discovering joyful things

Christmas in a time of Covid
After one of the most difficult years most of us can remember, I think we could all do with a little moment to stop and celebrate, don’t you? This online magazine - a bumper version of my monthly newsletter - contains ideas for celebrating and sharing the joys of Christmas, even if you are in lockdown; mindful gift ideas and DIY projects; tips for writing Christmas letters; 12 festive envelope templates for you to colour in and post; and loads more.
Flip through the magazine below (if you hover over the magazine window you’ll see an option to make it full screen), or click “download” to print and read it the old-fashioned way, and to use any of the resources and templates inside. (Give it time if it’s slow to download - it’s a big file!)

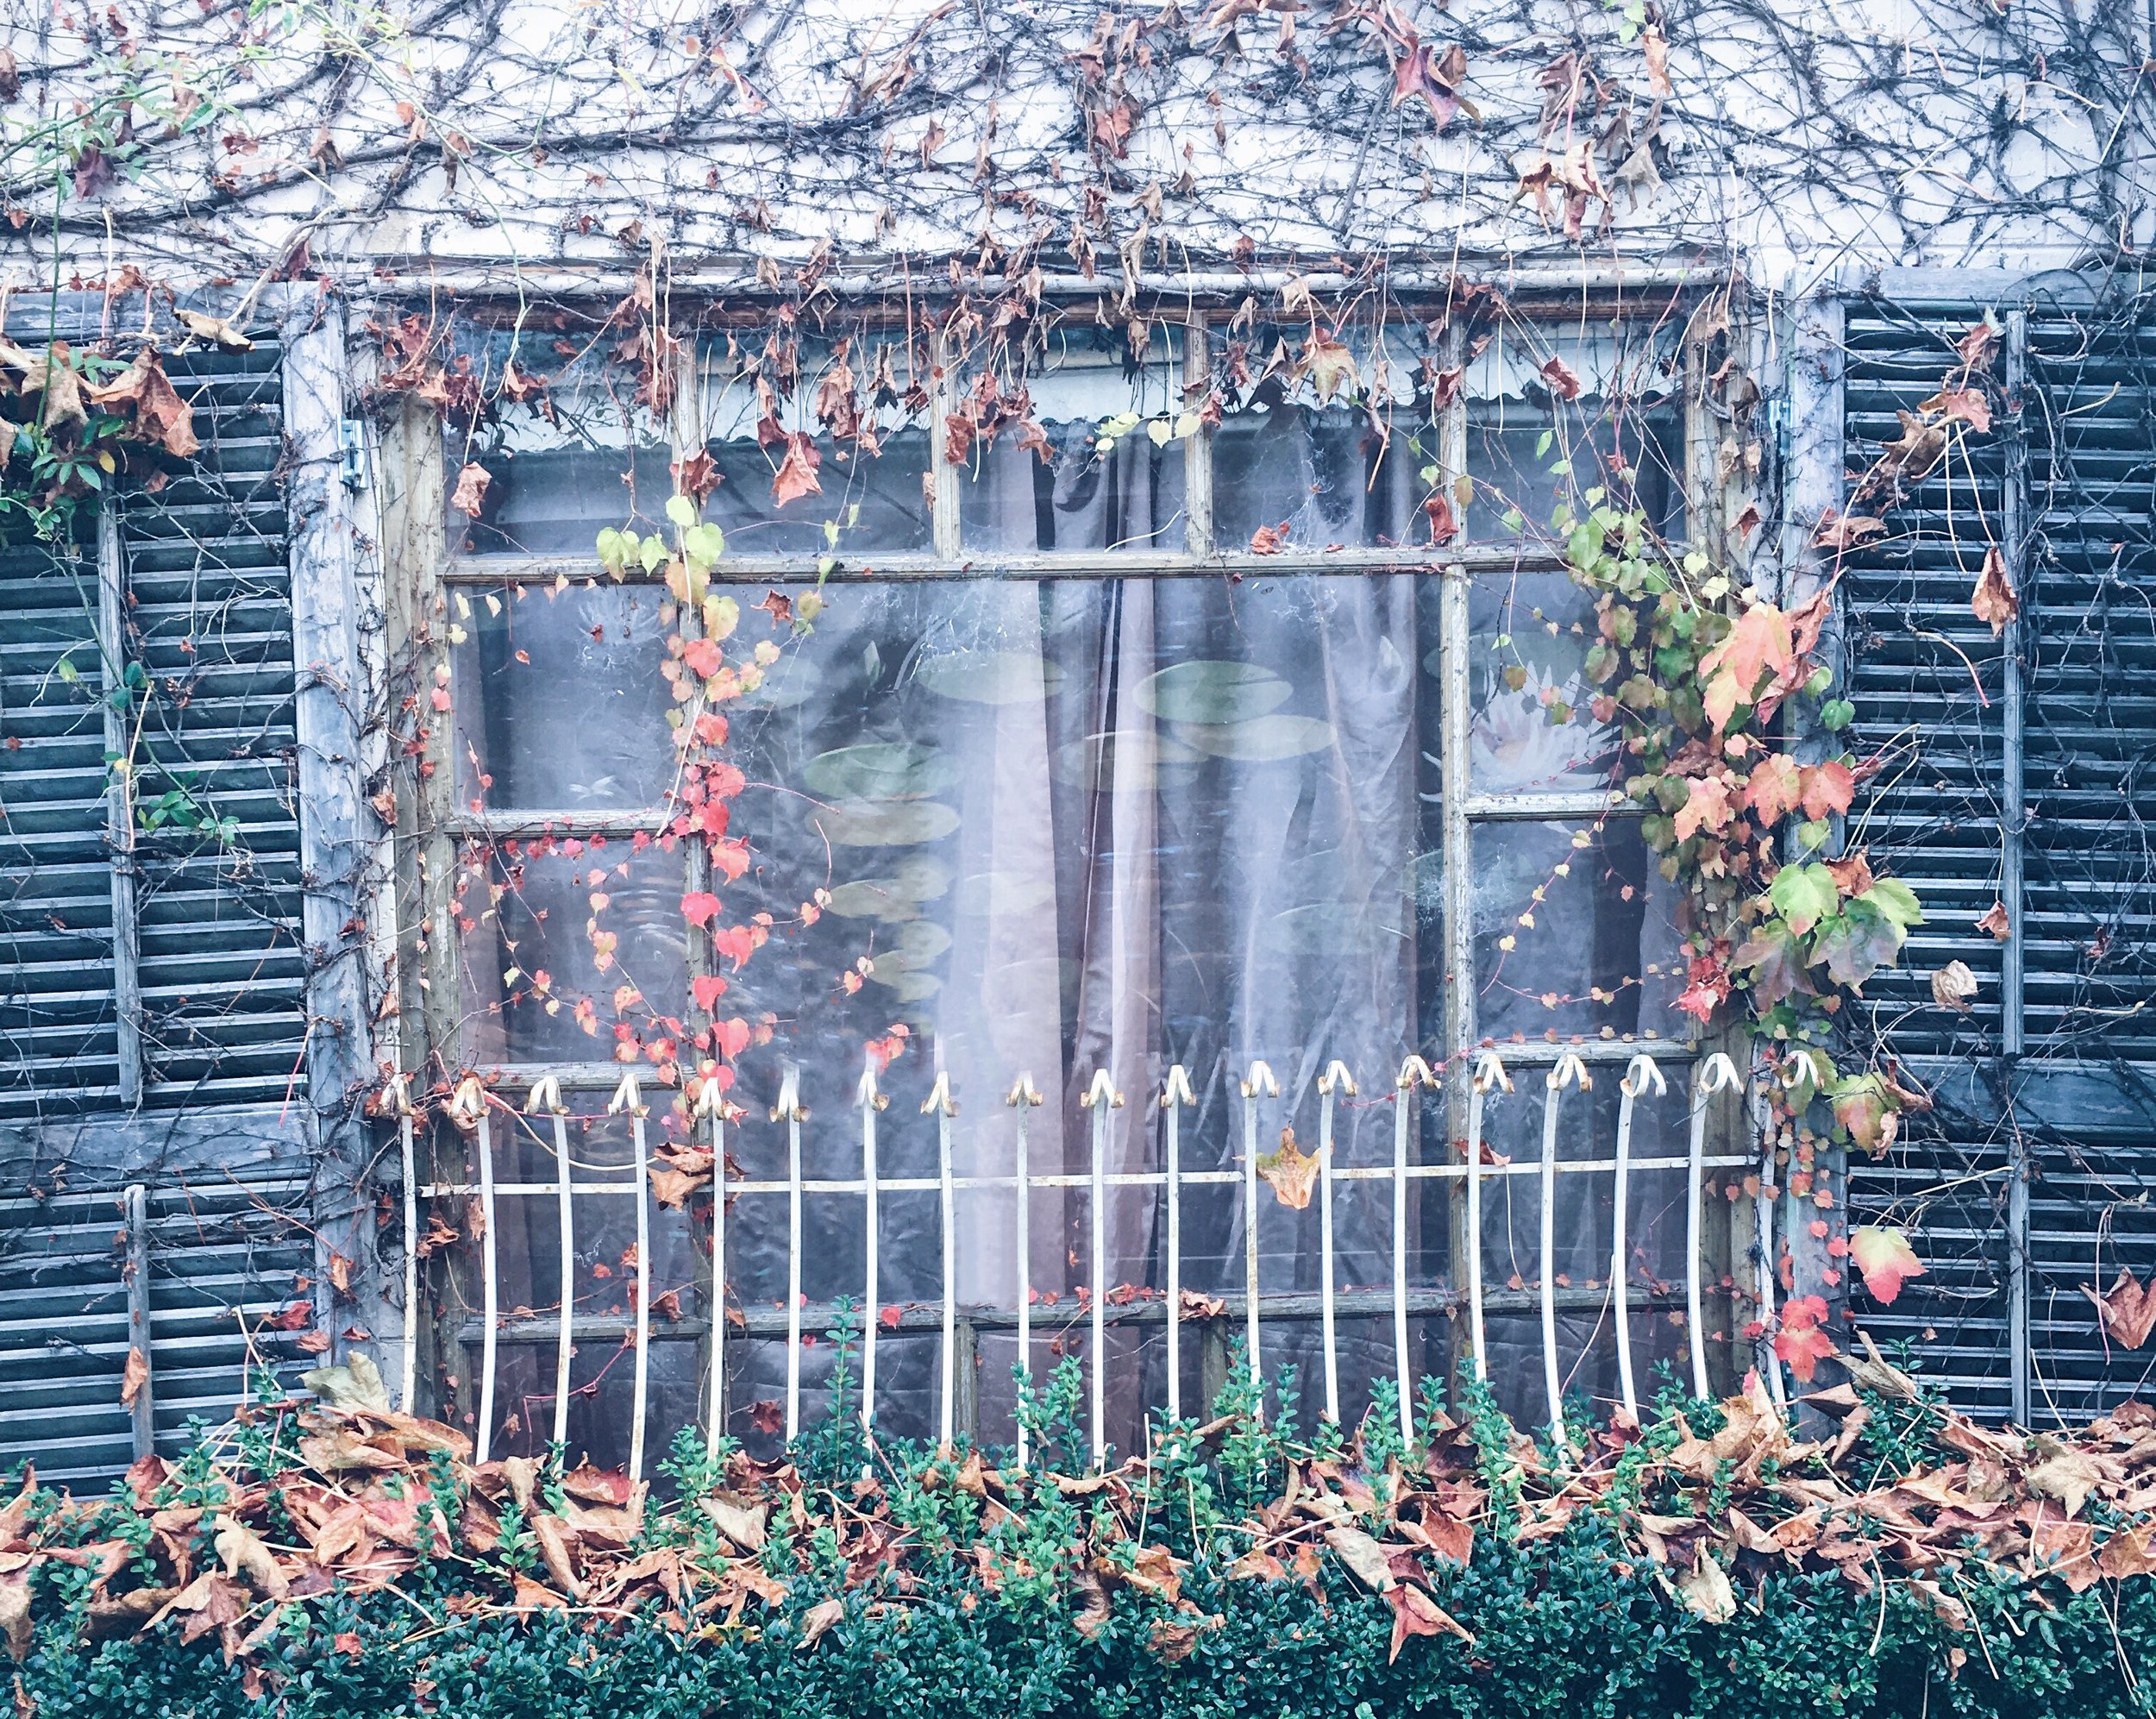
Can you hear the garden singing?

When the world closed back in March, and the us of our familiar communities, neighbourhoods and even entire nations was reduced to the surprising smallness of the we, or me, that inhabited each of our individual homes, Nature welcomed us like a mother hen.
We tended seedlings on window-sills, pruned back overblown autumn branches, and finally learned how to pronounce the names of our house plants. (It’s Monstera Deliciosa, not Monsteria). I would rest my palms on the soil beneath the Japanese maple tree, fingers outspread, and imagine the way the soil connected me to the trees and through them the root systems and through those root systems all the other root systems that spread across my yard and my neighbourhood and beyond the closed borders, all of us belonging to one giant ecosystem, even while we were apart.
At night I would look up at the moon and imagine all the other people alone in their houses, looking up at that same moon.
(Outside our tiny lockdown worlds, Nature didn’t weaken her embrace. Ducks swam in the Trevi Fountain. A herd of wild goats wandered through a Welsh town. The skies above some of the world’s most polluted cities shone clean and clear.)
Nature, and in particular for many people their gardens, became a place of solace. Even more so than usual. For me and my children, our tiny garden became the one place where we could go outside for as long as we wanted to. When the weather was warm we’d carry their schoolbooks into the garden and read on the grass. We’d eat out there when we could, and together tend to the plants: pruning the roses, netting the fruit trees to protect them from marauding possums, and planting rows of tiny carrot seedlings, celery, and Brussels sprouts.
Now spring is here and though my garden was late to bloom this season, it is well and truly making up for lost time now, showering us with an abundance of colour and perfume. For a little while I congratulated myself on a gardening job inadvertently well done, until I began to notice the roses blooming in front gardens and over fences and along road-edges, all over my city.
Nature is having a moment.
I don’t know if it is the extra love and attention, the cleaner air and water, a sign of resilience after last year’s climate disaster, or something altogether different, but right now, it seems to me that the gardens of Melbourne are singing.
I shared this thought on Instagram recently and was surprised by the sheer number of people - not just in Melbourne but all over Australia and the world - who are noticing the same thing.
There is such sweet solace in a garden. Even in the tiniest of gardens, just a pretty pot with one happy houseplant growing, changing, reaching up and out - ever toward the light - and I have never been more grateful for my little pocket of green-and-rainbow than I am right now.
Can you hear the gardens singing?

It's just a carrot

Except of course it was never going to be “just a carrot.”
Last weekend when our Premier announced that hairdressers could start working again, my husband booked a haircut for the very next day. “It’s symbolic,” he joked. “My curly hair is a symbol of our oppression.” I laughed at him, but I could also relate. Here in Melbourne we have been locked up for so long that everyone is starting to lose perspective, and the little things can feel very big indeed.
My husband has out-of-control hair. I have shingles. My kids are most probably illiterate.
And we are the lucky ones: we have steady incomes, we have each other, and we have our health (although just between us, shingles suck).
Not long ago I bought a take-away coffee from a cafe around the corner from our house, and the owner started to cry. She said, “I don’t know what I’ll do if we’re not allowed to open soon. I haven’t been able to pay my rent for seven months, and I’ve put everything I have into this business. I’m in my 60s and I live alone. What else am I going to do?” She said that if her landlord insisted she pay the missed rent she’d be sleeping “out there,” and gestured to a park bench, still wrapped in “Do not cross” tape because we were not supposed to sit down in public places.
For my part, ever since our second-wave lockdowns tightened in July, I began nursing a fantasy of going out for a walk, and not stopping. Not stopping when my one hour outside allowance was up. Not stopping when I reached the five-kilometre line that we were not supposed to cross. Not even stopping after the nightly 8pm curfew. In my imagination I just kept on walking, and strangers spoke of me as “that crazy, middle-aged lady who is walking her way around the world.” Kind of like Forrest Gump (except that I wanted to walk, not run, because I’m not that crazy).
I almost called this blog post “Run, Forrest!”
I ordered carrot seeds from the Diggers Club back during the first lockdown in March and, when they arrived about two months later (since everyone else seemed to have had the same idea at the same time), I popped them into soil in old egg cartons, and hoped they’d germinate.
Those baby carrots had to survive the entire winter outside in the ground, having their feathery tops battered by winds and munched by marauding possums, overcrowding one another because I didn’t bother to separate the seeds the way I was supposed to, and being generally neglected as my every waking hour was consumed by fitting overdue work commitments in around school-at-home for two children, while indulging fantasies of going for a walk and not stopping.
Yesterday I pulled the carrots out of the ground to make room for snapdragons (priorities, my friend!). Most of them were still small, many of them curly or split in two or twined around each other like lovers. But a few were long and straight like this one here. The children said, “Those look like they come from a shop!” in awed tones, as though this was the highest of possible achievements.
If my husband’s hair is symbolic of our oppression, my carrots are symbolic of our resilience. We can grow, even when the conditions are not… quite… ideal. And we might not all be big and strong: some of us feel very small. Some of us feel split, or wonky, or twisted. But we can still grow, and we still have the capacity to nurture and nourish each other.
The news isn’t looking great here, and the optimism we ventured to feel a week or two ago that things might open up quickly is starting to fade before it even had a chance to bloom, but tomorrow I’m going to make a Sunday roast. I’ll sauté the carrots (straight ones, baby ones and curly-wurly ones all) in butter and orange and honey. And when I serve them up I’ll tell my family they are not just carrots. They are a reminder of our capacity to survive, and grow.

Meadow-flowers and sneaky seed-bombs

The week before we left France, I caught up with our friend Rachel, who had been helping the children and I learn French. The children were at Ecole Maternelle that day so it was just me and Rachel. The air was December-cold despite the patchy sun so we sat indoors, at a table by the window, and ordered our coffees.
It was our goodbye: the children’s dad was arriving in a matter of days and then we would all cross the channel for our Christmas holiday in England and Scotland but today, in my final French lesson, Rachel and I wanted to talk about things closer to home. Like the bread vending machine that had been set up in a neighbouring town, because there are laws in France around bread always being available, and the local boulanger had closed down. So the council had a vending machine installed and the bakers from the town next door would stock it every morning with freshly baked baguettes and croissants. Ah, France.
And guerrilla gardening, we talked about guerrilla gardening. Rachel was part of a gardening group in her town that took on the responsibility for beautifying the public areas with green and growing things and, before we said goodbye, she handed me a little packet of seeds. It was a mix of wildflowers that could take root and grow in the tiniest of spaces, the little cracks and grooves between paving, and along the sides of walls. Rachel’s group had been handing these seed packets out for free to residents in their little town, encouraging everyone to scatter them as they walked to encourage diversity and discourage weeds, so now she did the same to me.
I carried the seed-packet home with me and I have been imagining myself as some kind of “meadow-flower Johnny Appleseed” ever since, skipping through Melbourne scattering wildflower-seeds wherever I go, turning my inner-city suburb into a bejewelled field of flowers.
But there are strict biosecurity rules in Australia and so I have never had the courage to open that little packet of seeds. It sits in the 18th Century writing desk I also brought home from France, among other mementoes I hold precious from that time, and has instead inspired home-grown wildflower melanges.
The company behind the seed packet Rachel gave me has been specialising in growing and harvesting meadow flowers for more than 70 years, and they sell mixtures of seeds for every imaginable use. Wildflowers that can be mown over; wildflowers that attract bees; wildflowers that change throughout the seasons. Wildflowers that grow in poor soil; wildflowers for cemeteries; wildflowers for damp and boggy earth. Tall wildflowers, small wildflowers, wildflowers in colours that suggest a medieval carpet (I’m not kidding), and on it goes. Hello, magical occupation envy!
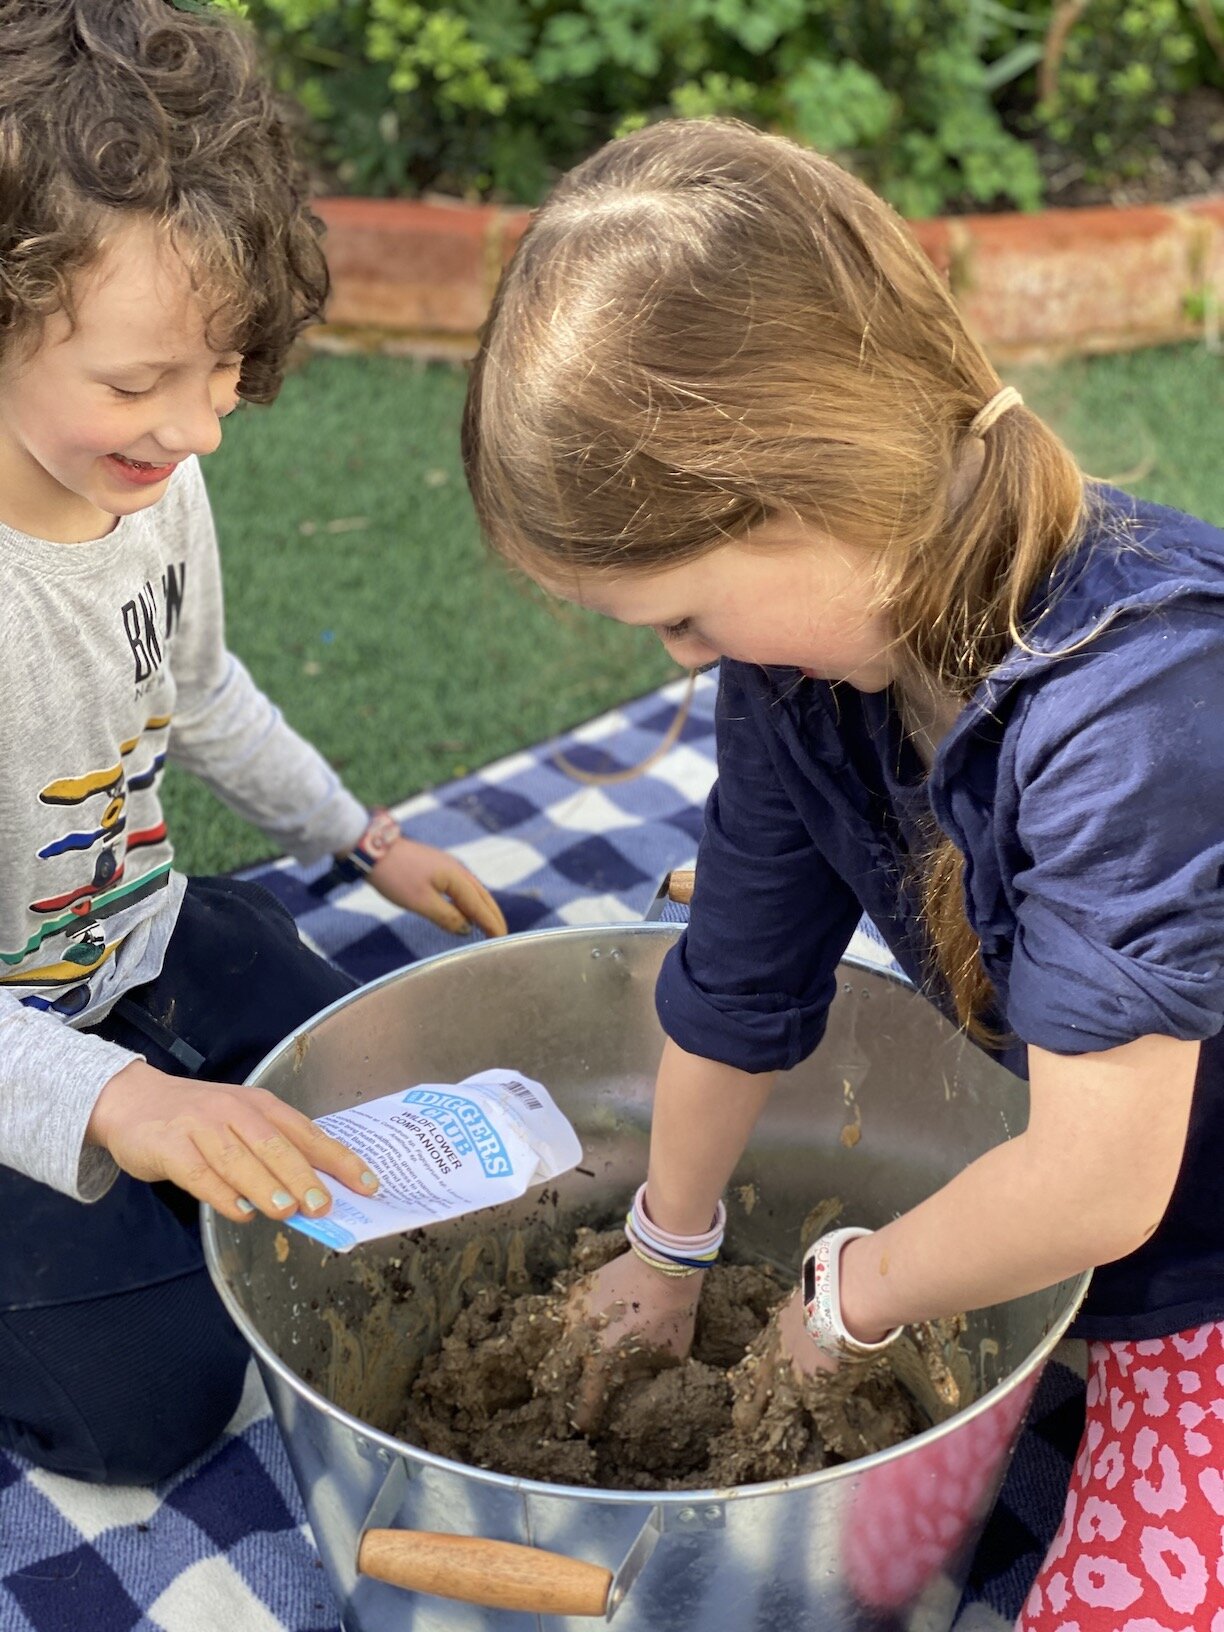
So I have decided to create some wildflower mixes of my own, using seeds safely grown here in Australia. Lacking any handy meadow-space anywhere nearby to create glorious fields of flowers en masse, I’ve gone with “seed bombs” instead, and that’s what I really wanted to share with you in this blog post.


Seed bombs, or seed balls, are simply little balls of clay, compost and seeds, rolled up and left to harden and dry. They are a guerrilla gardener’s best friend because you can just drop these little balls wherever you want your seeds to grow: they’ll sit there innocently until the next proper, soaking rain falls, allowing them to germinate and take root, helped by the tiny starter-soil you’ve given them with the clay and compost.
If you’d like to try making seed bombs, my method is below, along with the “wildflower seed recipe” I created (for medium-height wildflowers that grow well together in spring and summer in a meadow setting, many of them chosen to enrich the soil and encourage pollinators).
If you’ve ever made and shared seed bombs before - or if you give it a try after reading this blog post - I’d love to know how you get on!
Wildflower seed bombs


Wildflower meadow mix
Assorted poppies
Cornflowers
Silene pink
False Queen Anne’s Lace
Chocolate Queen Anne’s Lace
Love-in-a-mist
Flax
Coriander
Alfalfa
Buckwheat
Seed bomb recipe
Equal parts of clay (I used modelling clay from the local art supplies store), and
Compost (I used “zoo poo”)
A handful of vermiculite, a natural mineral that fosters plant growth
Your mix of wildflower seeds (or see mine, left)
Method
In a bucket, soak the clay in some water to soften it and make a mushy, easy-to-manipulate, muddy gloop
Add in the compost and vermiculite and mix them all around with your hands until everything blends together
Sprinkle the seeds over the top, and stir them in with your hands
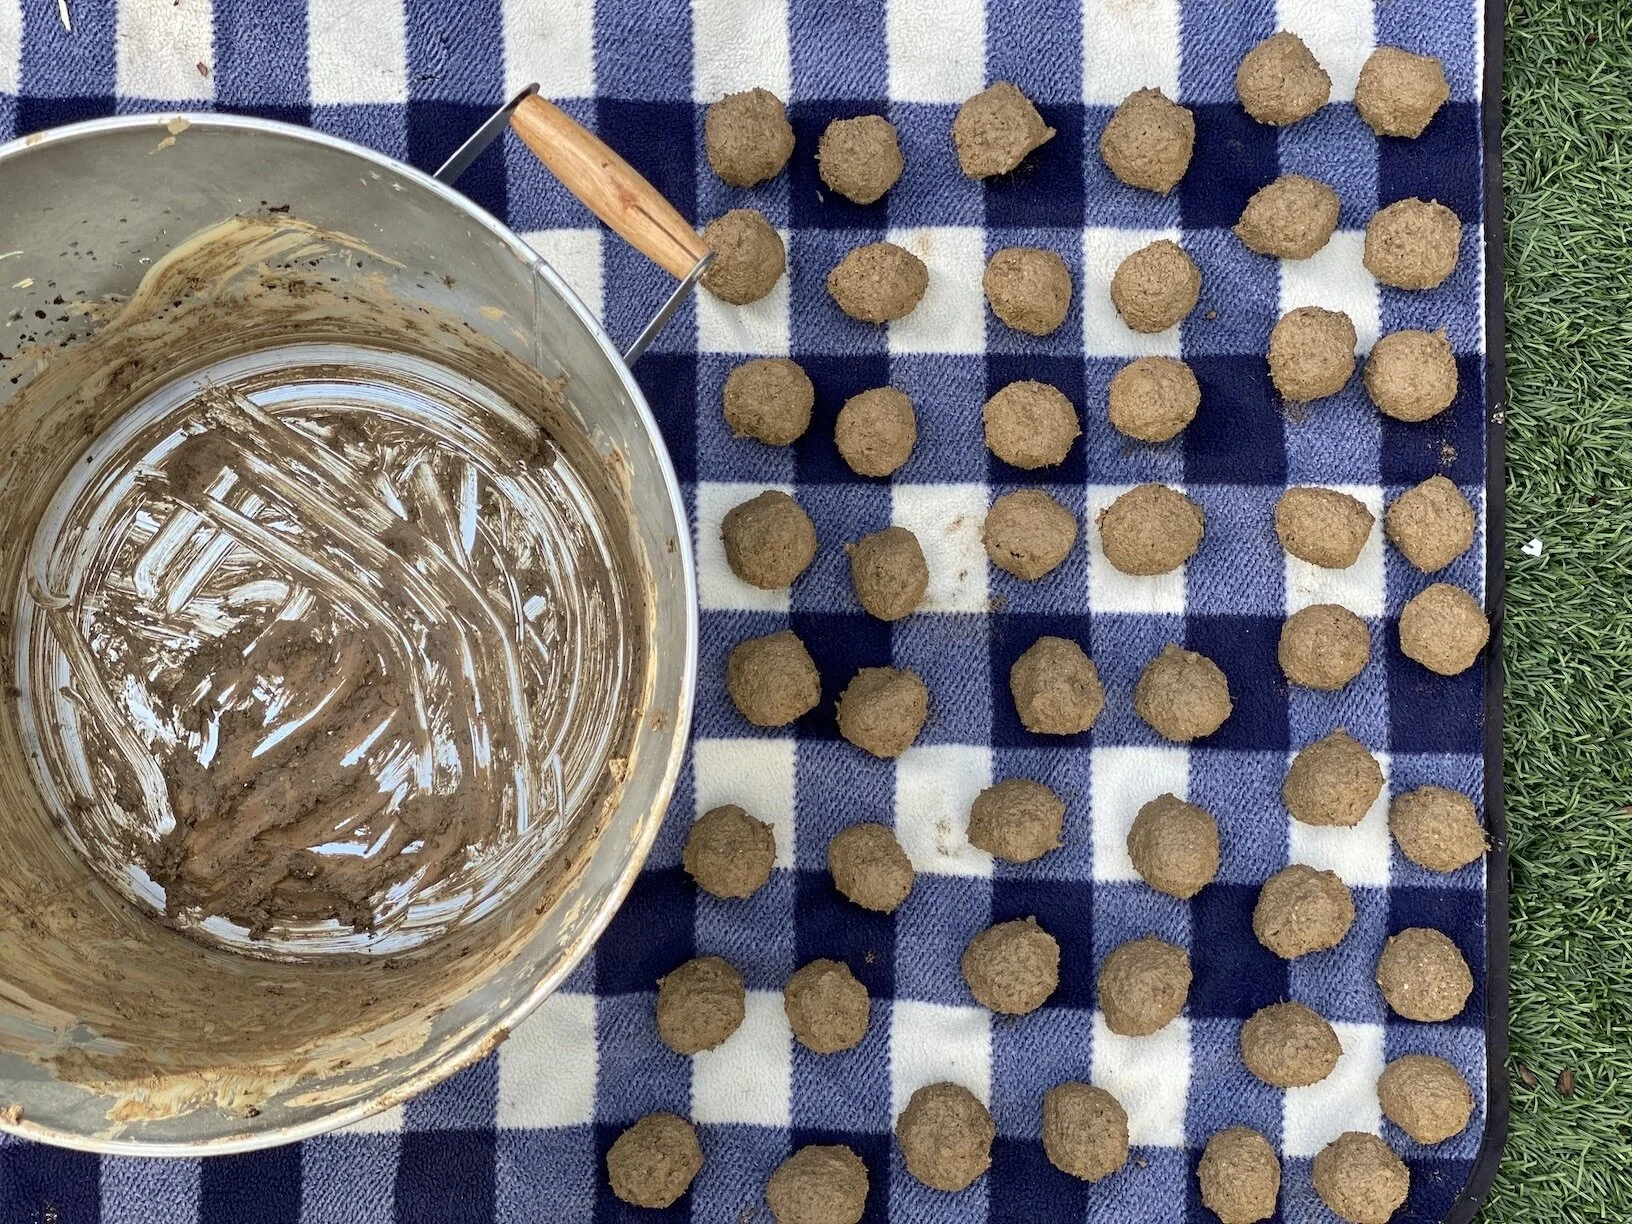
Now roll your clay/compost/seed mix up into little balls about the size of ping-pong balls, and set them aside to dry
When you are ready, start spreading the floral joy!

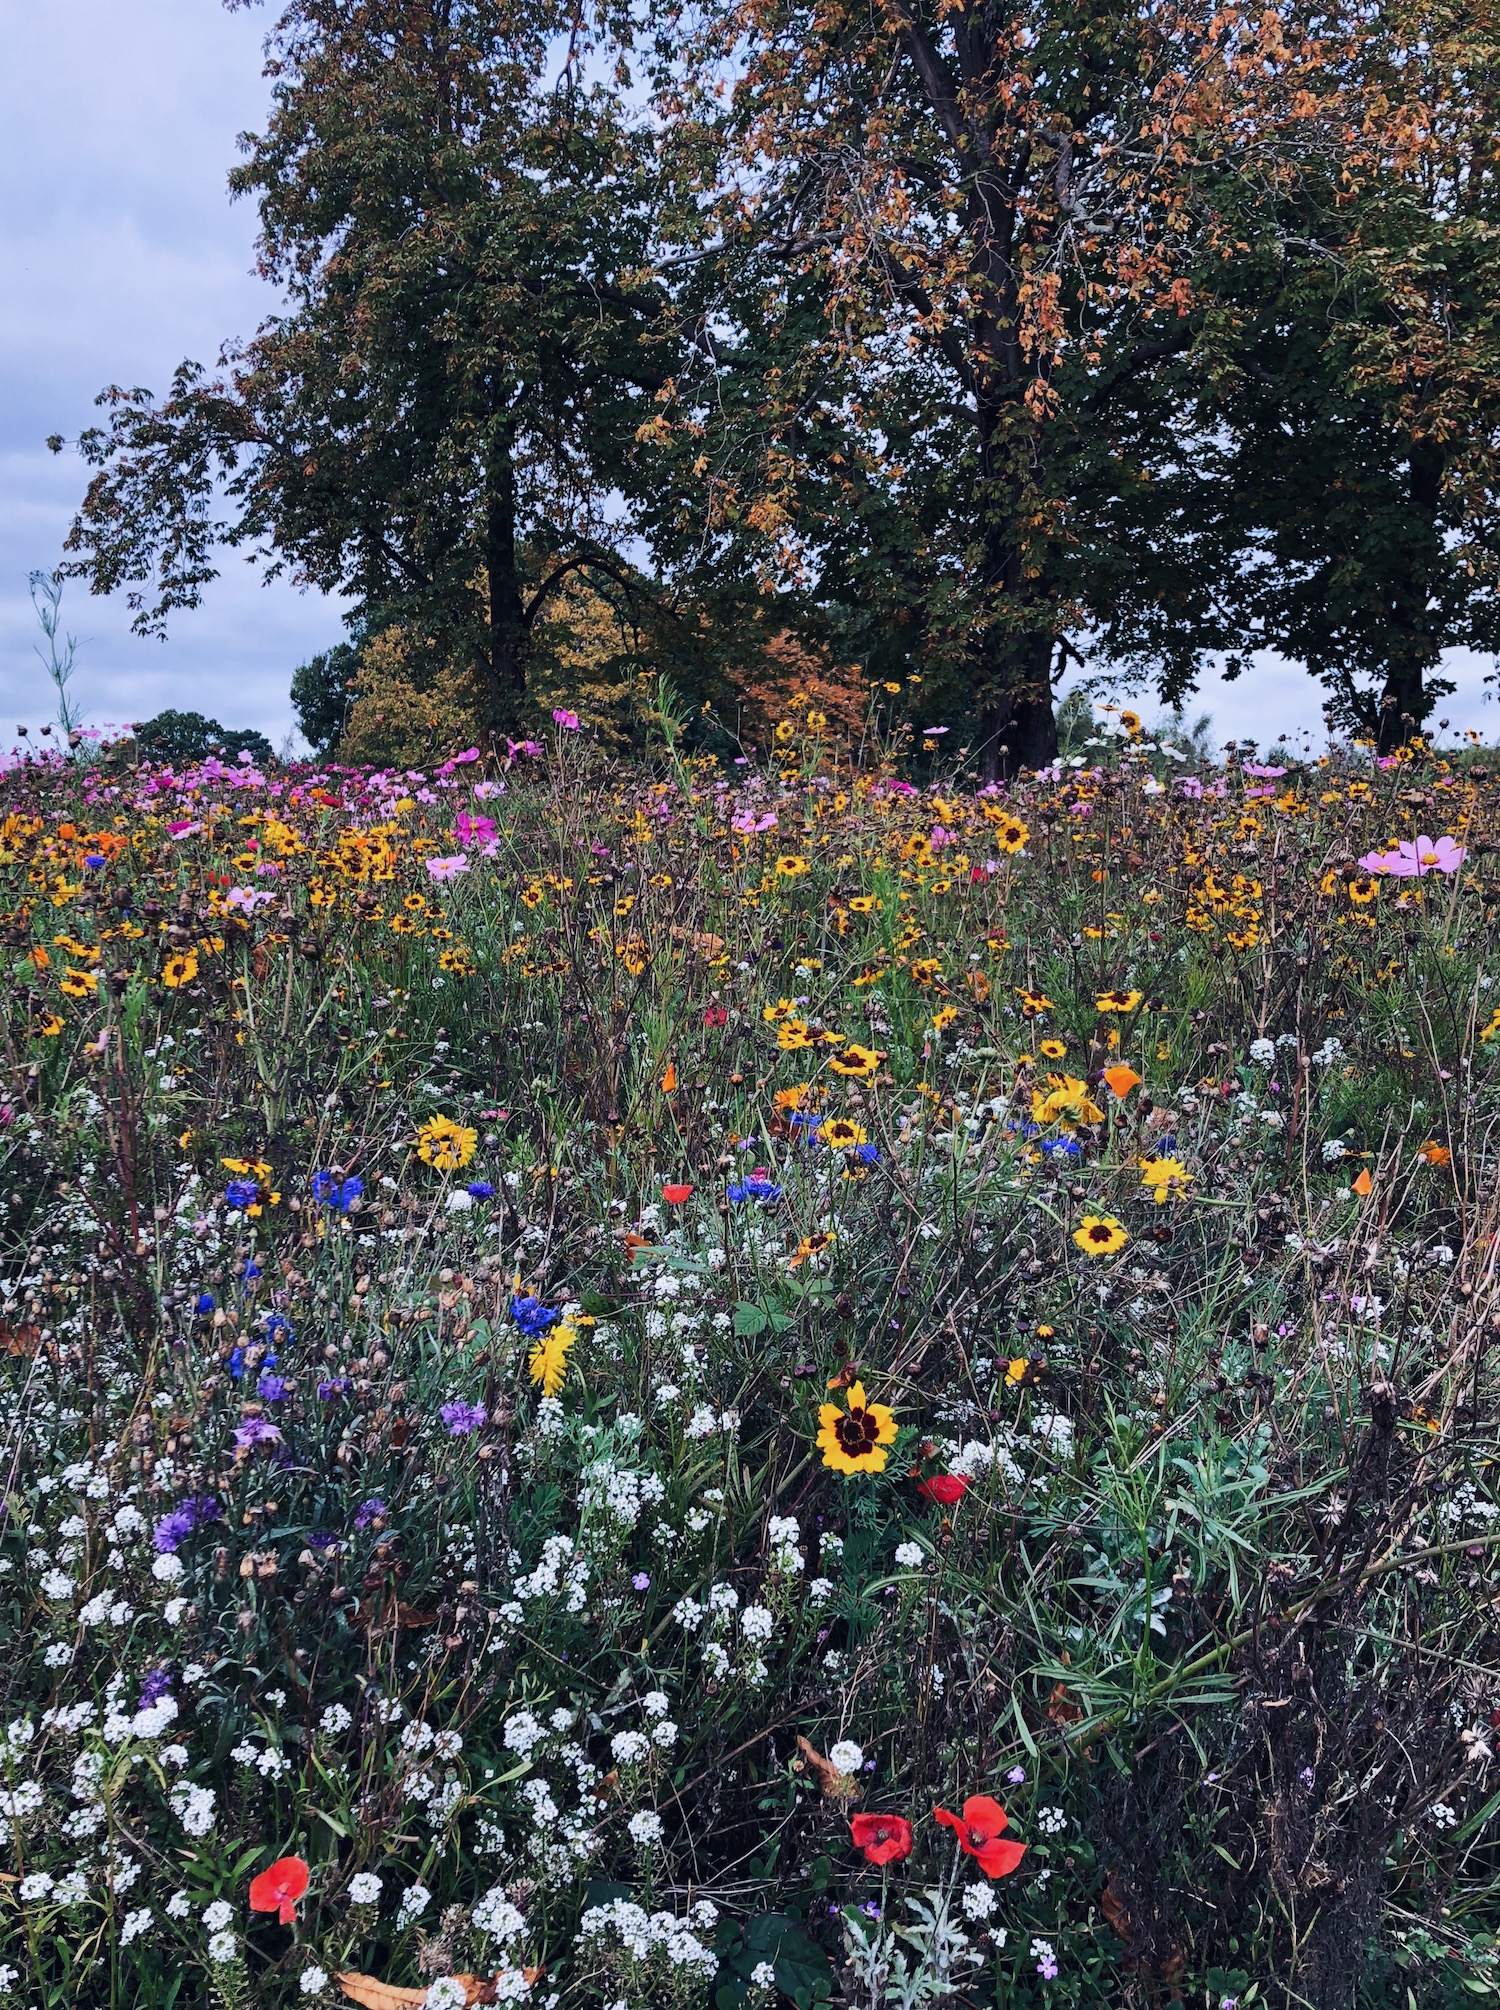
ps. The wildflower meadow pictured here was at Hever Castle in Kent, UK. The children and I spent an afternoon there (can you spot Ralph, then aged four, racing through the flowers in the photograph above?) and it was every bit as heavenly as you’d imagine it to be.

The end of innocence, and other February stories
The first story.
We are all four of us sitting on the floor in the children’s bedroom, reading stories before lights’ out. The book prompts discussion about growing up, and I half-joke to the children, “Never grow up. Always be my babies.” Seven-year-old Scout giggles, and strikes a pose: “I’m already 18 Mummy, I’m about to move out.”
“Oh no!” I mock-wail. “You are breaking my heart!”
Little Ralph, who is six, wriggles onto my lap with a smile. “Don’t worry Mummy, I will never leave you,” he promises, and as I say “Thank goodness!” he throws himself into my arms in a big, hearty bear-hug.
There is a lovely beat of a second or two - Scout and her Dad still laughing, Ralph in my arms - and then I begin to feel him cry. At first I think he is joking but, as the crying melts into sobs and wet tears soak my shoulder, we all realise there is something very wrong.
Ralph can’t find the words for a long time. The sobbing shakes his whole body and I hold him, and kiss him, and smooth his curls back from his wet cheeks.
Later, we realise what it all meant. This was the moment - the exact moment - of his childhood in which he first realised it wouldn’t be the four of us, together forever.
This changes everything. It is the beginning of the end of innocence.
* * * * *
The second story.
I am dead-heading roses before the freshness of the morning gives way to more of this thing we call summer. The little garden is coming back from weeks of severe heat, red rain (rain bringing down red dust from drought-fuelled dust-storms and ongoing bushfires) and heavy winds. The whole garden is somewhat the worse for wear, but beginning to rally.
All four eggs in the blackbird nest have hatched. For weeks, we watch mother and father adjust to new parenthood, racing around the garden seeking food while their babies eat, sleep and cry on steady rotation. The familiarity is not lost on me. We are not so different, the blackbirds and me.
And now as I lop finished blooms from around the deserted nest, I cast an eye over some of the newer roses I planted in spring. They are all-but bare, leaves burned to dust in the intense heat of last week, but Mother Nature never ceases to amaze me. Bending closer, I can see the swellings of green and red buds up and down the branches. Everything begins again.
The air in the garden is thick with happy bees. Forager-bees hurry in and out of flowers that have somehow survived the heat, joyful in the cool of this morning. For breakfast today, nectar of rose, gaura, cosmos, Queen Anne’s lace, clematis, marigold, hydrangea, salvia, valerian, bergamot and stock.
The choir of their hum forms the exact G-chord of the opening bars of John Denver singing Annie’s Song, so uncanny that I glance around, thinking my childhood guitar teacher must be somewhere nearby, about to tell me to practise more.
* * * * *
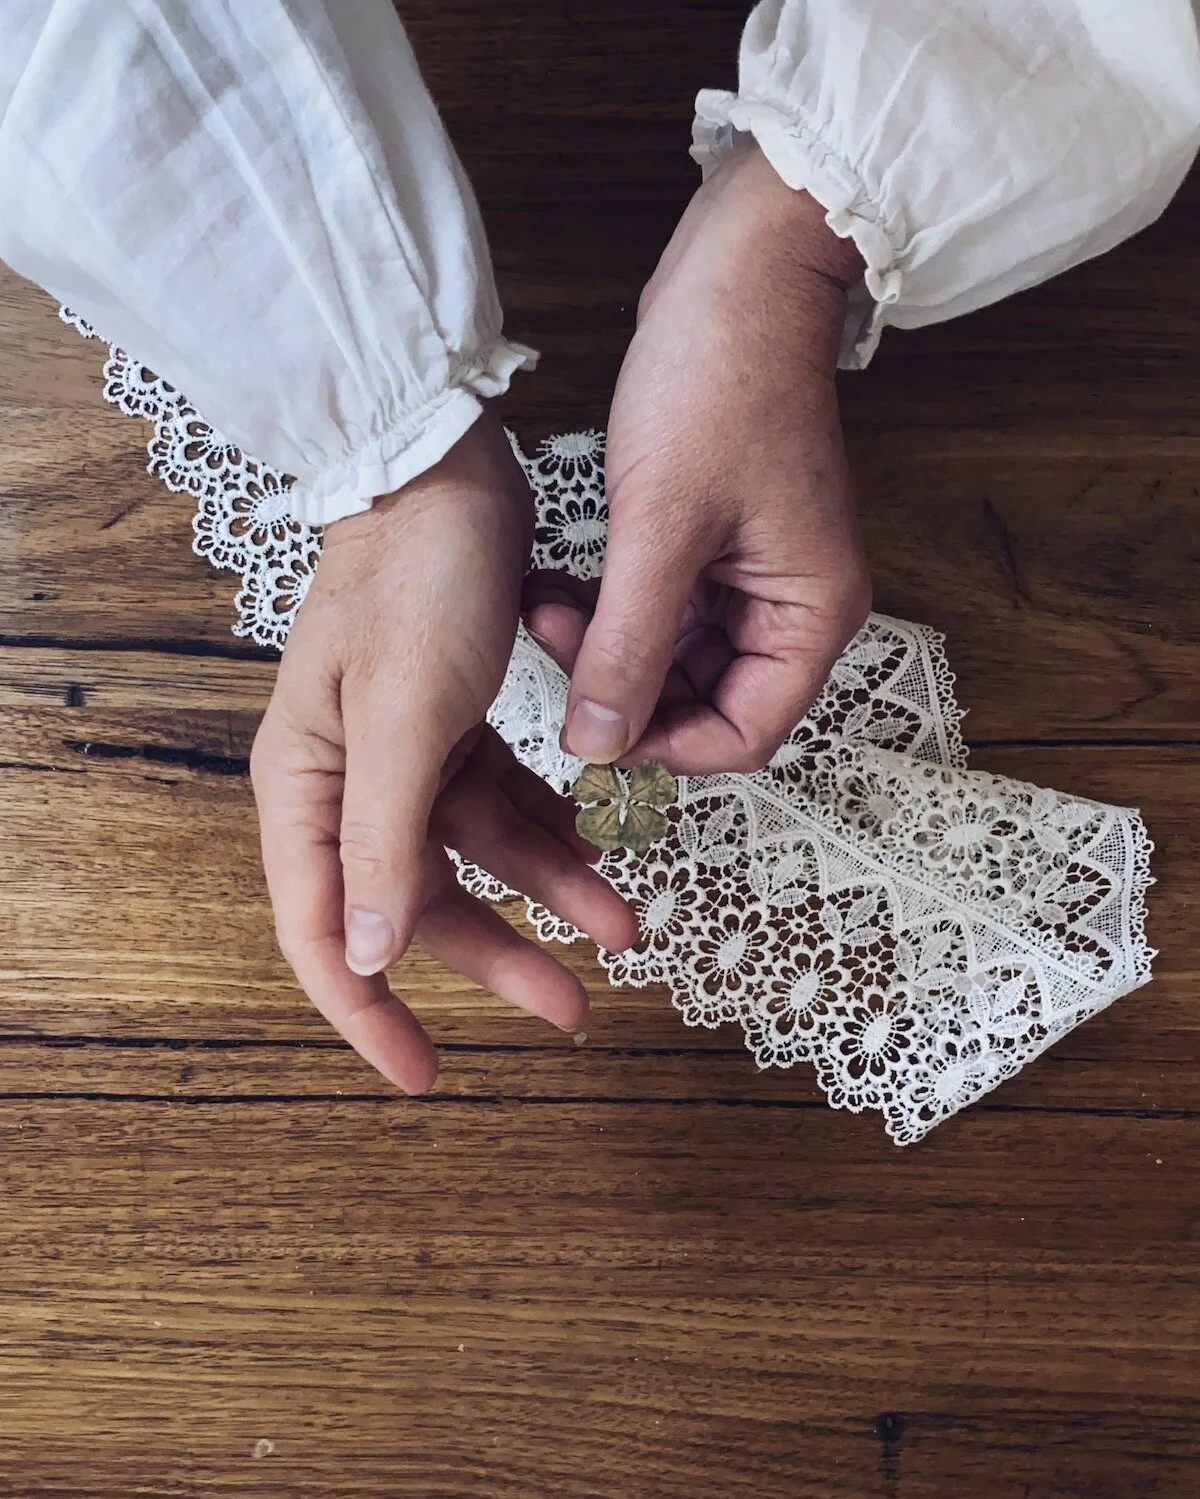
The third story.
The story begins two years in the past. I am on a coaching call, via Skype, with a lovely Romanian woman called Ana Maria. We are discussing her desire to learn to draw, to find more time for creativity, and her thoughts and fears about the possibility of starting a family. Mid sentence she stops, and I hear her exclaim a delighted “Oh!” across all the oceans that divide us. She announces, “I just found a four-leaf clover!”
(I have never found a four-leaf clover. I used to hunt for them all the time, as a teenager, but never had any success.)
Two years later, last week to be precise, I check my post office box and there, amid bills, bank statements and a 'food ideas' magazine I’m pretty sure I never subscribed to, is a fat envelope, slightly battered and bruised from its journey across continents, covered in Romanian stamps. Inside it is a collection of vintage stationery, pressed leaves, book pages, tea-bags, an old English-Romanian dictionary, antique lace, a sweet letter… and a pressed four-leaf clover.
It is the very four-leaf clover that Ana Maria had found during our conversation, two years earlier. I guess it brought her luck, because that family she talked about starting? Her little boy recently turned one.

The winter garden diary

I have been keeping a garden journal: notes and thoughts and ideas jotted down throughout the days as I try to bring my tired and beleaguered courtyard garden back to life after months of neglect and the hottest, driest summer on record.
Would you like to come outside with me? Step into my tiny courtyard and and let’s roll through the seasons from winter to spring…


25 May: Today’s garden tasks feel like a home demolition:
Pull out the valerian plants that have spread and smothered their neighbours. Do the same with the fishbone ferns and chickweed.
Pull down the potato vine that covered and shaded the pergola, a casualty of the hot summer
Pull out the two old lavender bushes that had become bushy and dry (my hands smell like dusty potpourri)
Also to go: one dead blueberry tree; one dead camellia; one dead rosemary bush; two dead clematis vines
Heavily prune one of the fuchsias: all the leaves have burned off but there is still green in the wood, so there’s hope
Cut back the passionfruit vine that tumbles over the fence from the neighbours on one side and is now strangling the Japanese maple, one of the standard roses, and the pomegranate tree. At the same time, cut back the hardenbergia vine on the same side that has joined forces with the passionfruit to choke as much of the garden as it can
On the other fence, cut back the jasmine that has similarly swamped the Japanese maple, standard rose, climbing rose and crepe myrtle
Go through the whole garden, aerating it with a fork
Feed the soil with some compost and turn it all over
Give it a really good soak with the hose. Still waiting for rain
26 May: It’s late in the season - weeks after Mother’s Day - but I decide to put some of the bulbs my children gave me into the ground, just in case. When I dig into the soil there are slaters, and no worms.
28 May: Garlic! I’m chatting with my friend Lee, a garlic farmer who wants to teach women in at-risk communities how to grow and harvest garlic to feed their families and earn some extra income. She tells me now is the time to plant them, and advises me to ask for “seed garlic” rather than culinary garlic at the farmers’ markets. Nobody has any (or none they’re willing to sell), but I find a big basket of garden garlic at CERES and buy several bulbs. I plant the cloves in circles around the roses at the front and back of our house, because I read that garlic growing near roses deters aphids.


8 June: I don’t understand why the two fuchsias, positioned only two metres from one another and receiving equal food, water, shade and sun, grow so differently. One is verdant and glorious, dark green leaves framing stunning coral flowers with such enthusiasm it is positively tropical. On the other, the leaves have wilted and burned. When I cup the leaves in my hands they fall from the plant and crumble to the ground. There is no sign of disease on the plant or in the soil around it… I don’t understand.
9 June: The garlic bulbs I planted last month are shooting skyward, already 10 centimetres above the ground in little circles around all my roses.
15 June: Pruning fruit trees means seeing several moves ahead, and I have never been good at chess. I need to find someone in-the-know, and actually watch them as they decide what to cut and what to keep. Also, when will my pomegranate fruit? It’s been five years.
16 June: One of the hardenbergia vines has died. In fact looking around the garden, none of them are looking good. A lot of the leaves have dropped and those that are left look sick. Should I try to revive them? The hated bamboo fence is also looking a lot worse for wear. Hardenbergia has wound around it, thickened, and pulled the fence from its framework. It is buckled in several places. I’m tossing up between rehabilitation and removal.
22 June: I cut down the hardenbergia that died. I have to extract the broken pieces from the fence piece by piece, since it is too tightly and thickly wound to unravel. I manage to cut it back to a stump but can’t for the life of me get the roots up or the stump out. It doesn’t even budge.
6 July: The garden is properly asleep. I’ve pruned and prodded, aerated and hosed, fed (gently, because it’s winter) and fussed. And now there are bare walls, stumps and brown earth where once was green joy. I put some rows of flower seedlings into the sun-drenched beds at the bottom of the garden, to get a head start for spring, but almost everywhere else the focus is rest. I’ve always heard that sleep, fresh air and good nutrition are the best ingredients for recovering from illnesses, and I hope the same will be true for my little garden.


7 July: I make a call and pull out all the other hardenbergia vines - sick-looking and neighbour-strangling every one of them. Actually I don’t pull them out because I can’t. I cut them down to the stumps. Without the hardenbergia I can see just how damaged the bamboo fence really is. It buckles in some places and swings freely in others, falling over my fragile flower seedlings, breaking them off at the top. I pull on gloves and heavy boots and just tear the entire fence down.
13 July. Still no worms. I feed the soil, mulch it, and bid it goodnight. The pile of dead vines and tree-branches takes up the entire grassed area of the garden. It’s about the size of a small SUV, or a Solstice bonfire. I call the Council and book eight separate “green waste” pick-ups, since they’ll only take what I can fit in our one green wheelie bin.
4 August: I think I have solved the mystery of the fuchsia. It was the hardenbergia! I was separating out some of the stock and sea holly seedlings that were growing too close to one another after I planted them last month, when I came across a root, running horizontally about 10 centimetres underground, that didn’t belong to anything. it was thick - about as thick as a man’s thumb - and as I started to pull it up it just seemed to never end. I followed it inch by inch, carefully extracting it from under the flower seedlings, to try and find the source. Finally I followed it all the way to the stump of the hardenbergia in the bottom corner of our garden, next to the pomegranate tree and beside the gate. I dug down at the base, deep, deep, and found another root. This one was almost as thick as my wrist! I followed it backwards and it spread in another direction and I pulled it, piece by piece, out of the garden bed. I repeated this again and again until, finally, the whole hardenbergia stump lifted out of the ground. It looked like a squid! A rock-solid stump with powerful roots radiating out of it more than a metre in every direction like giant tentacles.
As I was pulling out a hardenbergia close to the house, I had to completely uproot two of the winter roses and disturb a flowering daphne, but I still hadn’t reached the end yet. I pulled harder, and that’s when I noticed my fuchsia - the fuchsia that had almost died in autumn - wobbling. The hardenbergia root was directly under the fuchsia, stealing all its food.
3 September: Robert, who painted our whole house for us a few years ago, comes back and paints the brick wall that had been behind the bamboo fence. A soft white. It’s blinding in the sunlight, but hopefully over time vines (not hardenbergia!) will grow up and cover it.
7 September: The calendar says Spring although the weather begs to differ. Our school hosts a Father’s Day breakfast in the courtyard, and it is only 3 degrees. I start thinking about a future fundraiser to purchase braziers! Still, I’m sure the weather will warm up soon, and it is finally time to start planting.
White and pale pink clematis, alternating with white, pink or red roses, all the way along both fences
Three apple trees (dwarf so they won’t overwhelm the little garden), in pollination-friendly varieties
Two fruiting grape vines (bare rooted and dormant) to cover the pergola
A new hydrangea to replace the one that died last season
Seeds sown into old egg cartons and sat under the sun on the dining-room table: bee-friendly flowers like nigella, sunflowers, dill, lupins and more. I’m still looking for comfrey
I plant strawberries under the apple trees
22 September: Signs of life! Every morning I saunter into the dew-wet garden with my tea in hand, watching my breath form clouds in the air, looking for signs of life. Today I found some! Green buds on one of the apple trees, and red buds on the Japanese maple. The very first bluebell is a shocking blue, and there are buds on the sweet pea. The flowers I planted are doing so well now that I have to separate them again, although there are no blooms yet. I put my mother’s elderberry plant into the ground and promise myself I’ll keep it trimmed to a shrub. Nothing on the grapevines yet, but there’s some kind of swelling. Something is happening.
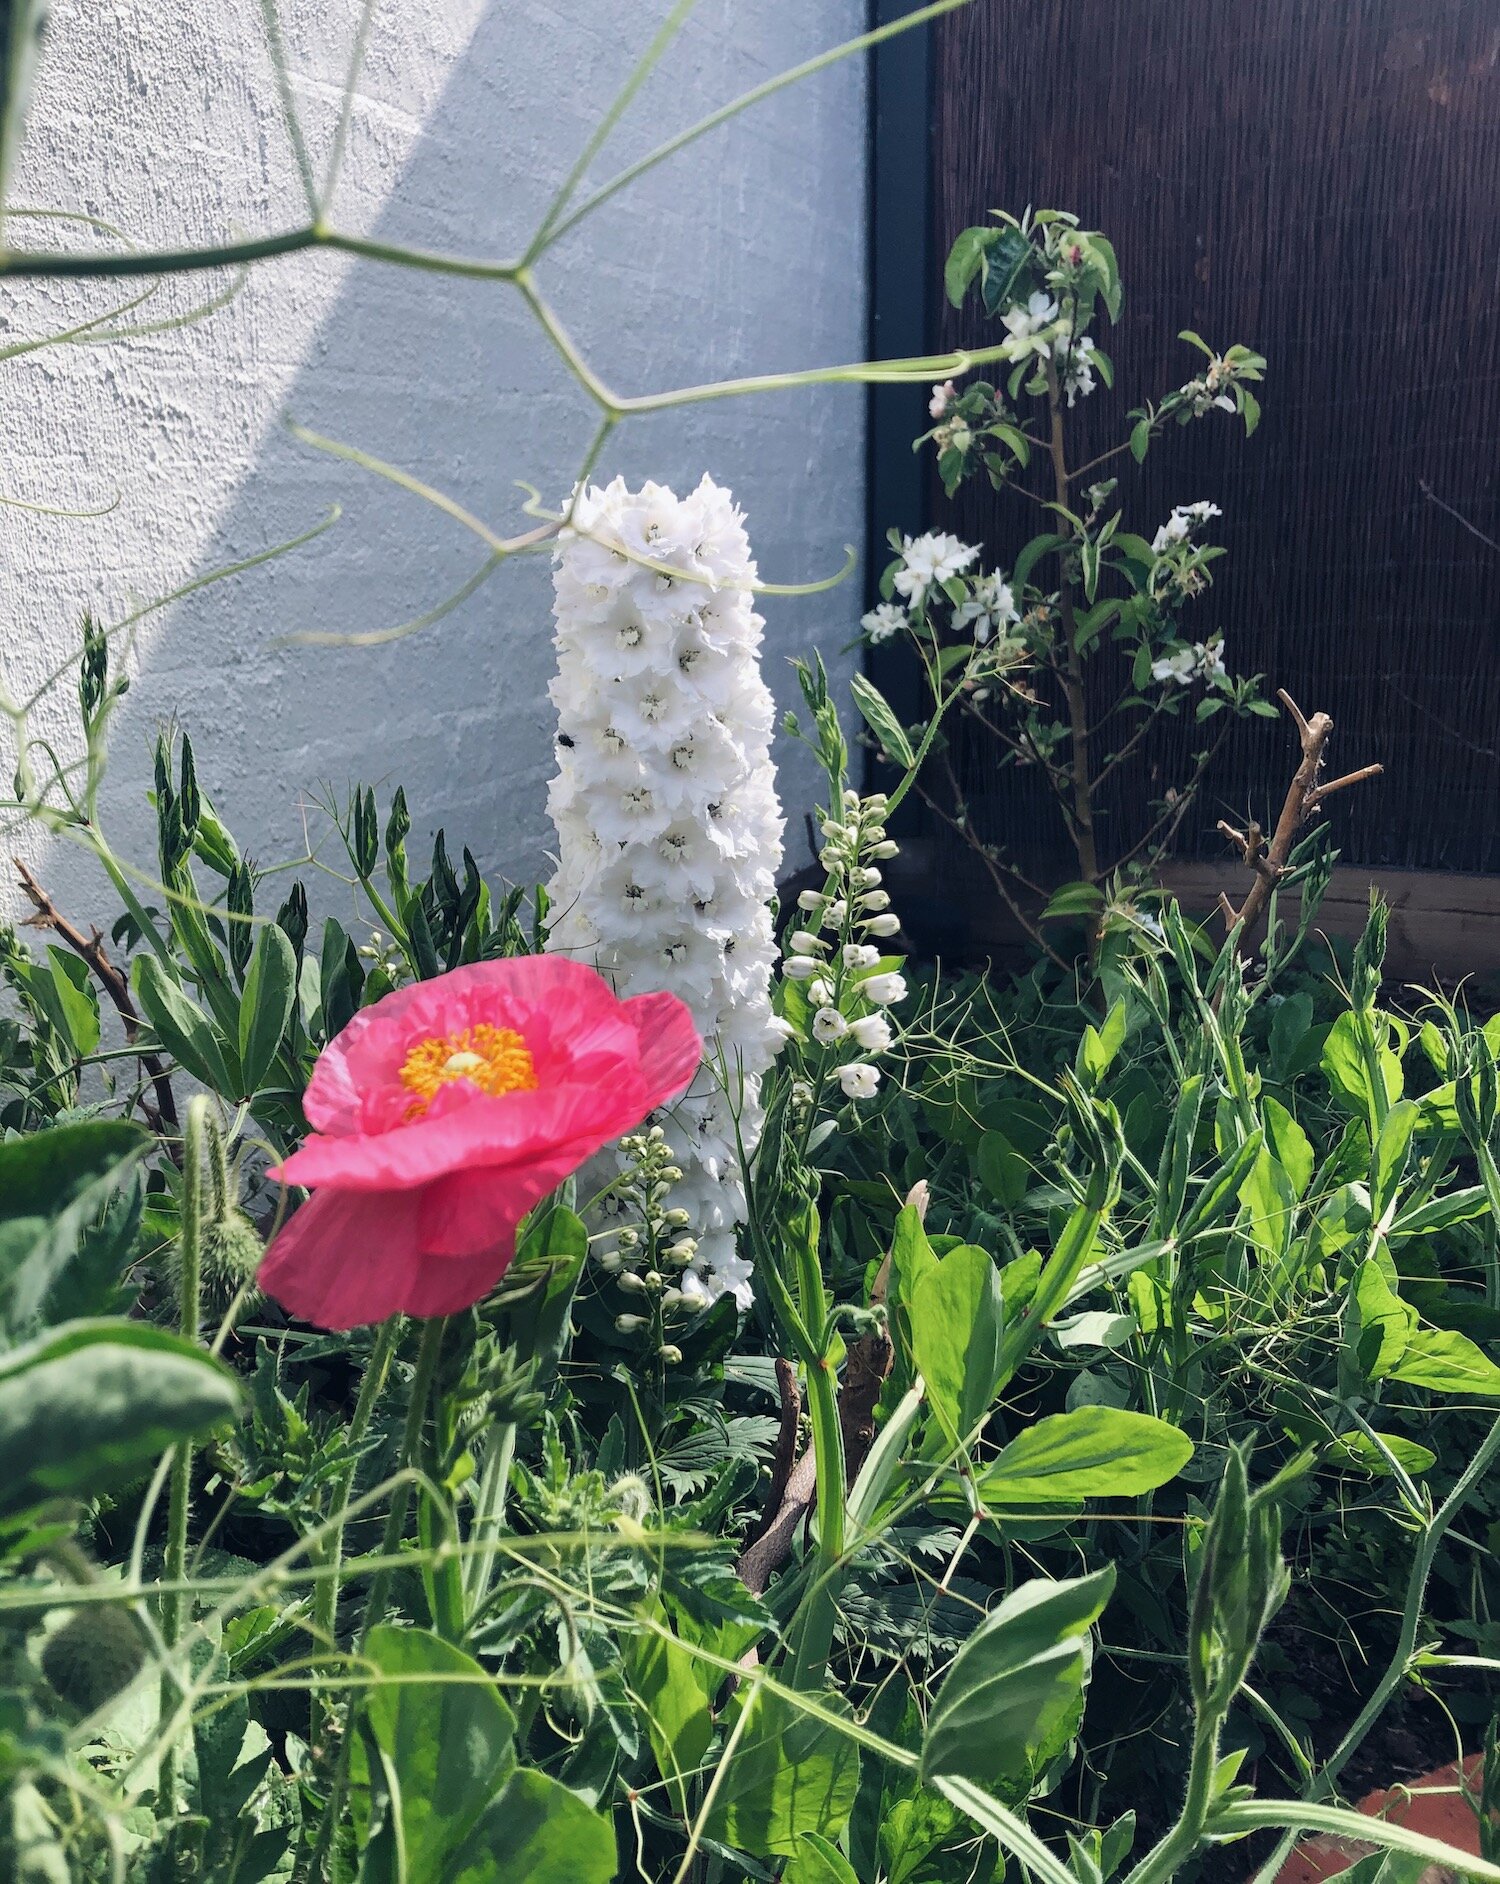
9 October: Here is a list of blooms that are making my little garden a fragrant rainbow of joy:
Foxgloves
Delphiniums
Sweetpeas
Poppies
Fuchsia (both of them!)
Wild strawberries
Lillies of the valley
Clematis
Valerian
Hellebores
Columbines
Alyssum
Apple blossoms
And one red rose
And last weekend when I was digging, I found something even better. Worms!


Harvest and home

Autumn swept into Melbourne last week with one last, brutal heatwave, scorching gardens and people alike, and reminding us that our place on this brown and sunburned land is insubstantial. In my family, the threads that tie us to this landscape are gossamer, only two generations young, and our biology has not caught up with our climate. Every time the mercury rises we are driven inside, hiding from the weather in the relative cool of double-brick walls and high ceilings and air conditioning.
Autumn is harvest time, usually a season of delicious bounty, but heatwaves here and drought there and floods over there have left many of my country’s crops rotting, or burned away, or not even planted. Often we are insulated from these events in the city, the travails of the farmers and producers only an hour or two away from us go unnoticed amid bulk discount produce in the supermarket, shipped in on ice from many thousands of kilometres away. But when a head of broccoli soars to $10.75 a kilo, surely more people will start to take notice.
We do our best to buy locally, supporting our farmers or the high-street shops that in turn support the farmers, and we follow the seasons as best we can, buying our food when it is at its best and was picked just the other day and just around the corner (rather than last month and in another time zone).
But if you can’t grow the crops yourself, it’s not always easy to know what is at its best, when.
This was easier in France. Shopping at the farmers’ markets in Dinan every week, I tried to let the produce inspire my cooking, rather than carrying a shopping list with me (I wrote about that in my newsletter last month, and you can read it here if you’d like to).
I quickly learned from this experience how ill-equipped I was as a cook to plan our meals in this way, and scouted around for some kind of guide to help me. And, this being France, naturally I found one. It was a little book called “Agenda Gourmand: use année de recites avec des produits de saison” (which is fairly self-explanatory even if you don’t speak French, but roughly means “Food planner: yearly recipes with seasonal produce”). There was a week to each opening, celebrating the produce that was likely to be at its best on that particular week, and sharing recipes and other tips for using and cooking with them.
Back in Melbourne now, I have decided to create - and paint - an agenda gourmand of my own, noting down the best times to plant, harvest, buy and forage for food where I live, and collecting my favourite recipes, remedies and stories for making use of them. I hope it will become my go-to food guide for seasonal eating, and maybe something I can pass down to my children as well.
I also hope it will become a celebration of the beauty and abundance of nature, both in paint and in words. Another way for me to make peace with my country, even when the heatwaves are relentless and fierce.
So I have started painting, and I have started reminiscing…

Pears…
They were never my favourite. Too sweet, too juicy, and with that funny, fuzzy texture on the tongue… not for me. (Although hard to surpass in a rocket salad with parmesan cheese and rocket, it’s true, to complement the pork ragu I like to make in autumn).
And then there was that tarte au poire I ate atop the Eiffel Tower in the autumn of 2011, on the holiday from which, unknowing at the time, I would bring my daughter home inside me.
September was cooling down. It had been raining, and parts of the metal steps were slippery as I climbed, alongside two friends I’d known and loved since childhood. I’d been to Paris before but this was my first time climbing the tower, and no amount of cliché, nor the blisters from the new red ballet-flats I’d mistakenly thought would be romantic on a visit to Paris, could make the moment less magical.
At the top we bought hot chocolates, and my friend Lindy chose a pear tart for us to share. It was one of those moments. Paris in the rain. The Eiffel Tower. Beloved friends… and that tart. Sweet, vanilla pastry, a hint of almonds, and juicy pears (fresh, with the skin still on them) arranged in a beautiful flower and glowing under a delicate glaze.
That was the day I made friends with pears.

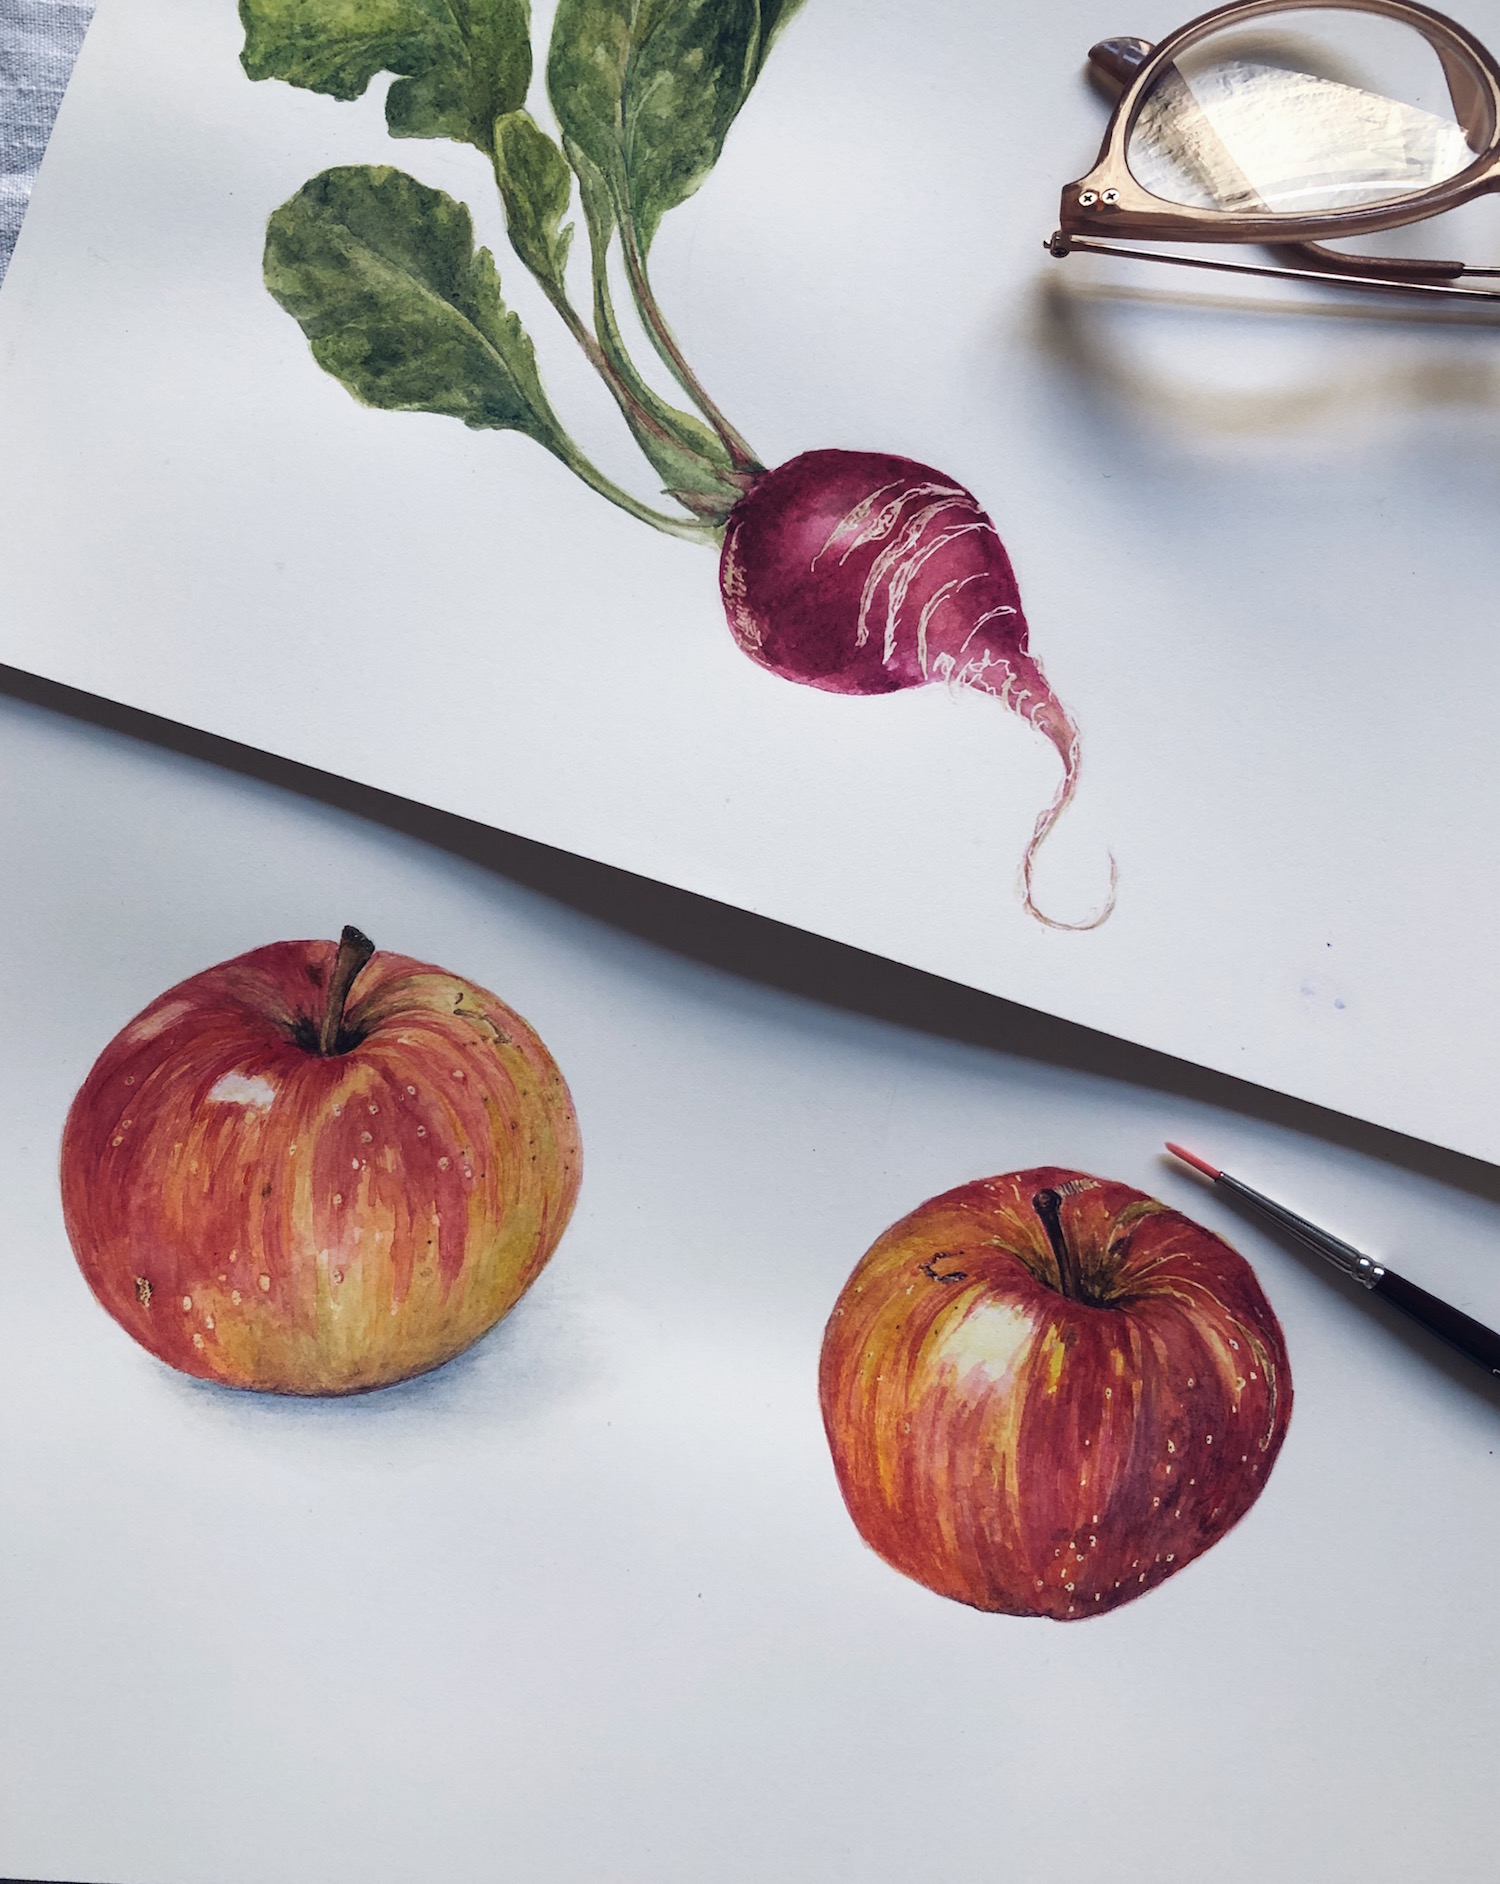
Radishes…
Sharp and clean, with a pepper-like crunch that warms a winter salad and makes orange sing. Slice them thinly, then hold the slices up to a window to see them glow like tiny moons.
Radishes are the first vegetable I remember growing. My mother found us a little patch of dirt around the side of our suburban house in Berowra Heights, and told us we could grow our very own vegetables. She told me she chose radishes because they were so easy to grow, even in cooler weather, and they were relatively quick: you have to harvest radishes early or they become hot and spongy.
I remember the touch of the warm soil as I drew a line in my little vegetable patch with my finger, carving a trench just deep enough to carefully place the seeds along the line I’d made, each of them two hands apart, before covering and gently patting the soil smooth again. The staggering weight of the watering can as I tilted it over my future harvest, barely able to hold it up. And the excitement when the first, green shoots poked up through that carefully tended soil… And then the waiting - oh! the waiting! - with the sublime impatience of childhood, for the harvest day to come.
Something else I remember: the extraordinary underwhelm of my first bite. Pepper! I suspect I wailed, “Too hot!” The flavour that now brings me so much delight (is there anything better, paired with pomegranate seeds, watercress, honey and fresh mint?) was a resounding failure in my childhood vegetable patch. I don’t remember what came next. Carrots, maybe?
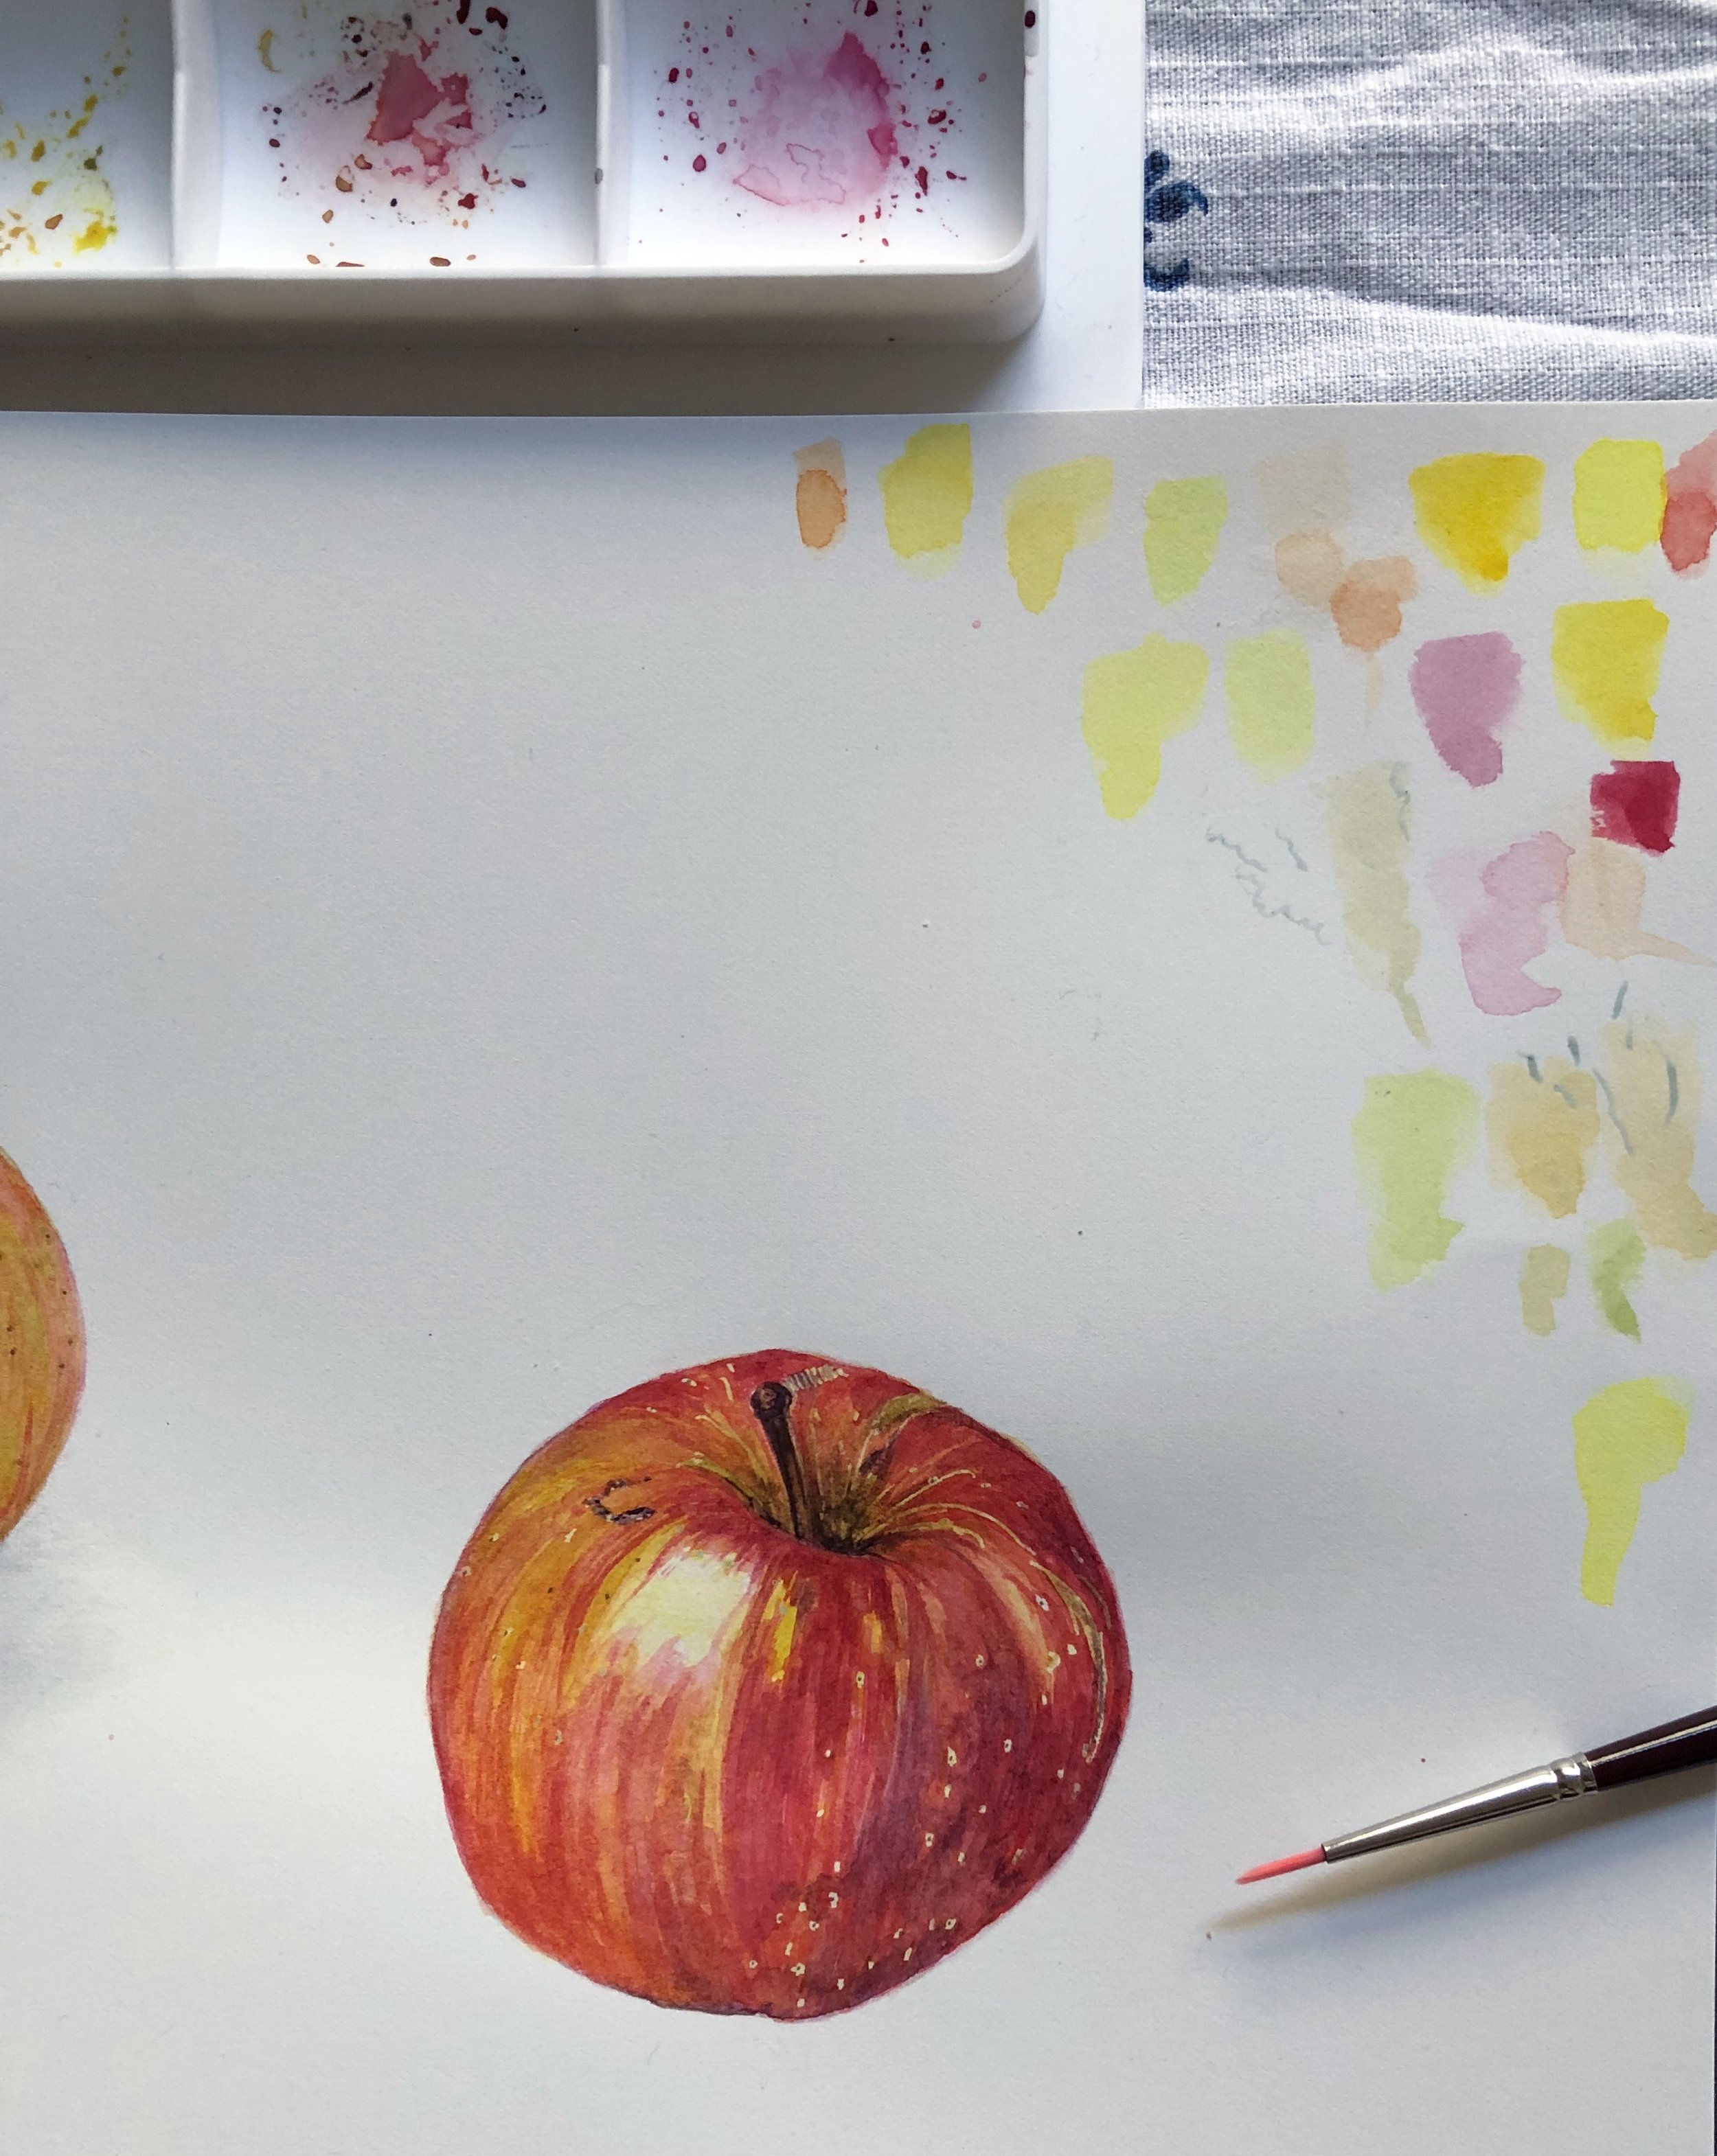
Apples…
The apple tree at the front of our house is fruiting this year. It’s just a crabapple tree, nothing we can pick and munch for morning tea like the gala apple I’ve painted here (I had to label it in the ‘fridge: “Mummy’s art, don’t eat.”) I chose the crabapple for our tiny front yard because the blossom trees on the next street over were so spectacular that in spring they would take your breath away. I think you could see those rows of blossoms from space, and that’s something special in the inner city. I love these trees so much I contacted the chief arborist at our local council to find out exactly what variety they were, so I could have my very own piece of blossom heaven.
I missed the blooms on our tree last year, because we were in France, but my husband tells me they were every bit as glorious as I’d hoped. And now our little tree is fruiting. Every morning as the children and I set off on our walk to school, we say hello to our tree and inspect the baby fruit, which seems simultaneously so improbable and yet so lovely in our tiny city yard.
In Dinan, there was a public apple orchard. Mostly cider apples, growing wild and unharvested on the side of the hill beneath the castle walls. There was a path winding through the apple-trees down to the river (they called the path a ‘Chemin des Pommiers’ - an apple walk), so covered in fallen apples in October that a gentle stroll became a slippery and treacherous clamber. But the air inside the orchard was perfumed with apple-flavoured honey.
Also this podcast about apple trees, with Lindsay Cameron Wilson, makes me so happy.
What are your stories?

Lessons from the summer garden

I have been waiting for the weather to cool.
The summer’s evening we returned home from France, I stood in my little garden in the shocking humidity, and took these pictures. It was a jungle. Abundant and overgrown, some plants thriving and other plants choking, and I made plans to gently nurture it back to life. My very own Secret Garden.
I made a start, cutting back the valerian and unwinding the clematis so the other plants could breathe. There was no saving the blueberry bush, one of the hydrangeas or two of the camellias. Two out of three of the Japanese maples were looking decidedly sad.
But I still held out hope for the roses, the pomegranate, and my favourite oak-leaf hydrangea, and the honeysuckle was so healthy it had all-but swallowed the children’s cubby house whole.


But instead of making it better, I only made things worse. Clearing away the overgrown vines left my space-starved plants vulnerable when the heat came - and come it did, less than a week later, in waves of day after day with temperatures in the late 30s and early 40s, Celsius.
No amount of water can keep alive a plant that is being literally burned from the sky. One of my happily-blooming fuchsias was the first to go. At the end of one particularly long, hot day (long after dark it was still 36 degrees), every leaf had turned brown. When I cupped the leaves in my hand, they fell from the stems and crumbled to dust.
The little Jack Frost plants soon followed suit, and most of the Japanese windflowers. Soon my gardenias were looking sad, the oak-leaf hydrangea crisped at all the edges, and the leaves began dropping off the Japanese maple.
None of the border plants survived, and brown began to swallow green.
The poets of ancient Jerusalem wrote, “To everything there is a season.” (Or were they quoting Pete Seeger?) And nowhere is that more evident than in an actual garden, where the seasons govern, and human intervention can only go so far in changing or mitigating what nature intends.
One of the things I noticed about the public flower gardens in France was that in spring and summer, they were more beautiful than anything you could imagine: full of shocking, extravagant colour like a fragrant, bee-filled rainbow explosion. But when autumn came and the seed-heads drooped, gardeners cut everything back, aerated the ground, and let it rest for the cooler months. It wasn’t pretty: brown patches of earth with the odd leftover strand of sad annual eking out the last of its days.
We don’t tend to do that in Australia. We plant and tend for year-round cover, and seek colour in every season. I know I’ve tried this in my own little garden, filling those brown patches as best I can in winter so we only look out on green.
But respecting the season means working with nature, rather than fighting it.
Those plants in my garden shouldn’t have been left to smother one another but, once it was done, I should have known better than to strip things bare right when the worst of the heat was about to begin. And I had known it would begin: January and February where I live are the hottest months of the year.
But I was impatient, eager to reconnect with my home by putting my hands in the earth, and I wouldn’t wait. In many parts of Europe, brown and grey are the colours of winter. I made them the colour of Melbourne in summer, too.
Gardens teach us patience, if we will let them. To everything there is a season. There is a season for brown, and a season for colour. A season for hot, and a season for cold.
A season for abundance, and a season for rest.
My friend Brenner and I send one another voice-messages most days, little audio missives that carry with them the ambience of our respective worlds. In mine, while soaring temperatures burn everything around me and sting my eyelashes, there is a heartbreaking crunch of dry things underfoot as I walk and talk. In Brenner’s messages, sent to me from her home in tropical far-north Queensland, I hear frogs and cicadas, and the soft and ever-present sound of rain. Up there, these seasons aren’t spring-summer-autumn-winter. They are known as the wet season, and the dry.
Nature comes back.
Even my burnt plants will re-shoot leaves. And if they don’t, others will clamber over and take their place.
So I will wait. When the weather cools, I will replant but, when winter comes, I will allow my garden to rest. To lie fallow, the way nature intended. It’s ok, I will remind it, to be brown.
Come spring, I hope I can bring you a rainbow.


Botanical project: leaf skeletons (non toxic)

Whenever I discover a leaf skeleton in the garden it feels like a little piece of magic. Rare good luck, like finding a four leaf clover or seeing a double rainbow. The circumstances for nature to create a leaf skeleton have to be just right: damp enough for the fleshy parts of the leaf to decompose, sheltered enough (probably under other leaves) to encourage microscopic organisms to eat away at those leaves, and somehow exposed at just the right time for me to find the leaf while all those lovely veins are still in place, before it breaks or blows away.
I love to send leaf skeletons as gifts in my mail. They are something special, precious, a memento from my garden or a walk I've taken that is tinted with enchantment. But because they are so hard to find, I wanted to learn how to help nature along, and make my own leaf skeletons. Turns out there are several ways to do it, following processes that range from a couple of hours to a couple of weeks, and using everything from water and pantry ingredients to caustic substances requiring rubber gloves and goggles, and straight-up bleach.
I have tried three of the non-toxic methods, and am here to share them with you today.
Step 1: Pick & prepare the leaves
No matter what method you use, some steps to making leaf skeletons are always the same:
Choose your leaves: for best results, choose leaves that have a strong vein system. Tougher, more waxy leaves have better results than softer, younger leaves
Clean the leaves: gently rinse them in a bowl of water, and wipe any dirt or mud away with a soft cloth. If the dirt is stubborn, use an old toothbrush to (gently) scrape it away
Step 2: Choose your method
How you choose to make your leaf skeletons will depend on the time you have available, the materials you have in the cupboard, and how willing you are to work with potentially caustic substances. Here are the pros and cons of the three methods I'm sharing today. If you click on any of the methods below, you'll jump straight to the relevant instructions.
Pros:
* Completely safe
* Nature's method
* Gentle on leaves
Cons:
* Takes several weeks
* Gets gross and smelly
Pros:
* Completely safe
* Easy to find ingredients
* Relatively fast results
Cons:
* Can be rough on leaves
Pros:
* Supposedly faster
* The Internet loves this method (lots of tutorials)
Cons:
* Dangerously caustic
* Hard to find ingredients
* Can be rough on leaves
Step 3: Make your leaf skeletons
a) Water method
Take a shallow dish (like a baking dish) and fill it with water. The dish should be ceramic or glass, not metal (I don't know why. Maybe it's to avoid rust, or has something to do with the minerals or chemicals in metal?). Place the leaves in the dish (it's ok if they're on top of each other) and weigh them down with something heavy to ensure they stay covered with water.
Leave the water to sit for between three and four weeks. It will get murky, and start to smell really bad (like a vase when you've left cut flowers in it for too long).
Take one leaf out of the murky water, place it on a flat surface, and gently try to brush away the gunk and membrane from the leaf. Use an old toothbrush (softly), or a paint brush if you're worried the toothbrush will break the leaf. If it's too tough, put the leaf back into the water and give it a few more days to soak.
Rinse the leaf in clean water. If necessary, continue brushing away any remaining pieces of the pulp while it's in the water. Once you're done, lay it on a paper towel to dry.
b) Bicarb soda & baking powder method
Dissolve equal parts bicarbonate soda and baking powder in a saucepan of water. I used one tablespoon of each, and approximately a litre of water.
Place your leaves into the pot, and bring it to the boil. Reduce to a simmer, stirring it gently from time to time. The water will froth up, and will get brown and murky.
Watch the leaves until they have softened, and you think they are ready to clean away. This could take several hours (I was using hardenbergia leaves and it took about an hour and a half). If necessary, top up the water from time to time to ensure they leaves remain covered.
Take the leaves out of the saucepan and place them into a shallow tray of clean water. Using and old toothbrush, gently try to brush away the gunk and membrane from one leaf at a time. If the leaf is too fragile, use a paint brush instead of a toothbrush.
Once you're done, lay the leaf on a paper towel to dry.
c) Washing soda method
Note: washing soda is not the same as baking soda. Washing soda is sodium carbonate: it's a powerful cleaner and non-toxic, but is highly caustic and definitely not edible. Wear gloves and goggles while working with it, and try not to inhale any dust that might float up when you stir.
In a saucepan, dissolve 3/4 cup of washing soda in about one litre of water.
Place your leaves into the pot, and bring it to the boil. Reduce to a simmer, stirring it gently from time to time. The water will froth up, and will get brown and murky.
Watch the leaves until they have softened, and you think they are ready to clean away. This could take several hours (for some reason the camellia leaves I was using took forever - like about six hours - but general consensus on the Internet is up to two hours). If necessary, top up the water from time to time to ensure they leaves remain covered.
Take the leaves out of the saucepan and place them into a shallow tray of clean water. Using and old toothbrush, gently try to brush away the gunk and membrane from one leaf at a time. If the leaf is too fragile, use a paint brush instead of a toothbrush.
Once you're done, lay the leaf on a paper towel to dry.
How to make washing soda
If you can't find washing soda at the shops, try this easy at-home process.
Pre-heat your oven to 200C (400F). Spread two cups of baking soda evenly on a large baking tray, and place it in the hot oven for about half an hour. You'll know the transformation has happened when you look at the powder: washing soda is more grainy and dull than baking soda, and when you stir things around (not with you fingers!) you'll see it doesn't clump together. If you're not sure, grab some baking soda and put the two side by side, to see if they look different.
Step 4: Press the leaves
Leave cleaned leaf skeletons in a warm, sheltered place to dry for approximately one hour.
Once you are sure the leaf is completely dry, place it between two paper towels and store it under a heavy book until you are ready to use it.
Step 5: Decorate
I prefer to leave the leaf skeletons their natural colour, but you can absolutely play with other decorative ideas if you wish. After all the pulp has been removed but before you dry and press the leaf skeleton, you could place it in bleach to whiten it, or in food colouring. Alternatively, once dried and pressed, you could carefully paint the leaf skeleton (metallics look really great!).
That's it! If you decide to make these, let me know how you go. I'd love to see how they turned out, and learn what you think of the process.
ps. I've been working on a little video to show people how to make leaf skeletons using Method 2 (the baking powder and bicarbonate soda method), as part of a "botanical crafts" course I'm developing. The video is not finished yet but, in the meantime, I've created a printable tutorial using screen-grabs from the video to give you a more visual step-by-step guide, if you think that will help. You can download that tutorial here:

The Most Beautiful Letter You Have Ever Written
Come join me and a host of gentle, creative, like-minded people in my five-week letter-writing and mail-art course, delivered entirely online. This course is all about creativity, personal connections, and spreading joy to others through the old-fashioned postal service. Learn more or join in here.

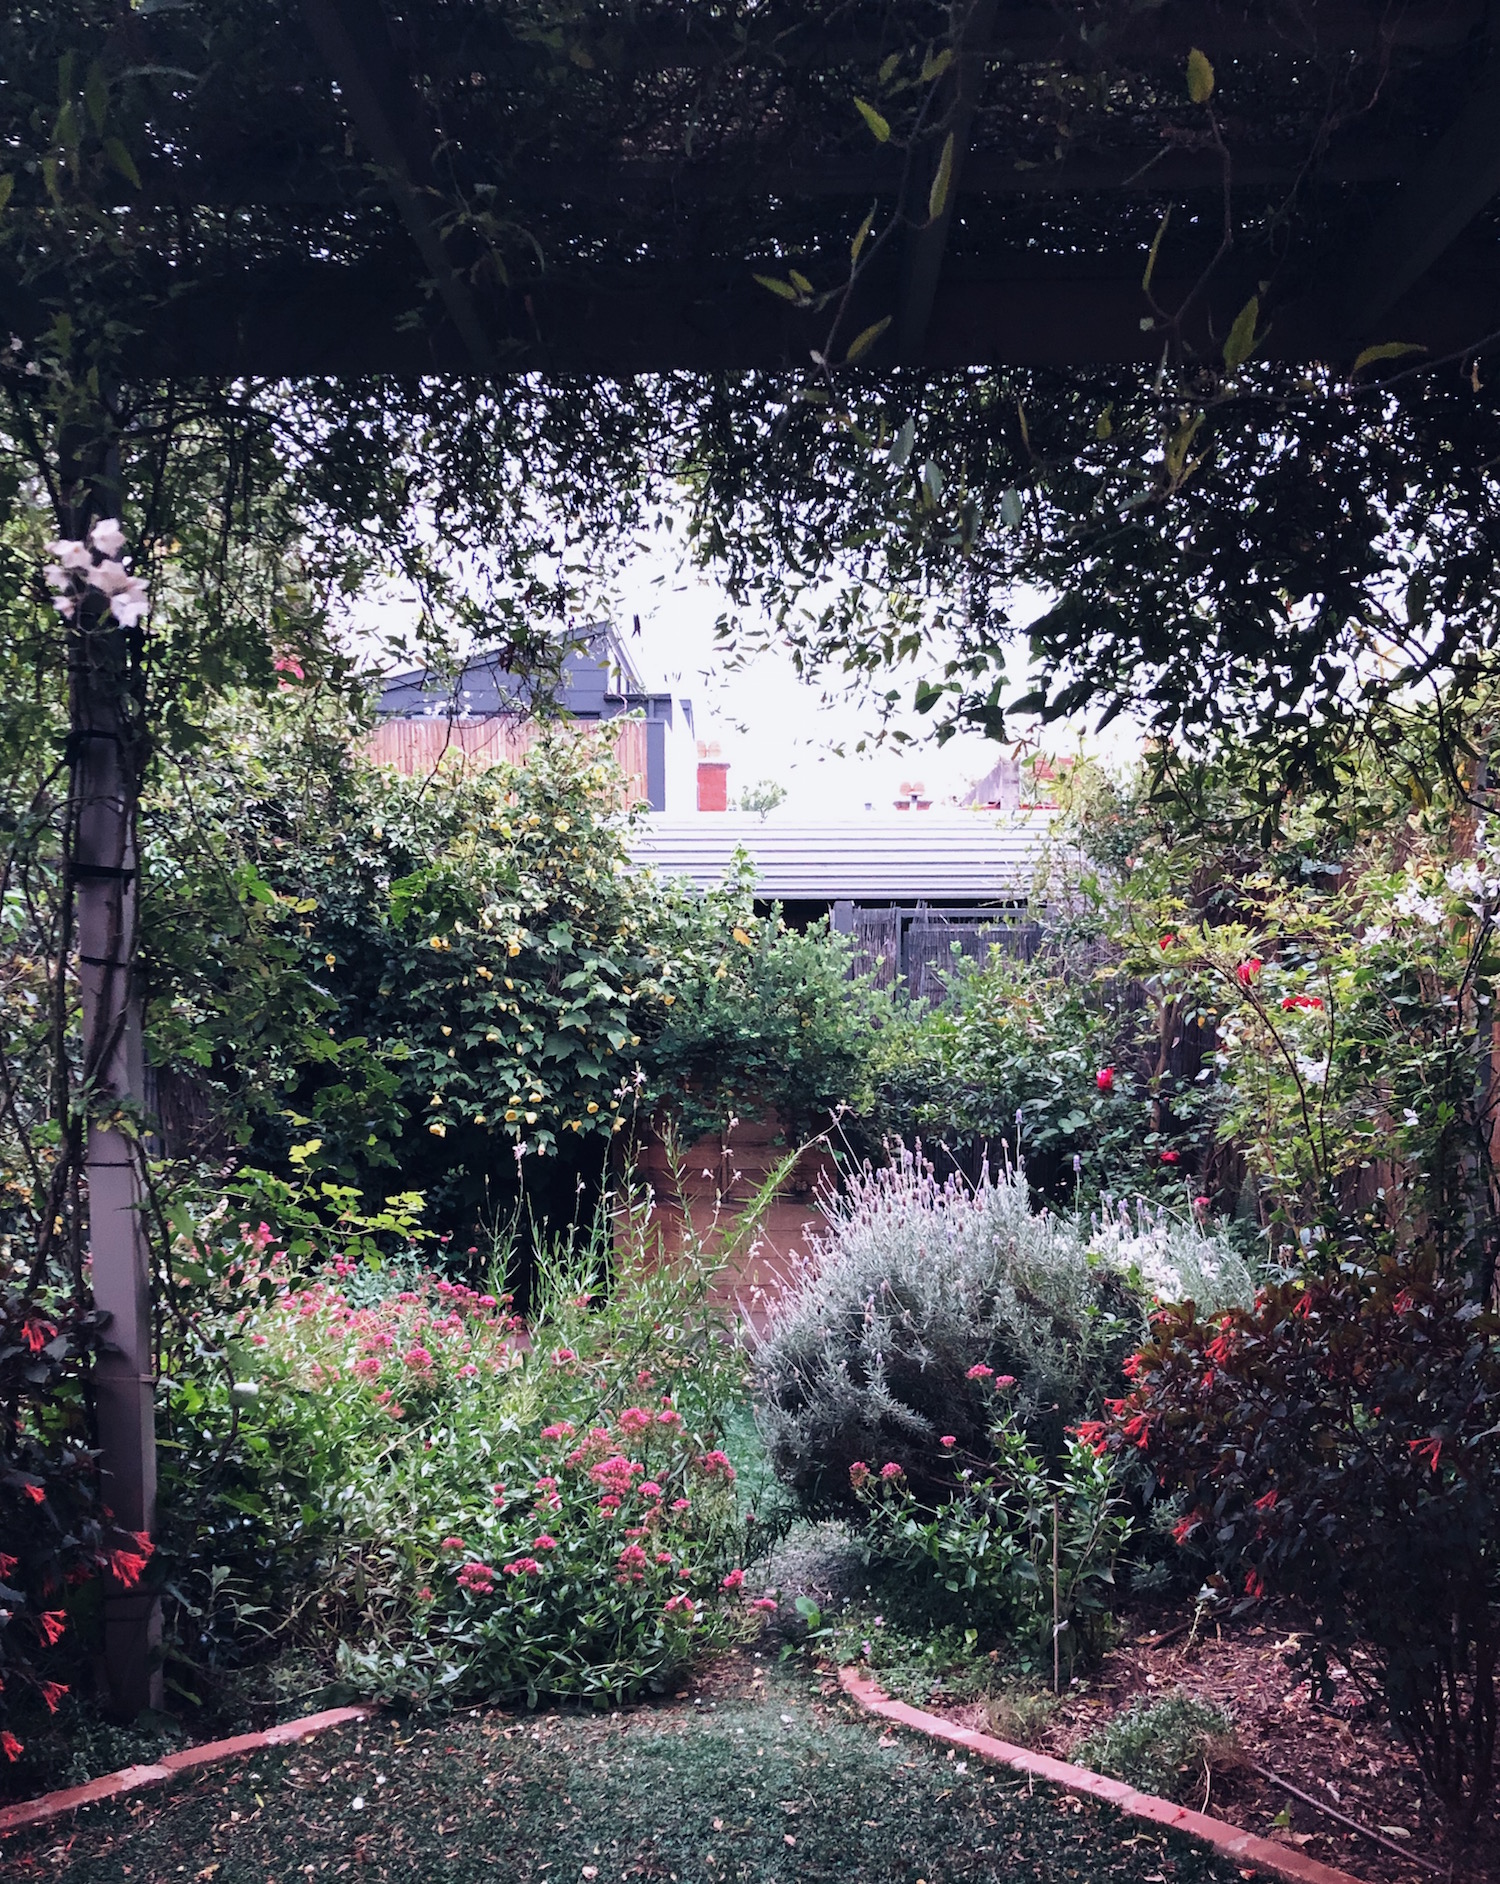
Composting for tiny gardens (even courtyards & balconies)

Hello! This is my city garden! It is the size of a single car-space, because until two years ago, it was a single parking space. We gave up having a guaranteed place to park our car in favour of creating a green room in which to relax, ponder and play, and it was the best decision we made in our entire home. The photograph above was taken last week, while I was cleaning up after a garden party during which we had had 40 guests over for afternoon tea. It was a warm day, and there were not one but three compost receptacles decomposing away in this very small garden. But nobody could see them, and nobody could smell them. Hurrah!
How did we do that?
In my ongoing quest to reduce waste in our home, and lessen our impact on the planet, it has particularly irked me that we didn't have a composting system. Even after we built the garden, I continued scraping mountains of food-scraps into the bin every day.
Essentially, space was the problem. Even the smallest of compost bins were quite big in relation to our garden. They'd create a giant, plastic eyesore, taking up precious growing-space. And, more to the point, occasionally smelling bad. (I know, I know, properly managed composts don't smell. Much. But if your garden is so small that you can all but touch both sides of it when stretching out your arms, that puts you in very close proximity to the compost no matter where you go. I live in Australia, friends. Things get hot in the summer. Pile as much dry matter and mulch as you like into that bin, the stench of slowly rotting watermelon rinds and browning banana peels will find a way to cut through, as do the sandflies. It's gross.)
Day after day I kept scraping rinds and pulps into the rubbish bin, wishing I could scrape the guilt of my wasteful habit away with them. And to add insult to injury, I was paying good money to buy compost for the the garden in spring-time! I did my best to keep the waste low, by planning better, shopping smarter, and being more creative with my cooking. Thanks to the magic of the Instagram community, for example, I now have a host of delicious ways to use the green parts of leeks in my cooking. Recently I've learned how to dye fabric using avocado seeds and skins. But still, the rubbish bin is full of compostable matter every week.
Or I should say, was full. Enter the composting cannon.
Fair warning: I am about to wax lyrical about this product. I'm not being paid, sponsored or in any other way encouraged to say this stuff. These links are not affiliate links, and these makers don't know I'm writing this blog at all. I'm just thrilled to finally have found a solution to my organic waste problem.
(BTW in case the composting cannon doesn't appeal to you, I've also provided a bit of a product round-up of some other fantastic composters for small spaces, as well as beginners tips on composting, at the end of this blog post.)

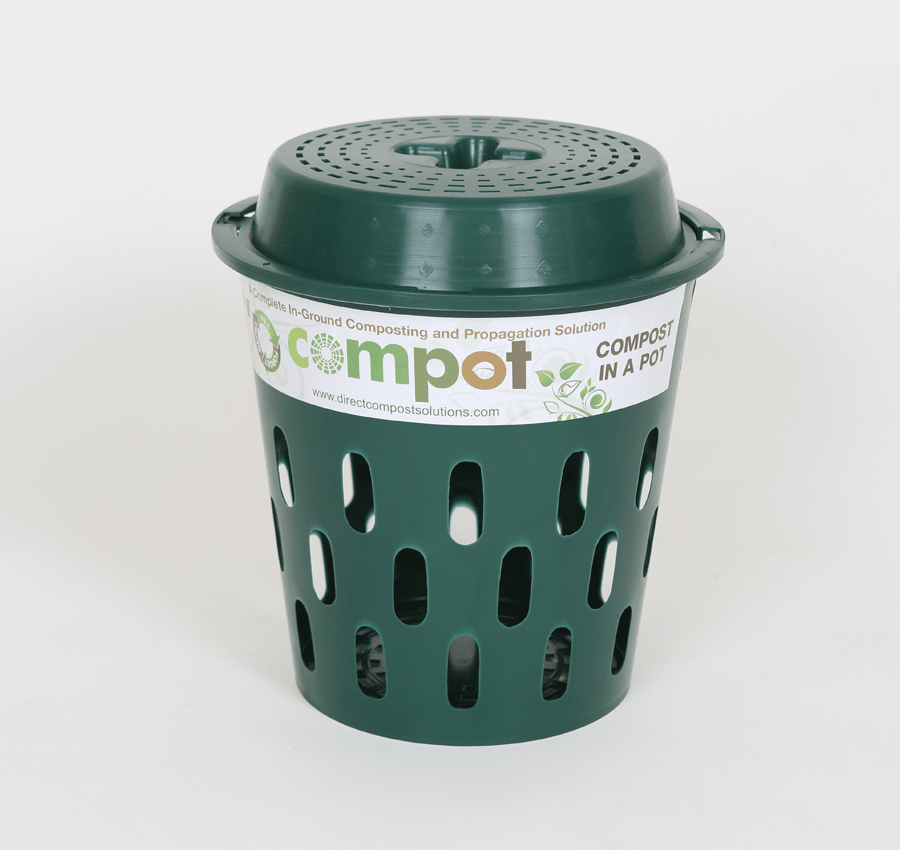
I discovered this little Australian invention at the CERES Community Environment Park, but you can also buy it online here. It is such a simple idea. You simply bury the cardboard cylinder in your garden (or in a planter box or big pot). Empty your food scraps into the cylinder, add a bit of mulch or shredded paper for dry matter, and push it down with the plunger provided. There's a mesh lid that keeps vermin away, holes in the side for worms to make their way through, and the whole thing breaks down over many months, delivering compost direct to your garden!
When I first took mine home, I couldn't quite figure out how it worked (it was just too simple - surely I was missing something!). So I've created a kind of mini tutorial for you in case you want to try it yourself.
How to use the Composting Cannon in a tiny garden

Step 1: Take the cannon out of the box, stare at it a while, and scratch your head. It will look like the picture above. There will be three cylinders, all with holes in them, each one fitting inside the other (like matryoshka dolls). Wire lids sit on both ends. Finally figure out that you have actually bought three "cannons" for the price of one, and feel very silly for not realising this in the first place. Separate them out. The wire lids are sized to fit the different width cylinders.

Step 2: Find somewhere in your garden where you can dig a hole about 12 centimetres wide, and 30 centimetres deep. If you're using pot plants, as long as the pot is at least 30 centimetres deep, you can use that just as easily. (The only challenge will be if your pot is too shallow - you don't want part of your composting cannon sticking out the top, looking ugly). Bury the cannon, leaving just enough of the rim sticking out of the top so that you can fit the wire lid over the top.

Step 3: It's ready to use! Tip any plant-based food scraps you like into the cylinder (some tips: citrus, onions, dairy and vegetable-fat products will slow down the composting process so should be minimised; and meat and animal fats should be kept out altogether because they attract rats - and smell really bad. There's a more extensive guide to what should and shouldn't go into a compost in the download at the end of this post). Now add a handful of mulch, dry leaves or even shredded paper on top. Use the plunger (it comes with the kit) to push everything down, then put the lid back on. Repeat this every time you have more food scraps, and that's it.
There is literally no maintenance - the worms do all the work for you, not only breaking down the scraps and creating the compost, but then carrying that compost through your garden or planter box, delivering it directly to the roots of your plants.
According to the website, each of these cylinders will compost more than 20 kilograms of organic waste during a four-month period. So with three, that's more than 60 kilograms transformed from stinking landfill into beautiful, nutrient-rich compost for the garden.
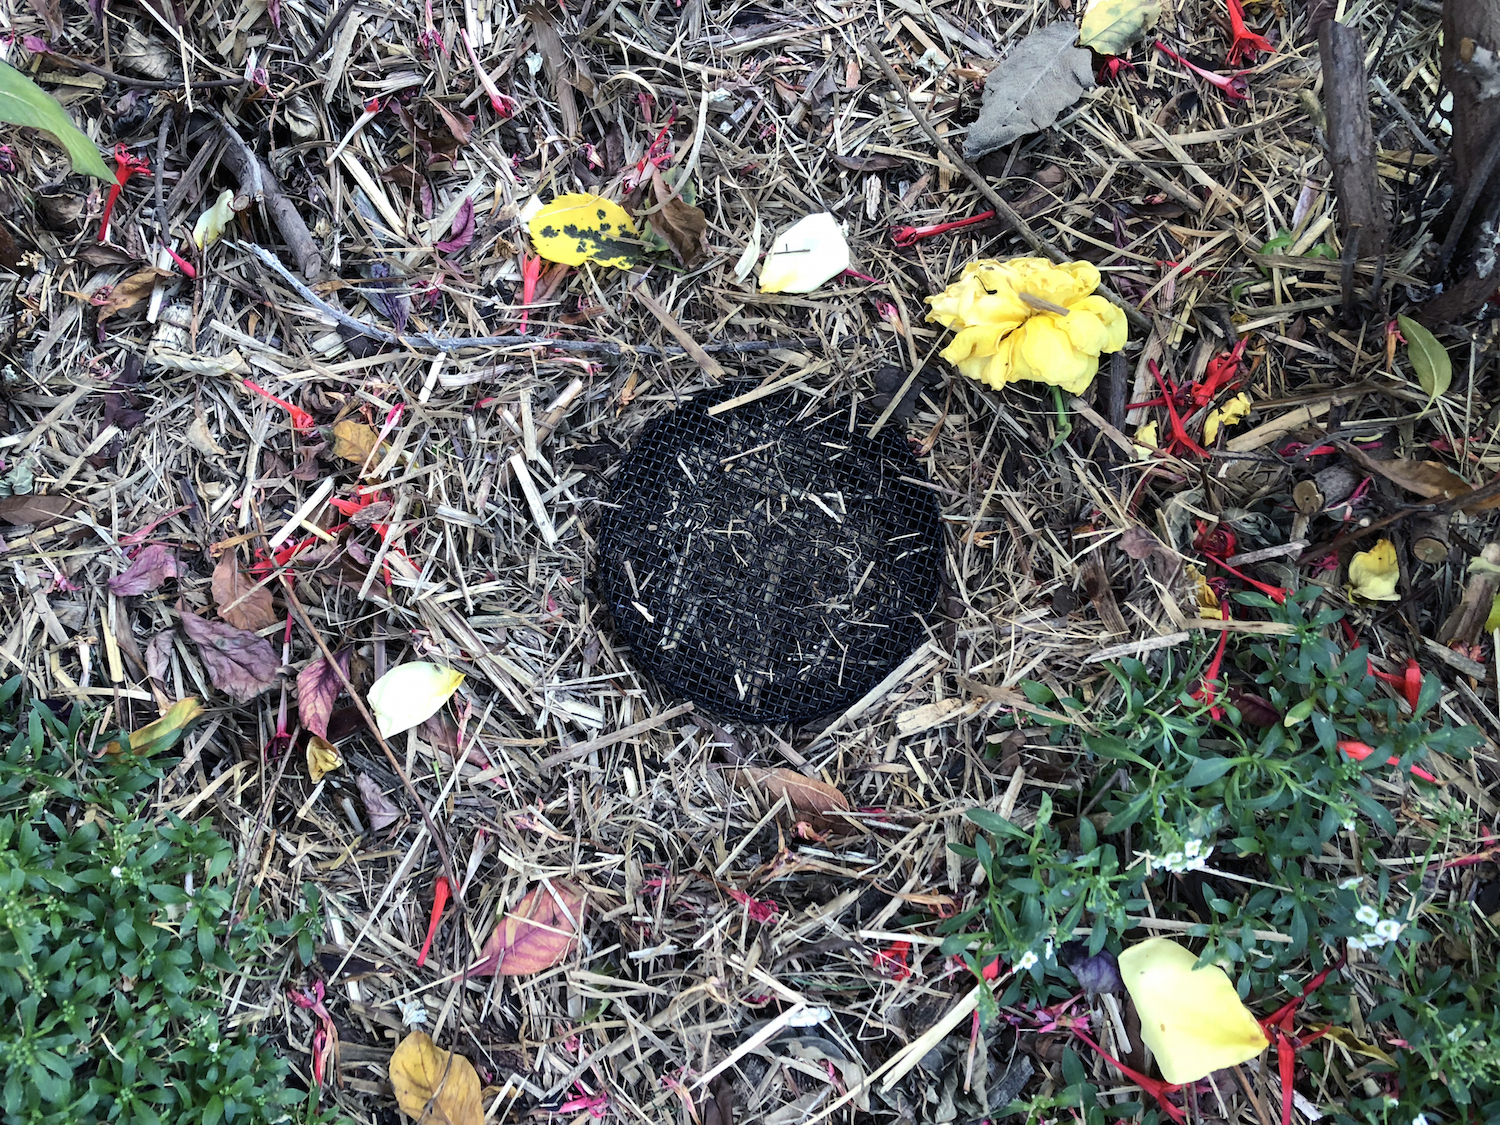
This is a really unobtrusive composting system. My three, when I'm not topping them up, look like the picture below. Actually they look even less obtrusive, because wind and birds cover them each day with the mulch, which I had to move aside to take this photograph.
The contents of your cylinders (and the cylinders themselves) will start to decompose after about four months. It takes even longer than that for them to start to be unusable, after which you can replace them (they are not expensive to buy, especially when you consider how long they last) and start all over again, adding more nutrient-rich compost to other areas of your garden or potted balcony.
One last thought: I do think you need to be somewhat realistic about just how much food waste you can fit into these little babies. We are a hungry family of four and, thanks to 50 percent of our family being pre-school aged, a lot of food gets dropped, tossed, played with or otherwise rejected (especially the vegetables!) so we tend to generate a lot of waste. On some days, when (for example) we've eaten through four bananas, made freshly-squeezed orange juice for the whole family, had a few slices of watermelon, and made a vegetable stir-fry for dinner, we can fill an entire cannon in one hit. If I've filled all three in quick succession, I do sometimes have to wait a few days and go back to putting the food scraps in the bin, until the food breaks down a little. So that's not ideal, but it is still a LOT better than our previous habits, and a great result for a tiny, inner-city garden.
Clever composting solutions for tiny gardens
Here's a quick round-up of some innovative composting solutions I've discovered online that appear to be great for reducing organic waste and creating garden nutrients when you only have a small space in which to work. (Remember I've only tried the Composting Cannon. I think I'll try the Bokashi next, and the two systems can supplement one another).

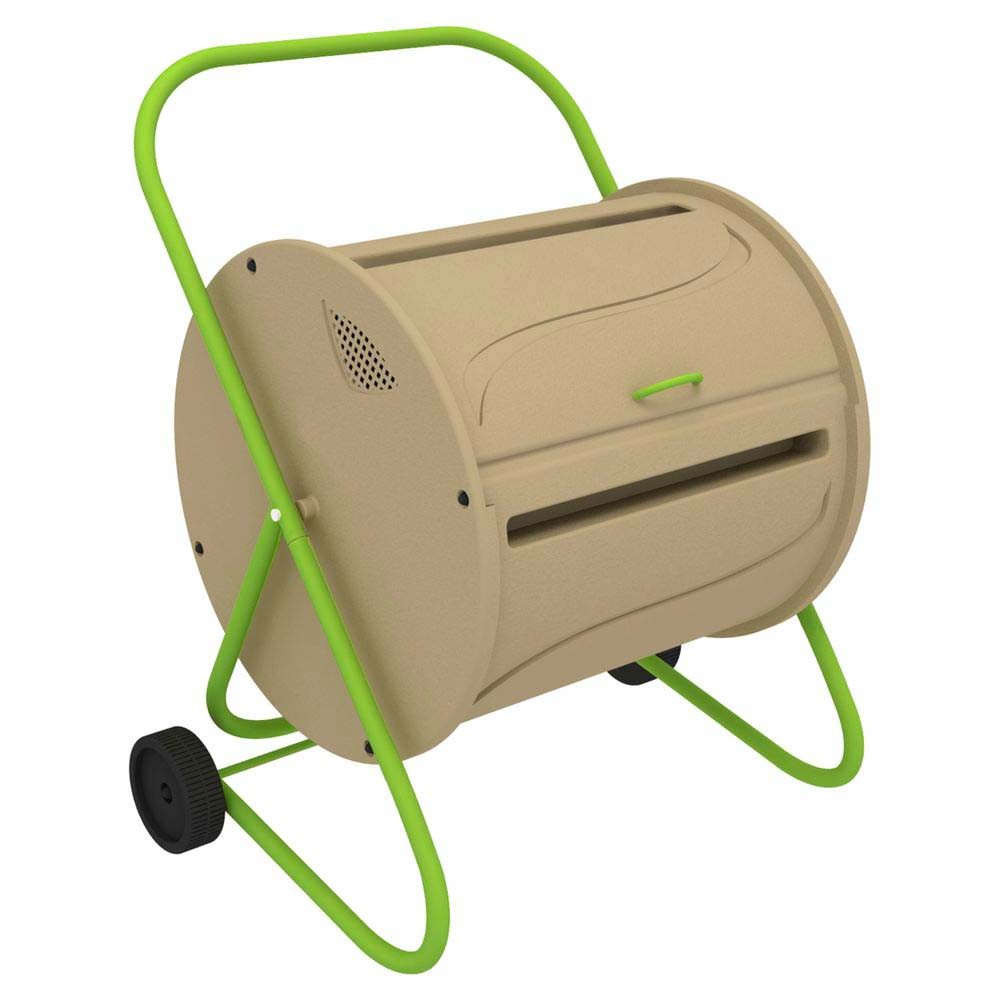
* Tumbleweed Compost Tumbler: a barrel on a stand than can be spun every couple of days to aerate the compost without needing to dig or turn

* Bokashi scrap fermenting: a system that is used to actually ferment kitchen waste (including meat and fish) by using micro-organisms to break down scraps, without creating bad smells

* Hungry Bin: a continuous-flow worm farm, on wheels so you can move it around your garden or balcony
What do you think? I'd love to know your ideas or experiences on composting or otherwise reducing and reusing food waste in small spaces. And in the meantime if you're keen to get started but this is all new to you, I've created a handy, guide below with some basic tips on composting for beginners (including what to include and what not to include in a healthy compost), whatever system you decide to use.