JOURNAL
documenting
&
discovering joyful things

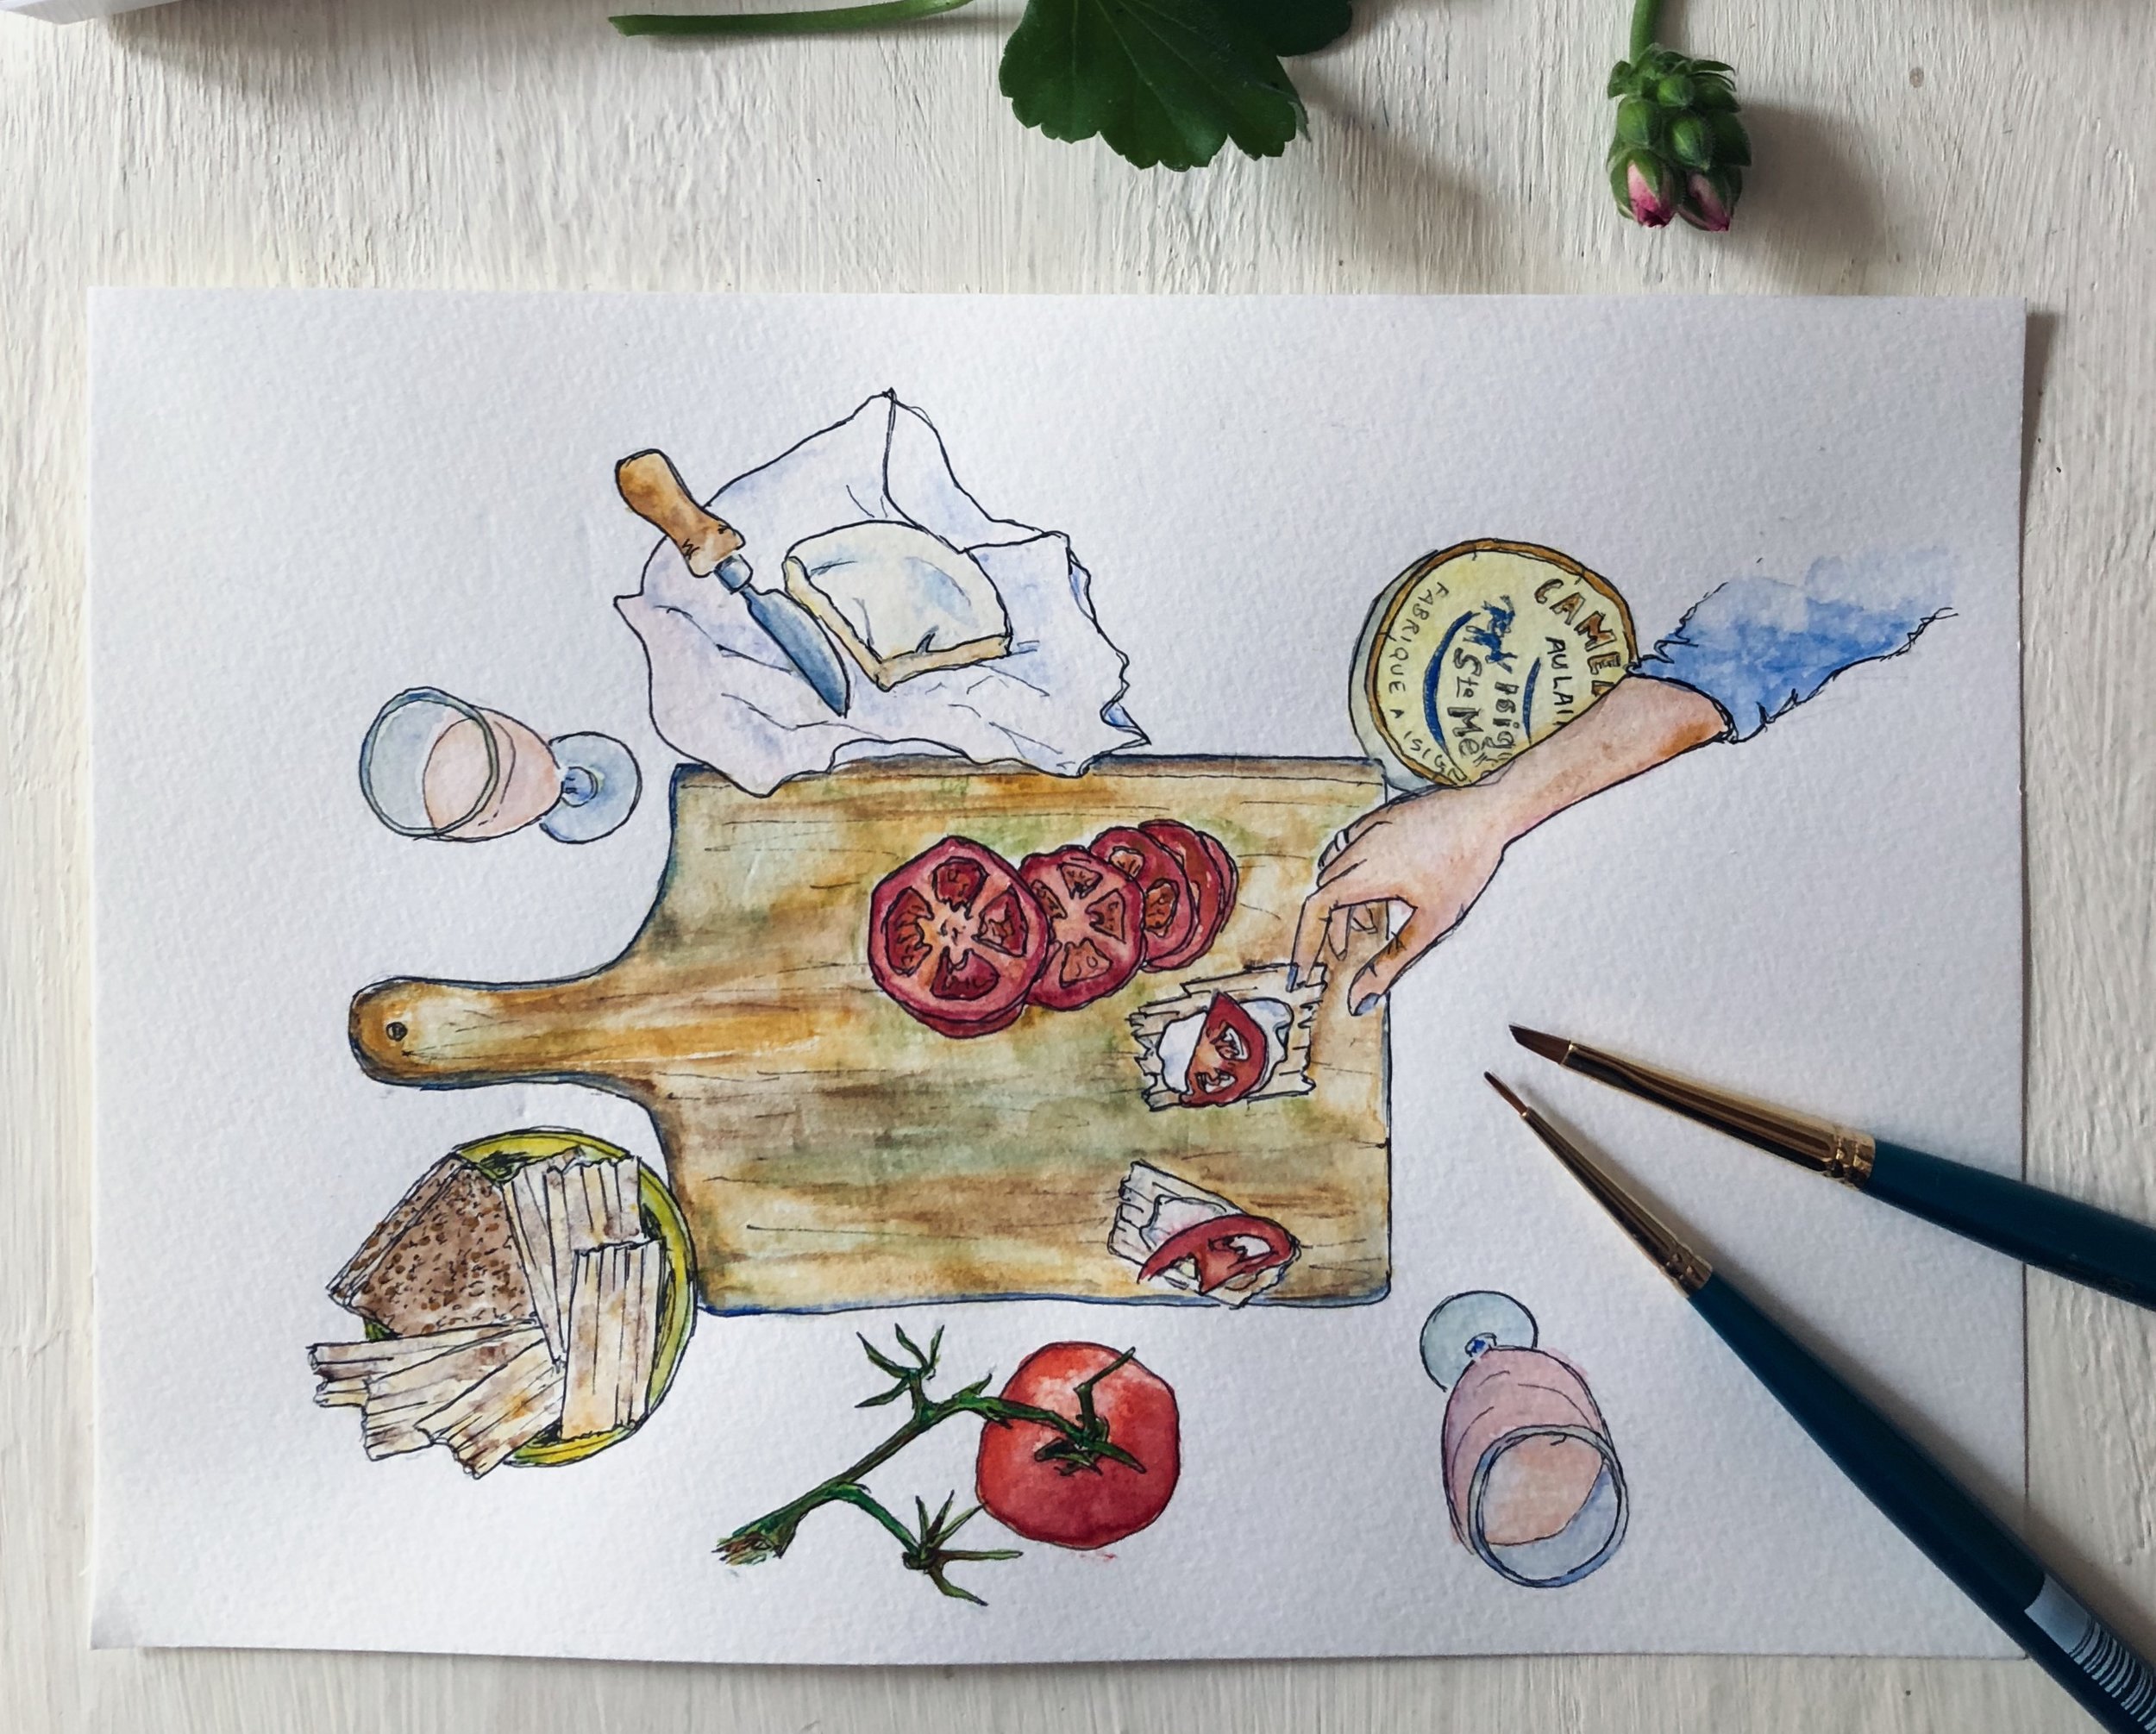
Crackers and creative confidence

Last night while drinking champagne and eating crackers with soft cheese and slices of fresh tomato (topped with ground salt and black pepper), my friend Tonia and I got to chatting about bell-ringers and how they manage to stop those giant bells from tolling past the designated number on any given hour. (Do you know how they do it?)
Creatively inspired by the champagne and the lateness of the hour, we came up with all kinds of theories, ranging from shoving some kind of giant feather duster up in between the clapper* and the inside of the bell, to having a second bell-ringer whose job it was to catch hold of the bell as it swung and then hold it there (perilously, in our imaginings, tilting over the edge of a bell-tower while holding back a giant brass bell with all their apparently-considerable strength). I have my suspicions that our theories would not hold water in a peer-reviewed study, but they filled our evening with laughter.
And somewhere in the midst of all this my brain, probably once again influenced by the champagne and the late night, made the leap from creative theorising on bell-ringers to creative inspiration in general to Quasimodo and the way jobs that were once intensely private (like bell-ringers in Notre Dame) were now as open to the world as anyone else (thanks to the Internet and in particular social media) to the way many artists are now using this phenomenon to practise in public and build a tribe or community of like-minded supporters around them.
Isn’t the Internet amazing?
And here’s something else we talked about. That everyone Tonia or I had ever known or met had had misgivings about sharing their creative work in public. Our Inner Critics not only make nasty comments that put us down and leave our confidence in tatters… they are also experts at isolating us and making us feel as though we are the only unworthy ones in the room. But the two truths are: 1) none of us is unworthy, and 2) at some time or another, all of us feel unworthy.
I mean, everyone.
In 1908, Monet destroyed at least 15 of his major works just before they were due to be exhibited in the Durand-Ruel gallery
Franz Kafka burned 90 percent of his writings and instructed in his Will that the rest was to be burned unread. The only reason we have Kafka's works today is because his friend ignored his wishes
Billy Joel said of his 1989 hit We Didn’t Start the Fire that “That melody is horrendous. It’s like a mosquito droning. It’s one of the worst melodies I’ve ever written.”
Woody Allen hated his classic movie Manhattan so much that he begged United Artists not to release it, and even offered to do another movie for free just to stop it from being released
Harper Lee tossed the manuscript for one of the world's most beloved novels, To Kill a Mockingbird, out the window
I once read that Picasso had been banned from certain galleries for trying to ‘fix’ his own paintings
The only reason we have these great works today is because the artists ultimately shared their work, despite their misgivings. (Even Kafka refrained from burning that final 10 percent of his work).
I don’t really have a lot more to say about this subject, except to wave my pom-poms and cheer you on. You’ve got this! Don’t hold your beautiful, creative work back, even if it’s not ready yet. Even if it’s not perfect. Let’s all celebrate the process, and build one another up.
End of rant.
* I had to look up 'clapper.' Now my Google history shows "what is the name of the donging bit in a bell?" I wonder what the aliens would think about us if they read our Google histories.

Botanical project: leaf skeletons (non toxic)

Whenever I discover a leaf skeleton in the garden it feels like a little piece of magic. Rare good luck, like finding a four leaf clover or seeing a double rainbow. The circumstances for nature to create a leaf skeleton have to be just right: damp enough for the fleshy parts of the leaf to decompose, sheltered enough (probably under other leaves) to encourage microscopic organisms to eat away at those leaves, and somehow exposed at just the right time for me to find the leaf while all those lovely veins are still in place, before it breaks or blows away.
I love to send leaf skeletons as gifts in my mail. They are something special, precious, a memento from my garden or a walk I've taken that is tinted with enchantment. But because they are so hard to find, I wanted to learn how to help nature along, and make my own leaf skeletons. Turns out there are several ways to do it, following processes that range from a couple of hours to a couple of weeks, and using everything from water and pantry ingredients to caustic substances requiring rubber gloves and goggles, and straight-up bleach.
I have tried three of the non-toxic methods, and am here to share them with you today.
Step 1: Pick & prepare the leaves
No matter what method you use, some steps to making leaf skeletons are always the same:
Choose your leaves: for best results, choose leaves that have a strong vein system. Tougher, more waxy leaves have better results than softer, younger leaves
Clean the leaves: gently rinse them in a bowl of water, and wipe any dirt or mud away with a soft cloth. If the dirt is stubborn, use an old toothbrush to (gently) scrape it away
Step 2: Choose your method
How you choose to make your leaf skeletons will depend on the time you have available, the materials you have in the cupboard, and how willing you are to work with potentially caustic substances. Here are the pros and cons of the three methods I'm sharing today. If you click on any of the methods below, you'll jump straight to the relevant instructions.
Pros:
* Completely safe
* Nature's method
* Gentle on leaves
Cons:
* Takes several weeks
* Gets gross and smelly
Pros:
* Completely safe
* Easy to find ingredients
* Relatively fast results
Cons:
* Can be rough on leaves
Pros:
* Supposedly faster
* The Internet loves this method (lots of tutorials)
Cons:
* Dangerously caustic
* Hard to find ingredients
* Can be rough on leaves
Step 3: Make your leaf skeletons
a) Water method
Take a shallow dish (like a baking dish) and fill it with water. The dish should be ceramic or glass, not metal (I don't know why. Maybe it's to avoid rust, or has something to do with the minerals or chemicals in metal?). Place the leaves in the dish (it's ok if they're on top of each other) and weigh them down with something heavy to ensure they stay covered with water.
Leave the water to sit for between three and four weeks. It will get murky, and start to smell really bad (like a vase when you've left cut flowers in it for too long).
Take one leaf out of the murky water, place it on a flat surface, and gently try to brush away the gunk and membrane from the leaf. Use an old toothbrush (softly), or a paint brush if you're worried the toothbrush will break the leaf. If it's too tough, put the leaf back into the water and give it a few more days to soak.
Rinse the leaf in clean water. If necessary, continue brushing away any remaining pieces of the pulp while it's in the water. Once you're done, lay it on a paper towel to dry.
b) Bicarb soda & baking powder method
Dissolve equal parts bicarbonate soda and baking powder in a saucepan of water. I used one tablespoon of each, and approximately a litre of water.
Place your leaves into the pot, and bring it to the boil. Reduce to a simmer, stirring it gently from time to time. The water will froth up, and will get brown and murky.
Watch the leaves until they have softened, and you think they are ready to clean away. This could take several hours (I was using hardenbergia leaves and it took about an hour and a half). If necessary, top up the water from time to time to ensure they leaves remain covered.
Take the leaves out of the saucepan and place them into a shallow tray of clean water. Using and old toothbrush, gently try to brush away the gunk and membrane from one leaf at a time. If the leaf is too fragile, use a paint brush instead of a toothbrush.
Once you're done, lay the leaf on a paper towel to dry.
c) Washing soda method
Note: washing soda is not the same as baking soda. Washing soda is sodium carbonate: it's a powerful cleaner and non-toxic, but is highly caustic and definitely not edible. Wear gloves and goggles while working with it, and try not to inhale any dust that might float up when you stir.
In a saucepan, dissolve 3/4 cup of washing soda in about one litre of water.
Place your leaves into the pot, and bring it to the boil. Reduce to a simmer, stirring it gently from time to time. The water will froth up, and will get brown and murky.
Watch the leaves until they have softened, and you think they are ready to clean away. This could take several hours (for some reason the camellia leaves I was using took forever - like about six hours - but general consensus on the Internet is up to two hours). If necessary, top up the water from time to time to ensure they leaves remain covered.
Take the leaves out of the saucepan and place them into a shallow tray of clean water. Using and old toothbrush, gently try to brush away the gunk and membrane from one leaf at a time. If the leaf is too fragile, use a paint brush instead of a toothbrush.
Once you're done, lay the leaf on a paper towel to dry.
How to make washing soda
If you can't find washing soda at the shops, try this easy at-home process.
Pre-heat your oven to 200C (400F). Spread two cups of baking soda evenly on a large baking tray, and place it in the hot oven for about half an hour. You'll know the transformation has happened when you look at the powder: washing soda is more grainy and dull than baking soda, and when you stir things around (not with you fingers!) you'll see it doesn't clump together. If you're not sure, grab some baking soda and put the two side by side, to see if they look different.
Step 4: Press the leaves
Leave cleaned leaf skeletons in a warm, sheltered place to dry for approximately one hour.
Once you are sure the leaf is completely dry, place it between two paper towels and store it under a heavy book until you are ready to use it.
Step 5: Decorate
I prefer to leave the leaf skeletons their natural colour, but you can absolutely play with other decorative ideas if you wish. After all the pulp has been removed but before you dry and press the leaf skeleton, you could place it in bleach to whiten it, or in food colouring. Alternatively, once dried and pressed, you could carefully paint the leaf skeleton (metallics look really great!).
That's it! If you decide to make these, let me know how you go. I'd love to see how they turned out, and learn what you think of the process.
ps. I've been working on a little video to show people how to make leaf skeletons using Method 2 (the baking powder and bicarbonate soda method), as part of a "botanical crafts" course I'm developing. The video is not finished yet but, in the meantime, I've created a printable tutorial using screen-grabs from the video to give you a more visual step-by-step guide, if you think that will help. You can download that tutorial here:

The Most Beautiful Letter You Have Ever Written
Come join me and a host of gentle, creative, like-minded people in my five-week letter-writing and mail-art course, delivered entirely online. This course is all about creativity, personal connections, and spreading joy to others through the old-fashioned postal service. Learn more or join in here.
Quick reminder
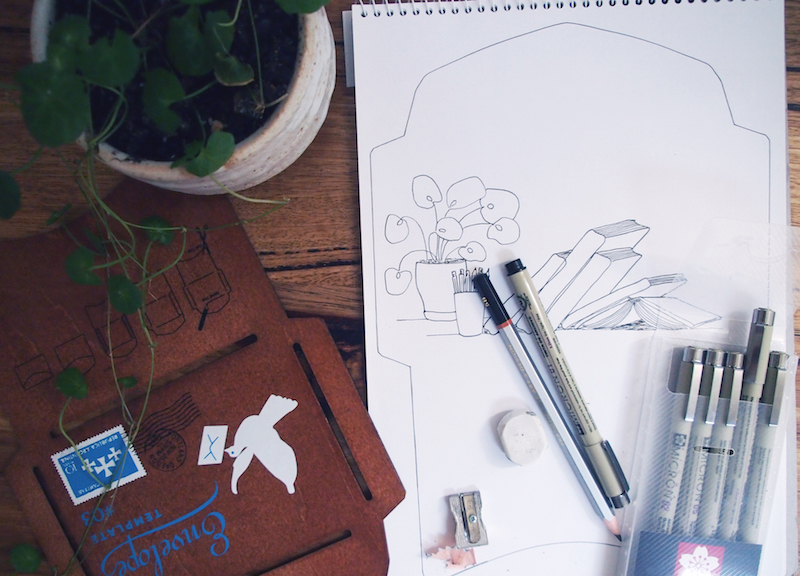 Just a quick note to remind you that my Snail Mail Toolkit newsletter will land in folks' inboxes tonight. I've created the envelope template above, plus another, and will share them as printable downloads along with tips on how to personalise them and turn them into mail-art, writing prompts, and some other fun and useful snail-mail links. If this sounds like something you'd like and you haven't yet signed up to receive my emails, there's still time and you can do it here.
Yarn blooms
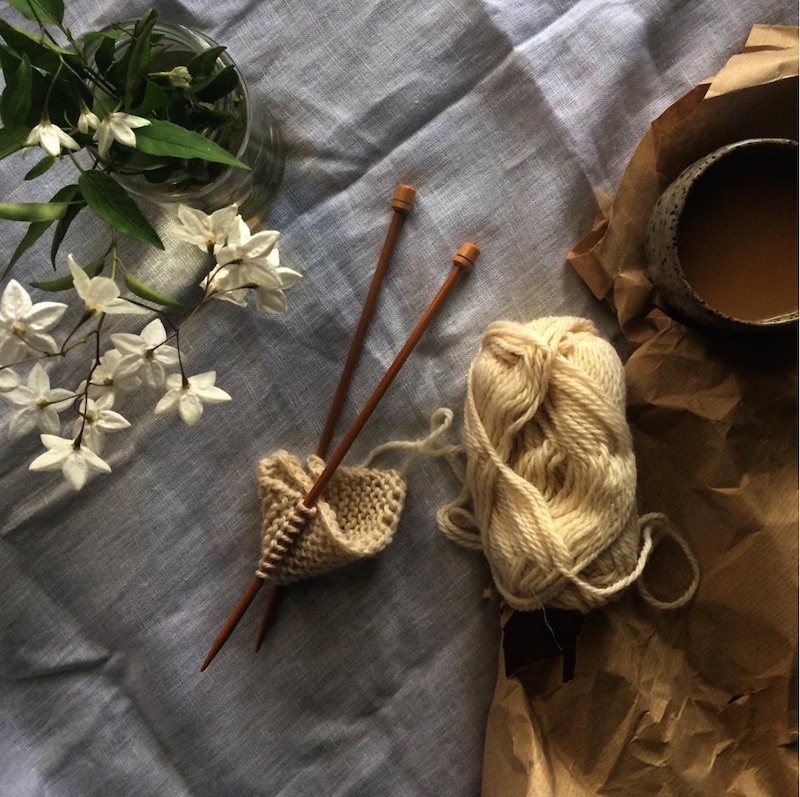
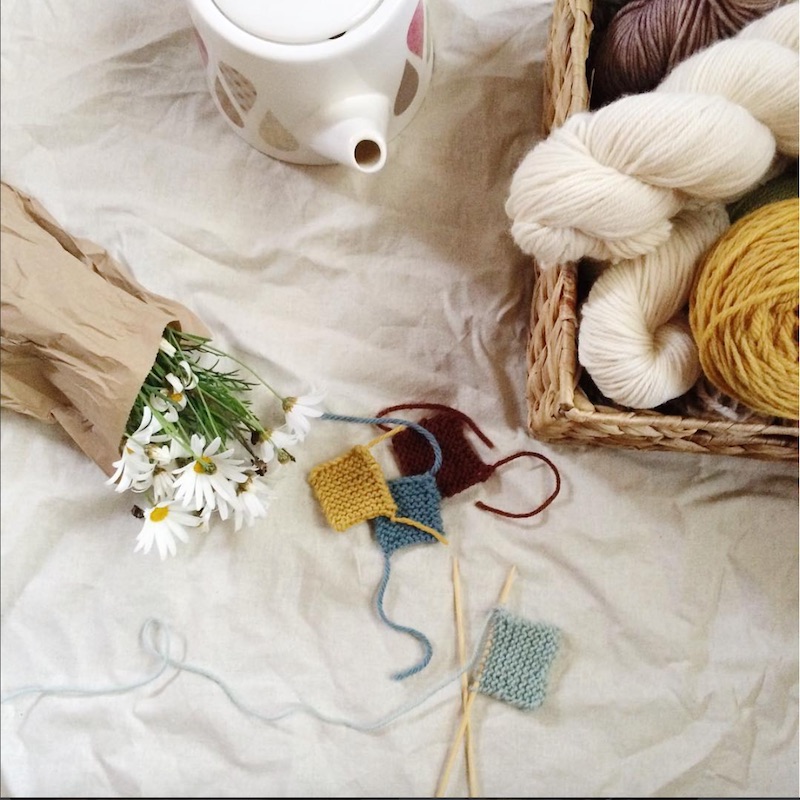
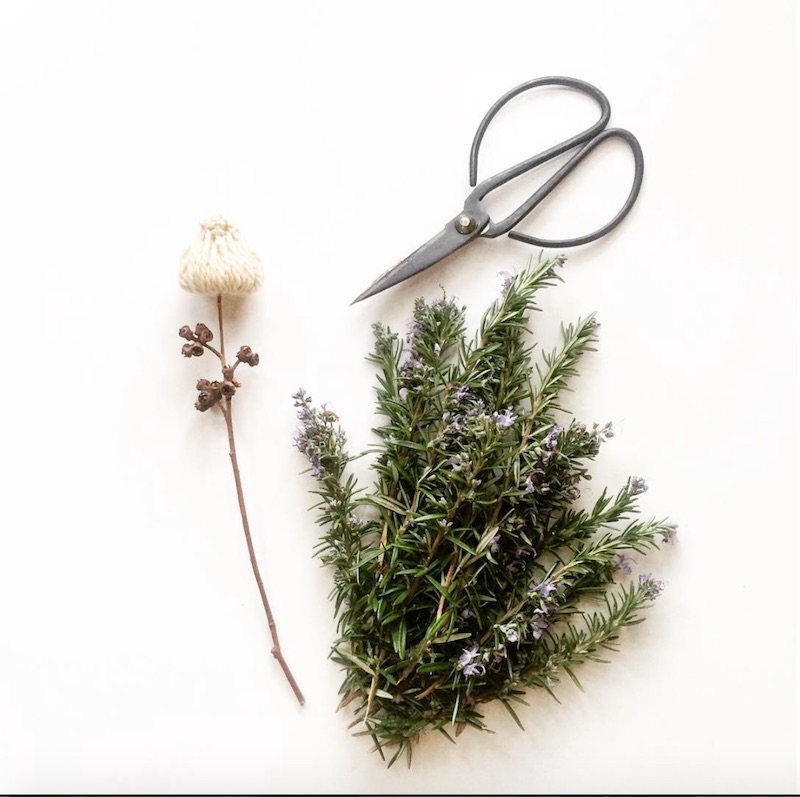
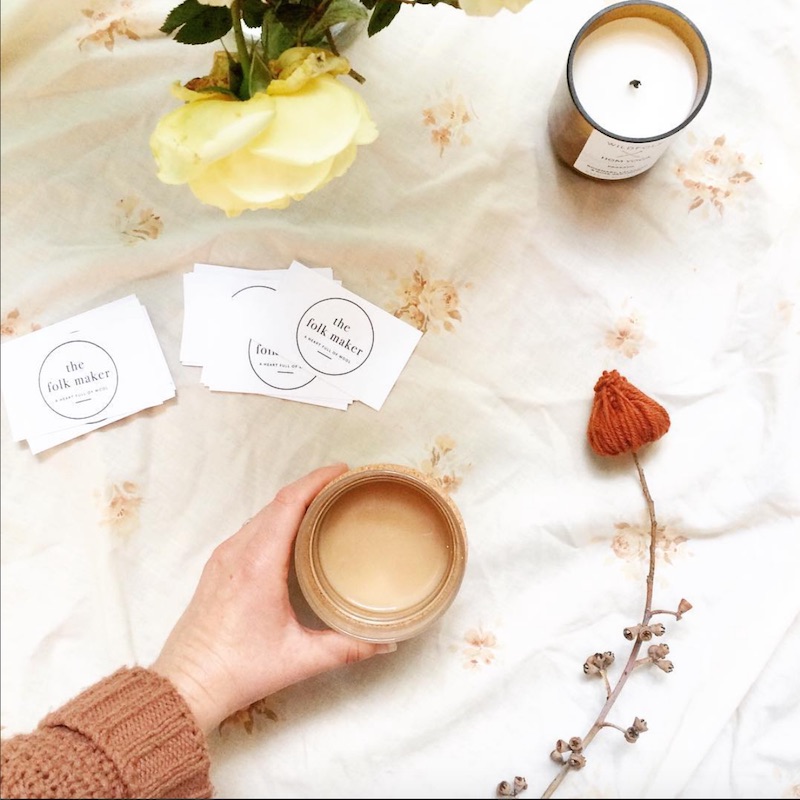
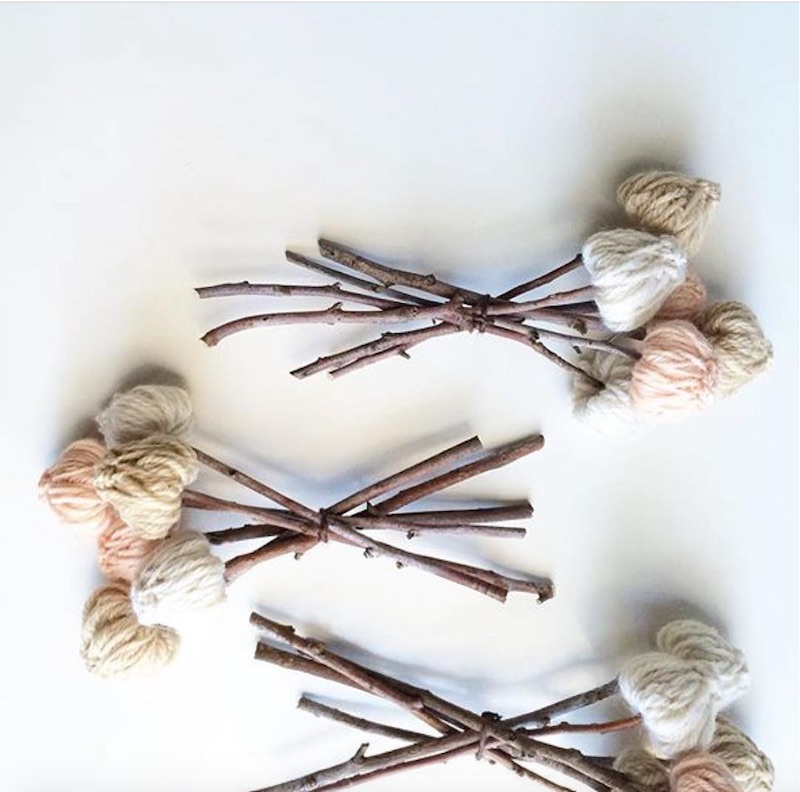
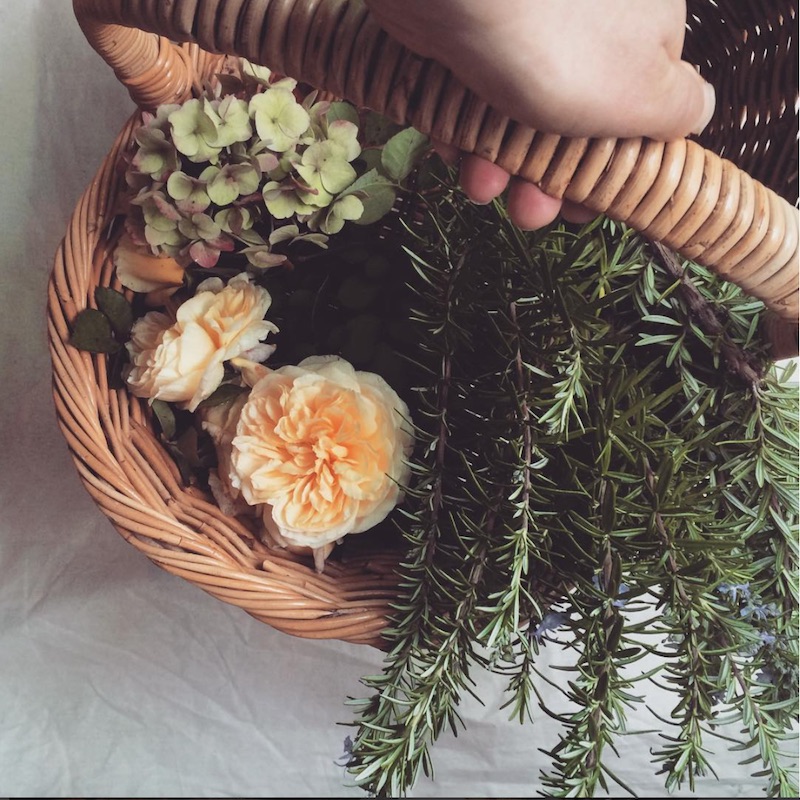
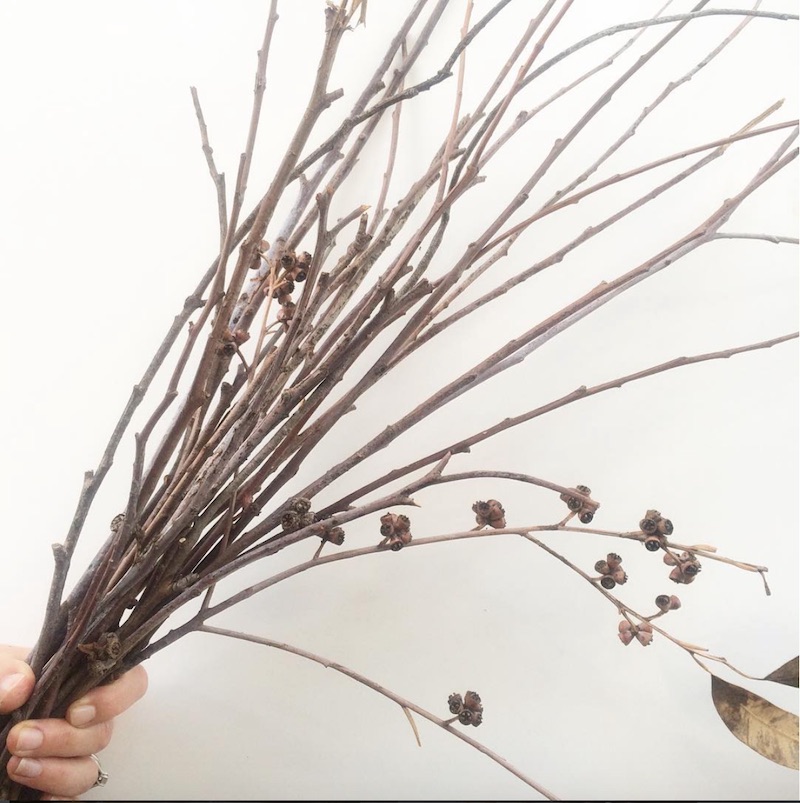
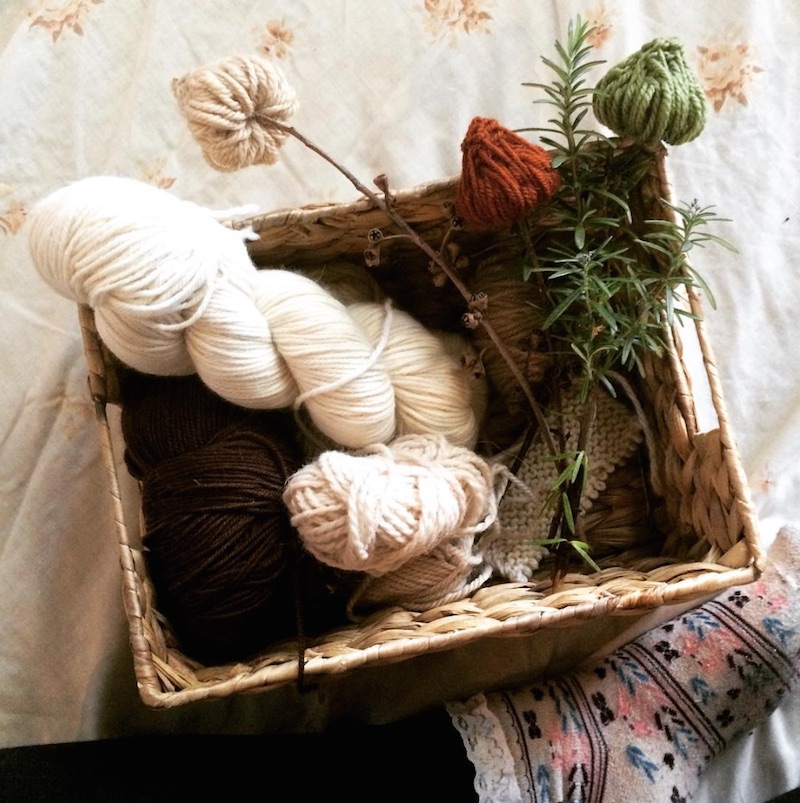
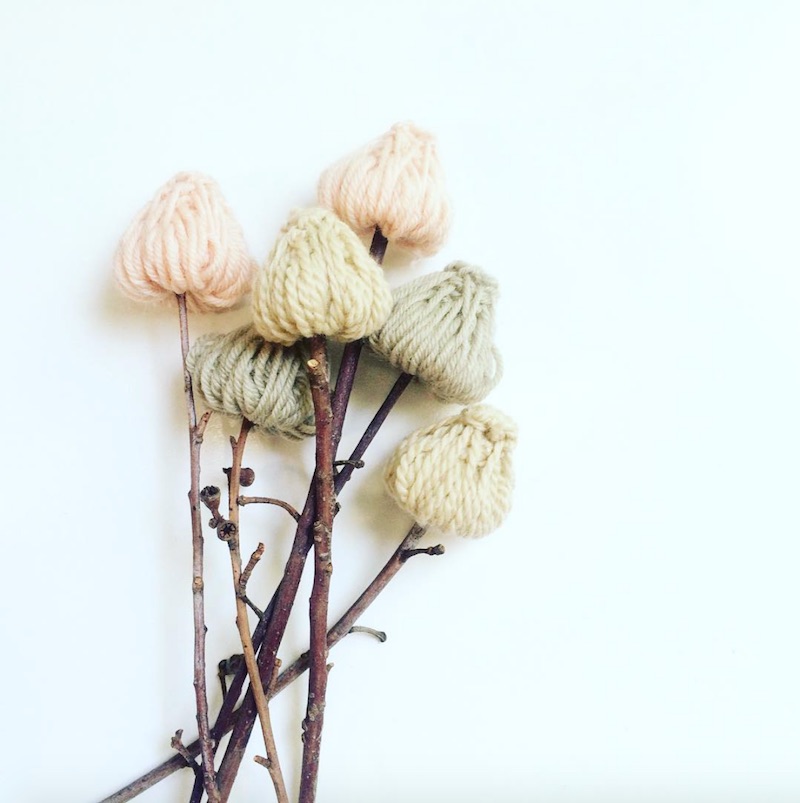
Fleur Lyon of The Folk Maker creates lasting posies out of yarn and found twigs, often with tiny gum-nuts still attached, and they are absolutely beautiful.
I discovered her Instagram feed only yesterday, and now I can't look away. Definitely wish-listing a posy of yarn blooms in neutral tones to sit above my hearth this winter!
All images from Fleur Lyon's Instagram feed, @thefolkmaker
Mini mail-art
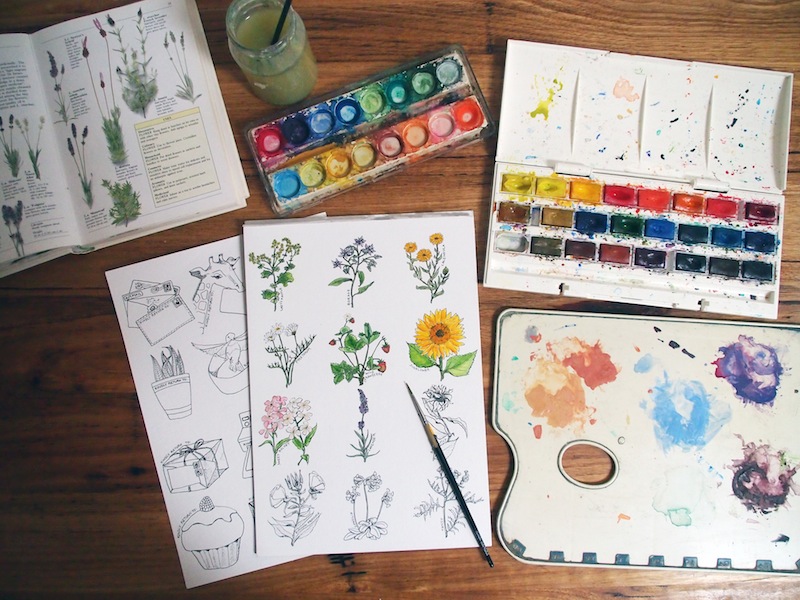
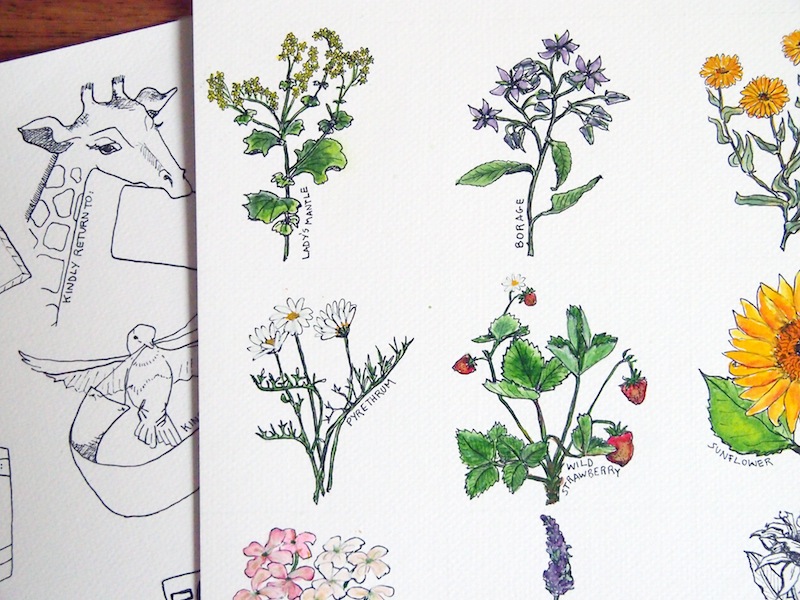
Hello, dear friends. This is just a little something I've been working on, to give to the subscribers I write to via this blog: mini mail-art. I've made a series of 12 water-colour botanical stickers that people can use to decorate their next mail; and another 12 "return address" stickers for them to personalise with their own addresses, and then colour if they want to.
9 Valentine's Day projects to try
 Is it love? Or is it just like? Does it matter? Why not use the notorious Jour de V as an excuse to make something for someone you love/like/admire, just to make them happy? Here are some last-minute ideas to get you thinking and inspired:
* I'm nuts about you * Biscuits that look like matchsticks? This is so much better than my matchbox art * So cute! Valentine animal envelopes * Homemade bath bombs to luxuriate your lover * Bad puns on printable gift-tags (for food-related gifts) * "You have a pizza my heart" (get it?). Seven printable Valentines * Pencil-flag Valentine notes. These would make great party favours or gift tags too * Paper fortune cookies * The most romantic ice-cream you've ever seen
Photo credit: Jenelle Ball, licensed for unlimited use under Creative Commons
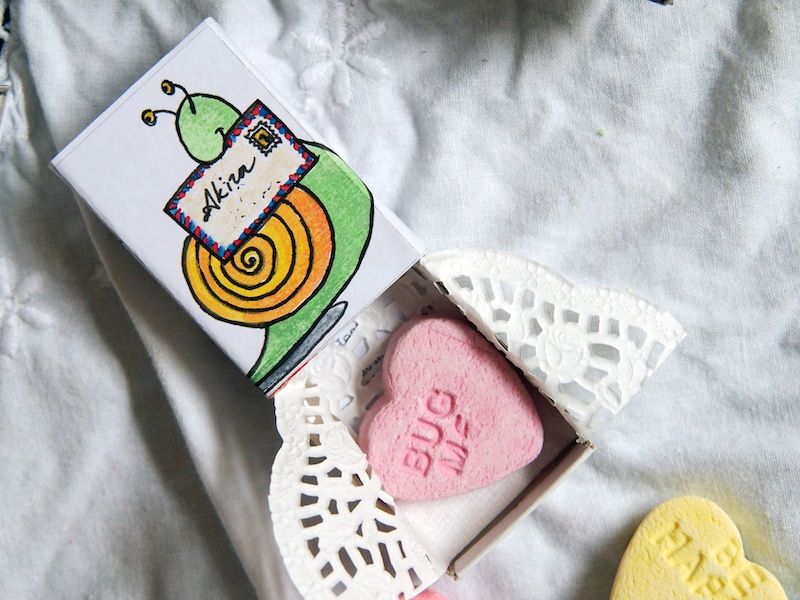
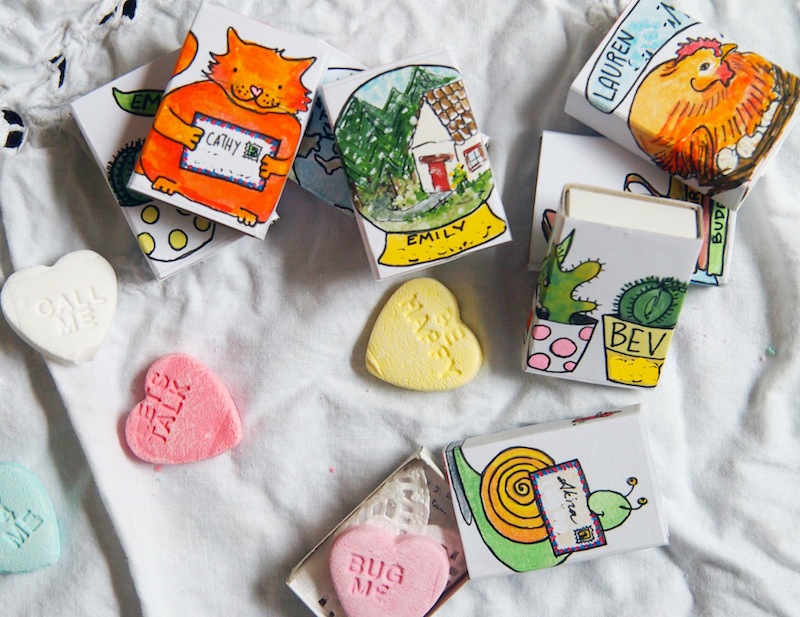
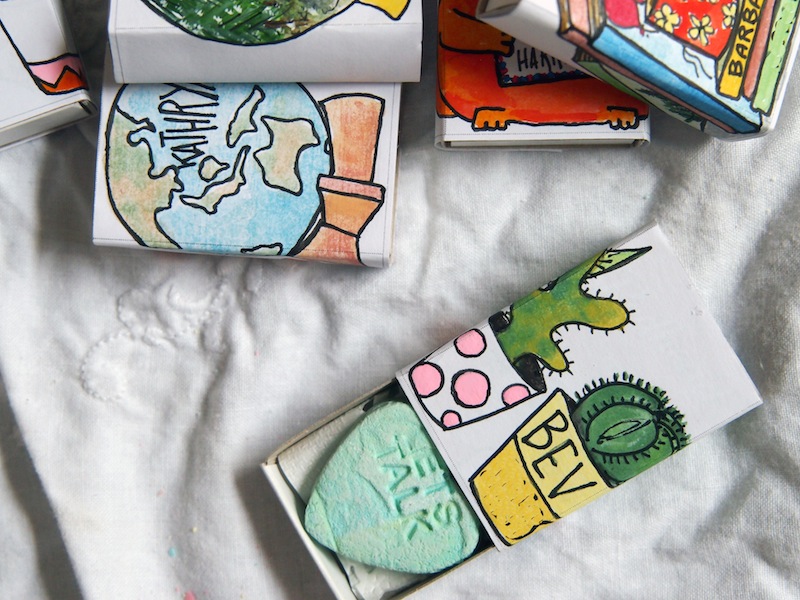
Match-box conversation hearts
Oh hello! *waves in enthusiastic and dorky manner* Remember me? I am so busy finishing my book that sometimes I don't get time for writing in this blog, but I have so many posts in the wings that I can't wait to share with you. Hopefully I'll get my time-management act together and can revisit this tiny and lovely community that is You Folks a lot more often. I really love this space. I love how comfortable it feels, how like-minded we all feel, even when actually we are quite different and diverse and opinionated and creative and quirky (because how boring would things be if we weren't), but on the MAIN THINGS (kindness, openness, encouragement, friendship) we are all on the same page, I think.
NEWS ALERT. Oh my goodness HOW EXCITING are the updates on the Serial podcast lately? If you listened to Season 1 but then kind of dropped back off, drop back in!! After almost 16 years, a new hearing on Adnan Syed's case is happening in Baltimore RIGHT NOW and you can follow what is going on each day on Serial. It is crazily compelling.
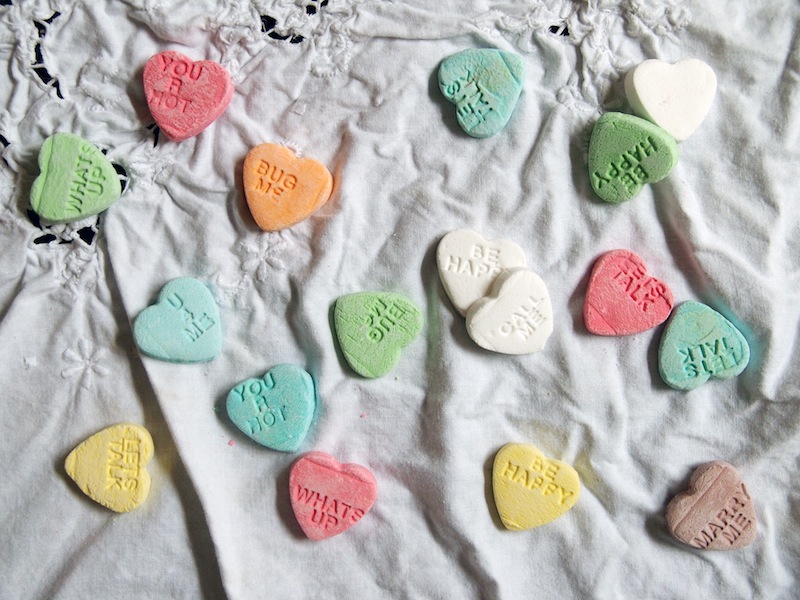
In the meantime, I have been having some fun lately jumping on the "decorate old matchboxes" bandwagon, creating decorated little boxes for homemade "conversation heart" lollies (from a lolly shop in Maldon, more on that soon to come), to send to folks all over the world. If you'd like to replicate this idea for Valentine's Day, it's super easy. Just wrap some paper around a matchbox to get the size right, trace the outline, then unwind it and draw/paint/paste whatever image you like before pasting it properly back onto your matchbox. I lined my boxes with paper doilies but you could also use tissue paper, cloth, foil or anything else that inspires you.
On another matter, conversation hearts! How great are they? So much vintage fun.


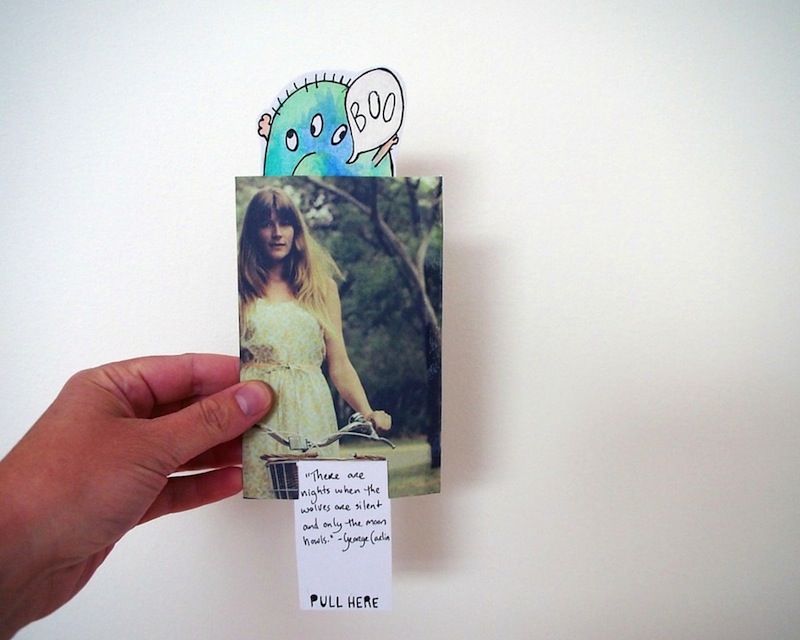
Make this: surprise slide-up cards
 Boo! Recently I made these little slide-up cards, after watching one of those "how-to" tutorials on YouTube that make simple things so much more confusing than they should be and assume you are the proud owner of an entire cupboard full of obscure craft supplies, when you could actually make do with a piece of cardboard and some sticky-tape.
Mine were Halloween-themed but if you want to make them too, they would suit pretty much any occasion or holiday: little hearts popping up to say "I love you," fireworks popping up to say "Happy New Year," flowers or confetti or - you get the point - to say "happy birthday," and so on.
Following is my pared-back tutorial, with a few moments of "full disclosure" on things I did wrong or could have done better, so you can learn from my mistakes.
The basic mechanics of these kinds of slide-up cards involve plastic wrapped around a rectangular piece of cardboard (or more accurately, an "H" shape, to stop the plastic from sliding off). You stick a second piece of cardboard with your picture or message on one side, and a third piece of cardboard with the "pull here" instructions on the other side. When you pull down on one piece of cardboard, the plastic slides around, pushing the other piece of cardboard up. Make sense?

ΔΔ What you'll need:
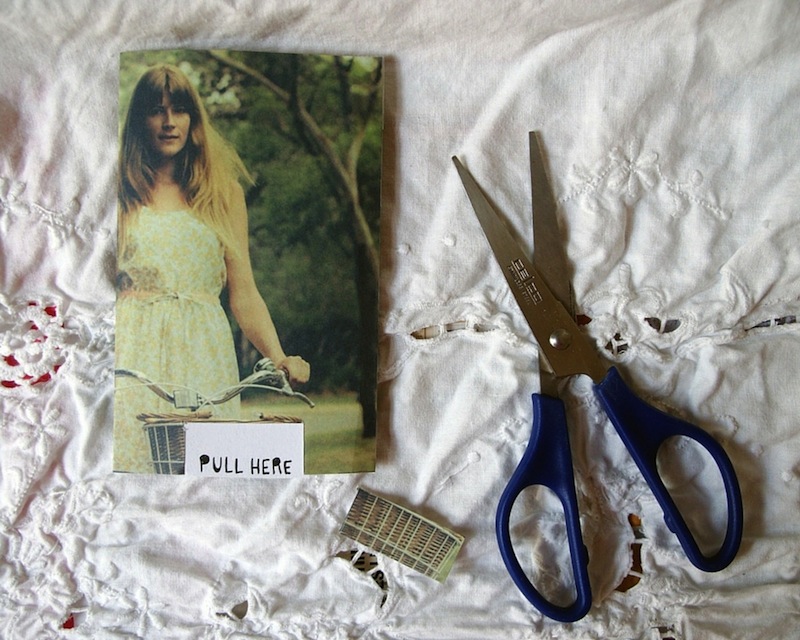
* One or two sheets of thin cardboard, or some thick (eg water-colour) paper * Scissors * Sticky-tape or glue * A pencil, or something to measure your cards (you could use a ruler and/or one of those grid maps, OR you could do what I did, and trace around your mobile 'phone) * Thin plastic (full disclosure: being the non-craft-supplies-cupboard type person that I am, I didn't happen to have any thin plastic available, so I just cut up the plastic covers from some greeting cards - do you know what I mean? - and they would have worked really well except for the folds in the plastic that caused the "slide up" bit to catch)

ΔΔ While you can make these cards all out of the same cardboard, I used a few different types, just to make my cards interesting. I used the beige cardboard you see pictured because it was handy, to make the H-shaped mechanics of the card. I used water-colour paper for the slide-up monster or ghost, and for the "pull here" tab at the other end, because I thought the colours would show up better on white than beige and I didn't happen to have any white cardboard handy. I used old pages of Frankie magazine to make the "envelope" of the card, because they're pretty. You could of course use plain cardboard for the envelope, which would leave a whole lot of space to create your own design or the first part of the message.
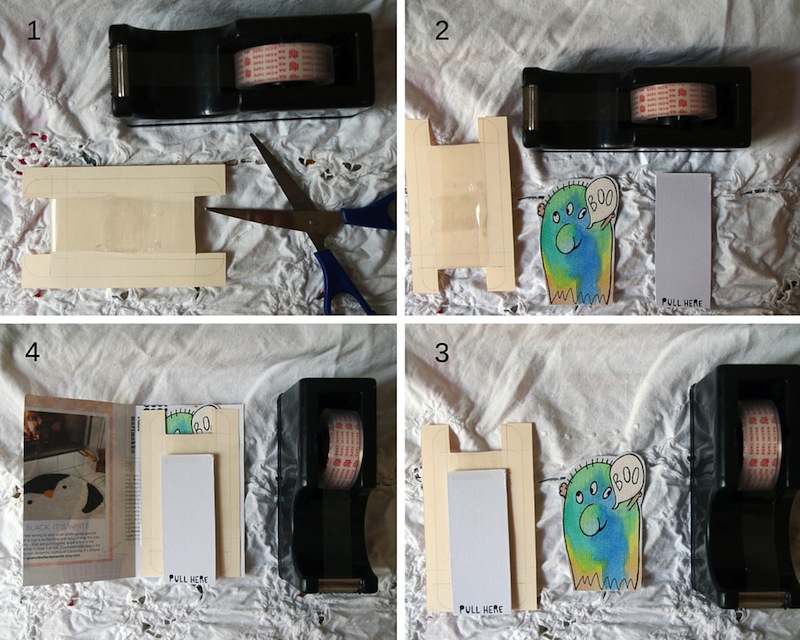
ΔΔ Step 1 (top left): cut out a piece of cardboard in an "H" shape, then cut out two rectangles, slightly smaller. I traced around my iPhone to get the rough sizes of my two smaller rectangles (which make up the monster and the "pull here" tab), then just went a bit bigger to get the H shape. You can see the pencil-work where I traced around the iPhone then made it a big bigger. This is part of the inside of the card so don't worry about pencil marks.
Step 1b (because clearly this is actually two steps but I forgot to take a photograph of the H before I'd already stuck the plastic on)... Now cut out a strip of plastic long enough to wrap all the way around the short bit of the H, then wrap it around and stick it together. Make sure it's not too tight, because this is what will be used to slide your picture up and down so it needs to move easily. (Full disclosure: as I mentioned, the creases in the re-purposed gift-card wrapping I used meant that in some cards, the plastic would get stuck and wouldn't slide smoothly. Also, I used sticky-tape to secure the plastic because I didn't think glue would be reliable, but the tape also created some problems with the smooth sliding of the pulley. So the one thing I would do very differently next time would be to find some better - crease-free - plastic at the newsagency, and possibly some good glue)
ΔΔ Step 2 (top right): take your two smaller (in my case iPhone-sized) pieces of cardboard, and place them to the plastic on the H to see how they fit. You may need to trim them further. Now would be a good time to draw your slide-up message or illustration (in my case the monster), because it gets tricky to draw or paint after the card is made.
ΔΔ Step 3 (bottom right): place your "pull here" card on top of the H, lining it up with the bottom of the H-card. Then tape it to the plastic at the top. Turn the H over, and line up your picture (monster) card, face down, so that the top of it is flush with the top of the H-card. Tape it to the plastic at the bottom. Turn the H back over and test it at this point. Give the "pull here" tab a tug, and see if your picture slides up. Don't worry if they flop everywhere, the envelope will hold everything in place.
ΔΔ Step 4 (bottom left): cut out another piece of cardboard or paper. Measure it to be slightly bigger than the H, then double it sideways. I used pages from Frankie magazine for this. Fold the cardboard or paper in half, then stick the H to the right-hand side of the card (on the inside, of course). Make sure when you tape it that you secure the H on both sides, but don't stick down any of the moving parts.
ΔΔ Step 5: Fold the card over to close it, and seal it up with sticky-tape or glue, again making sure you don't go near any moving parts. Cut out a little square or semi-circle to reveal your "pull here" tab.
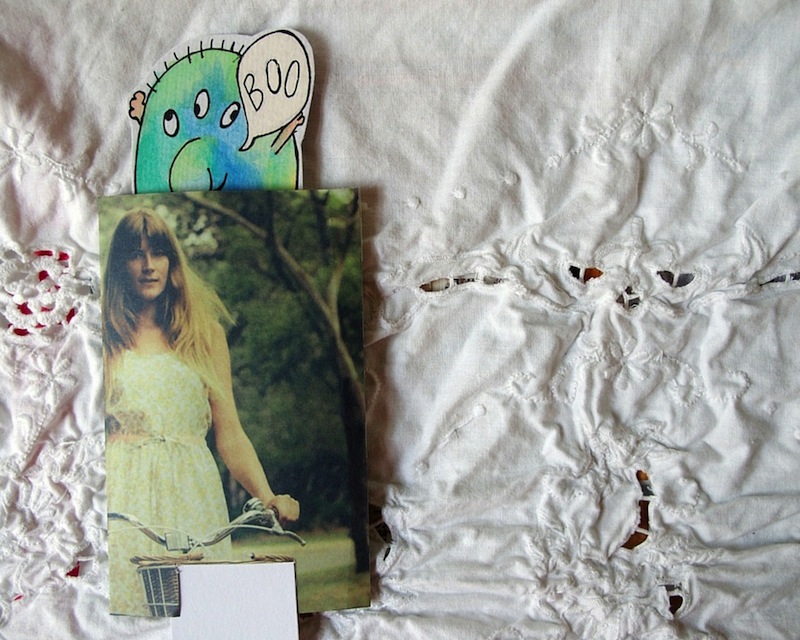
ΔΔ You're done! I used the blank space above "pull here" to include a spooky little Halloween quote (see the picture at the top). You could add a secret message here, if you wanted to.
Kindness, both knowing and unknowing
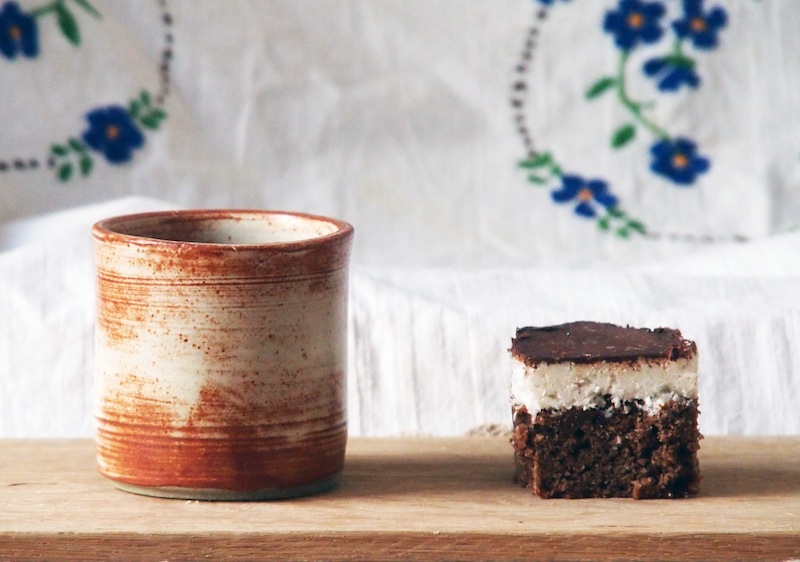 Sometimes kindness is a cup of tea, shared between friends. Sometimes kindness is the vessel that holds the tea.
Things have been a little less than peachy around here of late. A few weeks ago I was unwell - for three weeks - during which time I also suffered a rather devastating loss of a loved-one. Mr B was overseas for work so I had to deal with the combination of grief, pain and illness while caring for the children on my own, and keeping up appearances - whatever that means - for the sake of the little ones.
It wasn't easy and I'm not going to lie: more than once I locked myself in the bathroom to cry in private, then rinsed my red eyes and emerged, beaming like a mild maniac, "Who wants to play with play dough?"
I'm not the kind of person who finds it easy to open up or reach out when times are tough and so, as a result, I carried the first week of sickness and sadness entirely alone, before eventually the lump in my throat began to relax and allow me to share.
During that lonely week, completely unaware of anything that was going on, Tommy knocked on my door, bearing the gift of this lovely ceramic cup, made with his own hands.
I first met Tommy in the sandpit of Scout's childcare centre, where he used to teach the children. He transferred to a different childcare centre not long after that, but we used to bump into him all the time: at a school fete, at the local deli, in the park. And then one day Tommy reached out to me via this blog, and I sent him some mail art (it was this envelope).
Recently he switched directions in career, and is now pursuing ceramics full time. When he knocked on my door that day, handmade cup in hand, it was Tommy's way of saying "thank you" for the mail art I had sent him way back then.
He could not have known how horrible a week I was having, or just how much his gift could have cheered me in that moment. It wasn't a small gesture, either. Often I talk about how precious snail-mail is to people because it's hand-written, tangible, and permanent: I put it to you that there is not much more hand-made or tangible than ceramics.
Thank you, Tommy. I think what you created is beautiful but, more than that, every time I drink my tea from this cup I will be reminded of your kindness, both knowing and unknowing, at a time when I really needed it.
Mail art + mild regrets
 There are things in life that you live to regret and in my case, those things include having that second glass of cheap semillon sauv blanc last night, losing two hours of my life watching The Heat on TV while folding mountains of washing, and saying to myself at the end of said wine/watching/washing that just this once, I’d leave the dishes until morning. So this morning when I got up at my usual 5am it was harder than usual, my head hurt (I know, I’m a lightweight), and when I came downstairs the first thing I saw was a pile of dirty dishes. Regrets, my friends!
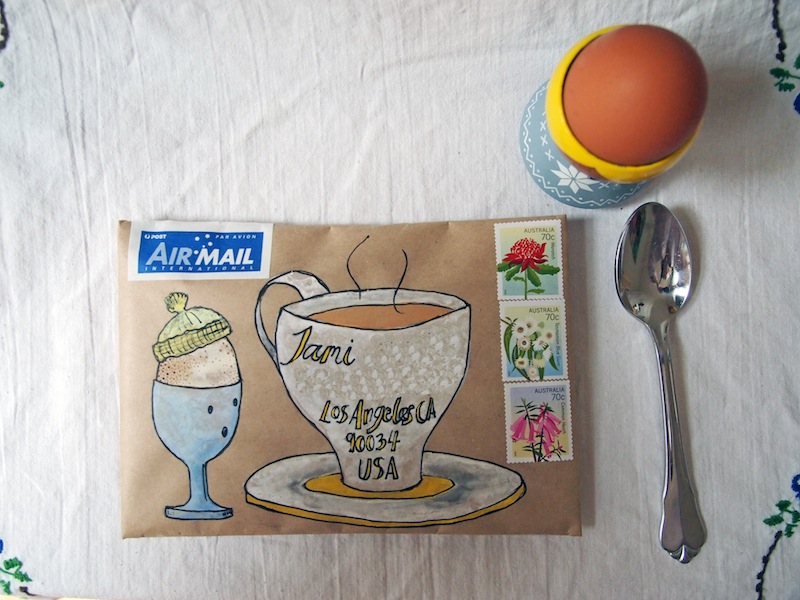
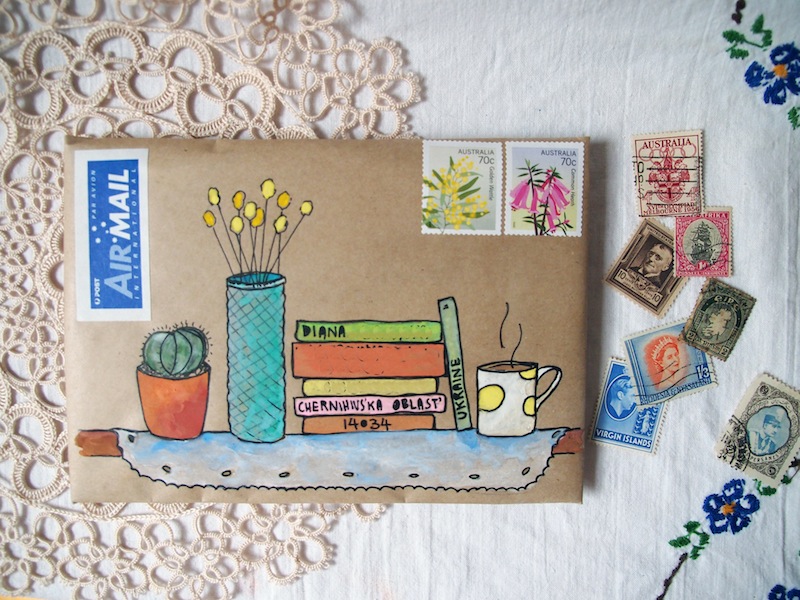
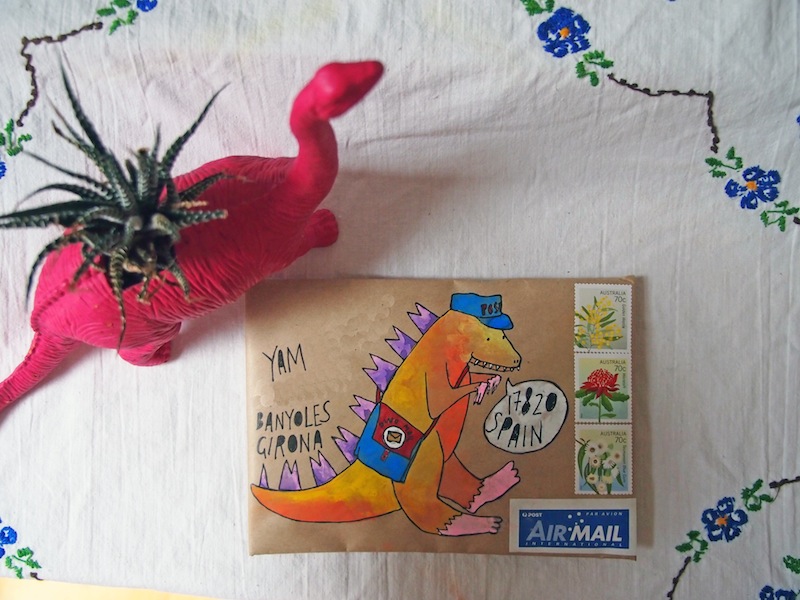
However, I plan to salvage the day by enjoying the sunshine out and about with my darling children, who hopefully will not be too loud or high pitched ;-). Here are some more envelopes I’ve been painting this week. Only five today. I hope you enjoy your Thursday, friends. And for all you Victorian folks who work for The Man, enjoy your day off tomorrow, you lucky things!
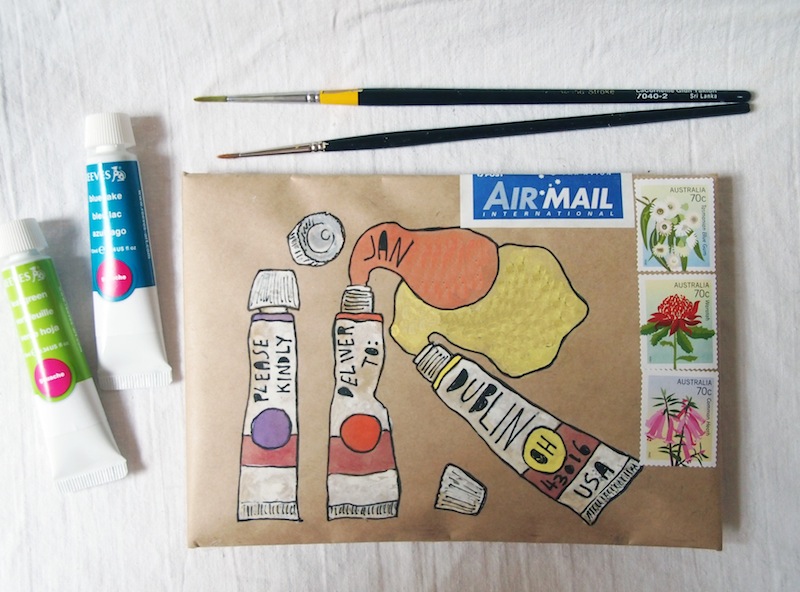
 ps. If you're worrying about the fact that I've left the full name and address on the first envelope on this page, don't fret. That mail is for Amber, who makes and sends the most phenomenal mail-art you've ever seen and regularly publishes her address on the Internet, so I know this is not a concern for her. I left it on because I thought that for a change it would be nice for you to see exactly what the people receiving my mail see, rather than big chunks of blanked out space.